# Stash Documentation - Complete Reference for AI
This document contains the complete Stash documentation for AI assistance.
Generated: 2026-09-22T22:50:16.826Z
## About Stash
Stash is a comprehensive platform for game developers offering:
- **Stash Studio**: Web-based developer portal for managing integrations
- **Stash Webshop**: In-game commerce and webshop solution
- **Stash Pay**: Payment processing with better rates than traditional platforms
- **Stash Launcher**: Game launcher platform
## Documentation Sections
## Section: Guides
# Quick Start
**URL:** https://docs.stash.gg/guides
**Description:** Get started with Stash - the comprehensive direct-to-consumer platform that helps game developers engage with players and sell content through checkout flows, webshops, and other experiences.
Stash is a direct-to-consumer platform for game developers. We help you engage with and sell content directly to players by building checkout flows, webshops, and other experiences (loyalty programs, leaderboards, game launchers, etc.). Stash also manages payments and compliance so that you can focus on game development and player experiences.
## Get To Know Stash [#get-to-know-stash]
## Jump To Product Details [#jump-to-product-details]
## Stash Tools [#stash-tools]
---
## Section: Guides
# Stash Docs MCP
**URL:** https://docs.stash.gg/guides/stash-docs-mcp
**Description:** Connect an AI agent to the Stash documentation over MCP, or load every page as a single Markdown file.
## Connect an agent [#connect-an-agent]
The MCP server runs at `https://docs.stash.gg/api/mcp` over HTTP and needs no credentials. Most MCP
clients take this config:
```json
{
"mcpServers": {
"stash-docs": {
"url": "https://docs.stash.gg/api/mcp"
}
}
}
```
| Tool | Returns |
| ------------ | ------------------------------------------------------------------------------- |
| `list_pages` | Every page, grouped by section, with title, description, and URL |
| `get_page` | The Markdown of one page. Takes the page URL, such as `/guides/stash-pay/about` |
| `search` | Full-text matches, grouped by section |
## Markdown files [#markdown-files]
Use these when the client can't speak MCP.
* Every page: [`llms-full.txt`](https://docs.stash.gg/llms-full.txt), 96 pages in one file, \~430 KB.
* One page: append `.mdx` to its URL, for example `https://docs.stash.gg/guides/stash-pay/about.mdx`.
---
## Section: Guides
# Demo Hub
**URL:** https://docs.stash.gg/guides/get-started/demo-hub
**Description:** Explore our fictional game called "Howling Woods" that serve as a demo hub. Download our sample app to experience Stash Pay, explore interactive webshop or see how you can reach desktop gamers using Stash Launcher.
## Demo App [#demo-app]
Begin by trying out our demo app on Android or iOS device. With this app, you can experience the
full **Stash Pay** flow integrated directly into the Unity game. To try the full in-app purchase flow, use one of the test cards.
You can try the demo app instantly in your browser using the online emulator, or install it on your own device by requesting TestFlight access (iOS) or downloading the APK (Android).
## Demo Webshop [#demo-webshop]
Explore the Howling Woods demo shop to experience the Stash webshop in action. The demo includes integration with
custom authentication provider (Amazon Cognito), a dynamic product catalog, and interactive features like a reward wheel, card draw, card match, and more showcasing what you can add to your
own integration. Just like in the app above, you can test the complete in-app purchase process using one of our test cards.
Webshop is also integrated with our demo app and launcher, so all three product works seamlessly together. Install the app and try out the account linking by scaning a login QR code on the
webshop.
## Demo Launcher [#demo-launcher]
Discover how to engage desktop players using Stash Launcher. Visit the launcher download page to try it for
yourself and see how the mobile app seamlessly connects and works alongside the desktop launcher. This download page is automatically generated by Stash for you, or you can also distribute
using your own channels.
---
## Section: Guides
# Test Card Numbers
**URL:** https://docs.stash.gg/guides/get-started/test-cards
**Description:** Use test card numbers to test your Stash Pay and Stash Webshop integrations. These test cards work with Stash's test environment and Stash Howling Woods demo.
**Important:** Test cards do not create real charges. All transactions using these test card numbers are processed in Stash's test environment and will never result in actual payment processing or charges to any real payment method.
**Apple Pay and Google Pay do not work in the test environment without individual setup.** Both require sandbox accounts. Contact your Stash representative to provision them for your test environment if needed.
## Quick Start Test Card [#quick-start-test-card]
For quick testing, you can use this simple test card:
| Form field | Value |
| :---------- | :------------------ |
| Card number | 4400 0020 0000 0004 |
| Expiration | 03/30 |
| CVC | 737 |
| Country | Any address |
| ZIP | Any five digits |
## Visa  [#visa-]
| Card Number | Card Type | Issuing Country/region | Expiry Date | CVV2 |
| -------------------------------------------- | ------------------------- | ---------------------- | ----------- | ---- |
| 4111 1111 4555 1142 (Security code optional) | Classic | NL | 03/2030 | 737 |
| 4111 1120 1426 7661 (eight-digit BIN) | Debit | FR | 12/2030 | 737 |
| 4988 4388 4388 4305 | Classic | ES | 03/2030 | 737 |
| 4166 6766 6766 6746 | Classic | NL | 03/2030 | 737 |
| 4646 4646 4646 4644 | Classic | PL | 03/2030 | 737 |
| 4000 6200 0000 0007 | Commercial Credit | US | 03/2030 | 737 |
| 4000 0600 0000 0006 | Commercial Debit | US | 03/2030 | 737 |
| 4293 1891 0000 0008 | Commercial Premium Credit | AU | 03/2030 | 737 |
| 4988 0800 0000 0000 | Commercial Premium Debit | IN | 03/2030 | 737 |
| 4111 1111 1111 1111 | Consumer | NL | 03/2030 | 737 |
| 4444 3333 2222 1111 | Corporate | GB | 03/2030 | 737 |
| 4001 5900 0000 0001 | Corporate Credit | IL | 03/2030 | 737 |
| 4000 1800 0000 0002 | Corporate Debit | IN | 03/2030 | 737 |
| 4000 0200 0000 0000 | Credit | US | 03/2030 | 737 |
| 4000 1600 0000 0004 | Debit | IN | 03/2030 | 737 |
| 4002 6900 0000 0008 | Debit | AU | 03/2030 | 737 |
| 4400 0000 0000 0008 | Debit | US | 03/2030 | 737 |
| 4484 6000 0000 0004 | Fleet Credit | US | 03/2030 | 737 |
| 4607 0000 0000 0009 | Fleet Debit | MX | 03/2030 | 737 |
| 4977 9494 9494 9497 | Gold | FR | 03/2030 | 737 |
| 4000 6400 0000 0005 | Premium Credit | AZ | 03/2030 | 737 |
| 4003 5500 0000 0003 | Premium Credit | TW | 03/2030 | 737 |
| 4000 7600 0000 0001 | Premium Debit | MU | 03/2030 | 737 |
| 4017 3400 0000 0003 | Premium Debit | RU | 03/2030 | 737 |
| 4005 5190 0000 0006 | Purchasing Credit | US | 03/2030 | 737 |
| 4131 8400 0000 0003 | Purchasing Debit | GT | 03/2030 | 737 |
| 4035 5010 0000 0008 | Visa | FR | 03/2030 | 737 |
| 4151 5000 0000 0008 | Visa Credit | US | 03/2030 | 737 |
| 4199 3500 0000 0002 | Visa Proprietary | FR | 03/2030 | 737 |
## Visa Electron [#visa-electron-]
| Card Number | Issuing Country/region | Expiry Date | CVV2/CVC3 |
| ------------------- | ---------------------- | ----------- | --------- |
| 4001 0200 0000 0009 | BR | 03/2030 | 737 |
## Mastercard
[#visa-]
| Card Number | Card Type | Issuing Country/region | Expiry Date | CVV2 |
| -------------------------------------------- | ------------------------- | ---------------------- | ----------- | ---- |
| 4111 1111 4555 1142 (Security code optional) | Classic | NL | 03/2030 | 737 |
| 4111 1120 1426 7661 (eight-digit BIN) | Debit | FR | 12/2030 | 737 |
| 4988 4388 4388 4305 | Classic | ES | 03/2030 | 737 |
| 4166 6766 6766 6746 | Classic | NL | 03/2030 | 737 |
| 4646 4646 4646 4644 | Classic | PL | 03/2030 | 737 |
| 4000 6200 0000 0007 | Commercial Credit | US | 03/2030 | 737 |
| 4000 0600 0000 0006 | Commercial Debit | US | 03/2030 | 737 |
| 4293 1891 0000 0008 | Commercial Premium Credit | AU | 03/2030 | 737 |
| 4988 0800 0000 0000 | Commercial Premium Debit | IN | 03/2030 | 737 |
| 4111 1111 1111 1111 | Consumer | NL | 03/2030 | 737 |
| 4444 3333 2222 1111 | Corporate | GB | 03/2030 | 737 |
| 4001 5900 0000 0001 | Corporate Credit | IL | 03/2030 | 737 |
| 4000 1800 0000 0002 | Corporate Debit | IN | 03/2030 | 737 |
| 4000 0200 0000 0000 | Credit | US | 03/2030 | 737 |
| 4000 1600 0000 0004 | Debit | IN | 03/2030 | 737 |
| 4002 6900 0000 0008 | Debit | AU | 03/2030 | 737 |
| 4400 0000 0000 0008 | Debit | US | 03/2030 | 737 |
| 4484 6000 0000 0004 | Fleet Credit | US | 03/2030 | 737 |
| 4607 0000 0000 0009 | Fleet Debit | MX | 03/2030 | 737 |
| 4977 9494 9494 9497 | Gold | FR | 03/2030 | 737 |
| 4000 6400 0000 0005 | Premium Credit | AZ | 03/2030 | 737 |
| 4003 5500 0000 0003 | Premium Credit | TW | 03/2030 | 737 |
| 4000 7600 0000 0001 | Premium Debit | MU | 03/2030 | 737 |
| 4017 3400 0000 0003 | Premium Debit | RU | 03/2030 | 737 |
| 4005 5190 0000 0006 | Purchasing Credit | US | 03/2030 | 737 |
| 4131 8400 0000 0003 | Purchasing Debit | GT | 03/2030 | 737 |
| 4035 5010 0000 0008 | Visa | FR | 03/2030 | 737 |
| 4151 5000 0000 0008 | Visa Credit | US | 03/2030 | 737 |
| 4199 3500 0000 0002 | Visa Proprietary | FR | 03/2030 | 737 |
## Visa Electron [#visa-electron-]
| Card Number | Issuing Country/region | Expiry Date | CVV2/CVC3 |
| ------------------- | ---------------------- | ----------- | --------- |
| 4001 0200 0000 0009 | BR | 03/2030 | 737 |
## Mastercard  [#mastercard-]
| Card Number | Card Type | Issuing Country/region | Expiry Date | CVC3 |
| -------------------------------------------- | ----------------- | ---------------------- | ----------- | ---- |
| 2222 4000 7000 0005 | Commercial Debit | CA | 03/2030 | 737 |
| 5555 3412 4444 1115 (Security code optional) | Consumer | NL | 03/2030 | 737 |
| 5577 0000 5577 0004 | Consumer | PL | 03/2030 | 737 |
| 5555 4444 3333 1111 | Consumer | GB | 03/2030 | 737 |
| 2222 4107 4036 0010 | Corporate | NL | 03/2030 | 737 |
| 5555 5555 5555 4444 | Credit | GB | 03/2030 | 737 |
| 2222 4107 0000 0002 | Corporate Credit | NL | 03/2030 | 737 |
| 2222 4000 1000 0008 | Credit | CA | 03/2030 | 737 |
| 2223 0000 4841 0010 | Credit | NL | 03/2030 | 737 |
| 5130 2900 0000 0009 | Credit | FR | 03/2030 | 737 |
| 2222 4000 6000 0007 | Debit | CA | 03/2030 | 737 |
| 2223 5204 4356 0010 | Debit | NL | 03/2030 | 737 |
| 2222 4000 3000 0004 | Fleet Credit | CA | 03/2030 | 737 |
| 5100 0600 0000 0002 | Premium Credit | US | 12/2029 | 737 |
| 2222 4000 5000 0009 | Purchasing Credit | CA | 03/2030 | 737 |
| 5103 2219 1119 9245 | Prepaid | BR | 03/2030 | 737 |
## American Express (Amex)
[#mastercard-]
| Card Number | Card Type | Issuing Country/region | Expiry Date | CVC3 |
| -------------------------------------------- | ----------------- | ---------------------- | ----------- | ---- |
| 2222 4000 7000 0005 | Commercial Debit | CA | 03/2030 | 737 |
| 5555 3412 4444 1115 (Security code optional) | Consumer | NL | 03/2030 | 737 |
| 5577 0000 5577 0004 | Consumer | PL | 03/2030 | 737 |
| 5555 4444 3333 1111 | Consumer | GB | 03/2030 | 737 |
| 2222 4107 4036 0010 | Corporate | NL | 03/2030 | 737 |
| 5555 5555 5555 4444 | Credit | GB | 03/2030 | 737 |
| 2222 4107 0000 0002 | Corporate Credit | NL | 03/2030 | 737 |
| 2222 4000 1000 0008 | Credit | CA | 03/2030 | 737 |
| 2223 0000 4841 0010 | Credit | NL | 03/2030 | 737 |
| 5130 2900 0000 0009 | Credit | FR | 03/2030 | 737 |
| 2222 4000 6000 0007 | Debit | CA | 03/2030 | 737 |
| 2223 5204 4356 0010 | Debit | NL | 03/2030 | 737 |
| 2222 4000 3000 0004 | Fleet Credit | CA | 03/2030 | 737 |
| 5100 0600 0000 0002 | Premium Credit | US | 12/2029 | 737 |
| 2222 4000 5000 0009 | Purchasing Credit | CA | 03/2030 | 737 |
| 5103 2219 1119 9245 | Prepaid | BR | 03/2030 | 737 |
## American Express (Amex)  [#american-express-amex-]
| Card Number | Card Type | Issuing Country/region | Expiry Date | Security Code |
| ------------------ | --------- | ---------------------- | ----------- | ------------- |
| 3714 4963 5398 431 | Credit | US | 03/2030 | 7373 |
| 3700 0000 0000 002 | Credit | US | 03/2030 | 7373 |
## US Debit [#us-debit]
| Card Number | Card Type | Issuing Country | Expiry Date | CVV2/CVC3 |
| ------------------- | --------------------------------------------- | --------------- | ----------- | --------- |
| 4400 0020 0000 0004 | Visa Debit / Accel / STAR / Maestro USA | US | 03/30 | 737 |
| 4000 0330 0330 0335 | Visa Debit / PULSE / NYCE | US | 03/30 | 737 |
| 5002 5100 0000 0013 | Mastercard Debit / Accel / STAR / Maestro USA | US | 03/30 | 737 |
| 5413 3300 3300 3303 | Mastercard Debit / PULSE / NYCE | US | 03/30 | 737 |
| 6011 6099 0000 0003 | Discover Debit / Accel / STAR / Maestro USA | US | 03/30 | 737 |
| 6445 6450 0000 0002 | Discover Debit / PULSE / NYCE | US | 03/30 | 737 |
## 3D Secure Test Cards [#3d-secure-test-cards]
The following cards are enrolled in 3D Secure 2. You can use them to test 3D Secure 2 authentication scenarios.
| Card Type | Card Number | Expiry Date | Security Code (CVC/CVV/CID) |
| ----------------------------- | ------------------- | ----------- | --------------------------- |
| American Express | 3714 4963 5398 431 | 03/2030 | 7373 |
| Bancontact / Maestro | 6703 4444 4444 4449 | 03/2030 | Not applicable |
| Bancontact / Visa | 4871 0499 9999 9910 | 03/2030 | 737 |
| Cartes Bancaires / Visa Debit | 4035 5014 2814 6300 | 03/2030 | 737 |
| Cartes Bancaires | 4360 0000 0100 0005 | 03/2030 | 737 |
| China UnionPay (Credit) | 6250 9470 0000 0014 | 03/2030 | 123 |
| China UnionPay (Debit) | 6250 9460 0000 0016 | 03/2030 | 123 |
| Diners | 3056 9309 0259 04 | 03/2030 | 737 |
| Discover | 6011 1111 1111 1117 | 03/2030 | 737 |
| JCB / Mastercard | 3566 1111 1111 1113 | 03/2030 | 737 |
| Maestro | 5000 5500 0000 0029 | 03/2030 | Not applicable |
| Mastercard | 5454 5454 5454 5454 | 03/2030 | 737 |
| Mastercard Credit | 2222 4000 1000 0008 | 03/2030 | 737 |
| Visa | 4917 6100 0000 0000 | 03/2030 | 737 |
| Visa Classic | 4166 6766 6766 6746 | 03/2030 | 737 |
## Testing refusal reasons [#testing-refusal-reasons]
You can simulate specific decline scenarios — insufficient balance, blocked cards, fraud, expired cards, and more — by typing a special value into the **cardholder name** field at checkout. Any of the test card numbers above will work; the cardholder name decides which refusal reason is returned.
### How to use [#how-to-use]
1. Pick any test card from the tables above.
2. Enter the **expiration date** and **CVC** as listed.
3. In the **cardholder name** field, enter one of the values from the table below (case-insensitive).
4. Submit the payment. The checkout will fail with the matching refusal reason, and a `PURCHASE_FAILED` webhook will be delivered with the same reason in the payload.
Cardholder-name overrides only apply in the test environment. In production, the cardholder name is treated as a normal name and has no effect on the transaction outcome.
### Refusal reasons [#refusal-reasons]
| Cardholder name | Refusal reason |
| :---------------------------- | :-------------------------- |
| `NOT_ENOUGH_BALANCE` | Not enough balance |
| `CARD_EXPIRED` | Expired card |
| `INVALID_CARD_NUMBER` | Invalid card number |
| `INVALID_AMOUNT` | Invalid amount |
| `INVALID_PIN` | Invalid PIN |
| `PIN_TRIES_EXCEEDED` | PIN tries exceeded |
| `PIN_VALIDATION_NOT_POSSIBLE` | PIN validation not possible |
| `CVC_DECLINED` | CVC declined |
| `AVS_DECLINED` | AVS declined |
| `BLOCKED_CARD` | Blocked card |
| `RESTRICTED_CARD` | Restricted card |
| `WITHDRAWAL_AMOUNT_EXCEEDED` | Withdrawal amount exceeded |
| `WITHDRAWAL_COUNT_EXCEEDED` | Withdrawal count exceeded |
| `TRANSACTION_NOT_PERMITTED` | Transaction not permitted |
| `NOT_SUPPORTED` | Not supported |
| `FRAUD` | Fraud |
| `FRAUD_CANCELLED` | Fraud — cancelled |
| `ISSUER_SUSPECTED_FRAUD` | Issuer suspected fraud |
| `ISSUER_UNAVAILABLE` | Issuer unavailable |
| `ACQUIRER_ERROR` | Acquirer error |
| `REVOCATION_OF_AUTH` | Revocation of authorisation |
| `REFERRAL` | Referral |
| `SHOPPER_CANCELLED` | Shopper cancelled |
| `3D_NOT_AUTHENTICATED` | 3D Secure not authenticated |
| `DECLINED_NON_GENERIC` | Declined — non generic |
| `NOT_SUBMITTED` | Not submitted |
---
## Section: Guides
# About Stash Launcher
**URL:** https://docs.stash.gg/guides/stash-launcher/about
**Description:** Discover Stash Launcher - a customizable direct-to-consumer distribution platform for delivering PC games directly to players on Windows and macOS. Experience features like custom branding, incremental updates, in-game purchases, community engagement tools, and seamless management through Stash Studio or CLI automation.
Experience the player journey by downloading our Howling Woods demoshop launcher.
Stash Launcher is a customizable direct-to-consumer (D2C) distribution platform that enables you to deliver PC games directly to players on Windows and macOS. Built for developers who want complete control over their distribution, the launcher supports incremental updates, branded experiences, and seamless integration with your existing game ecosystem.
## Highlights [#highlights]
* **Custom branding**: Fully customize the launcher based on your game-specific branding and design.
* **Incremental updates**: Automatically patch and deliver game updates to players, with smaller downloads.
* **In-game purchases**: Integrate Stash Pay directly in your game binary. The checkout experience stays consistent across your webshop and launcher.
* **Community engagement**: Create features like social hubs to foster player interaction and retention.
* **Seamless management and deployment**: Manage updates through Stash Studio or use the Stash CLI to automate deploys using your existing CI/CD pipeline.
* **Multiple release channels**: Set up separate channels for beta testing, QA, or gated access to specific builds. Control which players can access each version and manage staged rollouts with ease.
## Use cases [#use-cases]
### Direct game distribution [#direct-game-distribution]
Distribute your PC games directly to players without relying on third-party platforms. Maintain complete control over pricing, player relationships, and the download experience while reducing platform fees and restrictions.
### Beta testing and release management [#beta-testing-and-release-management]
Create separate distribution channels for production, beta, and internal testing builds. Control who has access to specific versions and gather feedback from targeted user groups before wider releases.
### Community hub integration [#community-hub-integration]
---
## Section: Guides
# Integrating Stash Launcher
**URL:** https://docs.stash.gg/guides/stash-launcher/integration
**Description:** Learn how to set up Stash Launcher with no coding required. Customize your launcher's appearance, configure release channels, and upload your first build through an intuitive interface in Stash Studio.
Base Stash Launcher setup requires no coding. Simply customize your launcher's appearance,
configure your release channels, and upload your first build—all through an intuitive interface.
## 1. Configure Appearance [#1-configure-appearance]
Open Stash Studio to begin customizing your launcher's appearance and branding.
### Select your game project [#select-your-game-project]
Select your game project in Stash Studio.
### Navigate to Launcher [#navigate-to-launcher]
Click on "Launcher" in the main navigation.
### Open Appearance settings [#open-appearance-settings]
Go to the "Appearance" section in the sub-navigation.
Here, you can set your launcher's background image, logo, and other visual elements. You can also configure how your installers
and download page will look for both Windows and macOS—all from this single interface.
To see your download page live, navigate to General Settings in Stash Studio and find your project URL. Use
[#american-express-amex-]
| Card Number | Card Type | Issuing Country/region | Expiry Date | Security Code |
| ------------------ | --------- | ---------------------- | ----------- | ------------- |
| 3714 4963 5398 431 | Credit | US | 03/2030 | 7373 |
| 3700 0000 0000 002 | Credit | US | 03/2030 | 7373 |
## US Debit [#us-debit]
| Card Number | Card Type | Issuing Country | Expiry Date | CVV2/CVC3 |
| ------------------- | --------------------------------------------- | --------------- | ----------- | --------- |
| 4400 0020 0000 0004 | Visa Debit / Accel / STAR / Maestro USA | US | 03/30 | 737 |
| 4000 0330 0330 0335 | Visa Debit / PULSE / NYCE | US | 03/30 | 737 |
| 5002 5100 0000 0013 | Mastercard Debit / Accel / STAR / Maestro USA | US | 03/30 | 737 |
| 5413 3300 3300 3303 | Mastercard Debit / PULSE / NYCE | US | 03/30 | 737 |
| 6011 6099 0000 0003 | Discover Debit / Accel / STAR / Maestro USA | US | 03/30 | 737 |
| 6445 6450 0000 0002 | Discover Debit / PULSE / NYCE | US | 03/30 | 737 |
## 3D Secure Test Cards [#3d-secure-test-cards]
The following cards are enrolled in 3D Secure 2. You can use them to test 3D Secure 2 authentication scenarios.
| Card Type | Card Number | Expiry Date | Security Code (CVC/CVV/CID) |
| ----------------------------- | ------------------- | ----------- | --------------------------- |
| American Express | 3714 4963 5398 431 | 03/2030 | 7373 |
| Bancontact / Maestro | 6703 4444 4444 4449 | 03/2030 | Not applicable |
| Bancontact / Visa | 4871 0499 9999 9910 | 03/2030 | 737 |
| Cartes Bancaires / Visa Debit | 4035 5014 2814 6300 | 03/2030 | 737 |
| Cartes Bancaires | 4360 0000 0100 0005 | 03/2030 | 737 |
| China UnionPay (Credit) | 6250 9470 0000 0014 | 03/2030 | 123 |
| China UnionPay (Debit) | 6250 9460 0000 0016 | 03/2030 | 123 |
| Diners | 3056 9309 0259 04 | 03/2030 | 737 |
| Discover | 6011 1111 1111 1117 | 03/2030 | 737 |
| JCB / Mastercard | 3566 1111 1111 1113 | 03/2030 | 737 |
| Maestro | 5000 5500 0000 0029 | 03/2030 | Not applicable |
| Mastercard | 5454 5454 5454 5454 | 03/2030 | 737 |
| Mastercard Credit | 2222 4000 1000 0008 | 03/2030 | 737 |
| Visa | 4917 6100 0000 0000 | 03/2030 | 737 |
| Visa Classic | 4166 6766 6766 6746 | 03/2030 | 737 |
## Testing refusal reasons [#testing-refusal-reasons]
You can simulate specific decline scenarios — insufficient balance, blocked cards, fraud, expired cards, and more — by typing a special value into the **cardholder name** field at checkout. Any of the test card numbers above will work; the cardholder name decides which refusal reason is returned.
### How to use [#how-to-use]
1. Pick any test card from the tables above.
2. Enter the **expiration date** and **CVC** as listed.
3. In the **cardholder name** field, enter one of the values from the table below (case-insensitive).
4. Submit the payment. The checkout will fail with the matching refusal reason, and a `PURCHASE_FAILED` webhook will be delivered with the same reason in the payload.
Cardholder-name overrides only apply in the test environment. In production, the cardholder name is treated as a normal name and has no effect on the transaction outcome.
### Refusal reasons [#refusal-reasons]
| Cardholder name | Refusal reason |
| :---------------------------- | :-------------------------- |
| `NOT_ENOUGH_BALANCE` | Not enough balance |
| `CARD_EXPIRED` | Expired card |
| `INVALID_CARD_NUMBER` | Invalid card number |
| `INVALID_AMOUNT` | Invalid amount |
| `INVALID_PIN` | Invalid PIN |
| `PIN_TRIES_EXCEEDED` | PIN tries exceeded |
| `PIN_VALIDATION_NOT_POSSIBLE` | PIN validation not possible |
| `CVC_DECLINED` | CVC declined |
| `AVS_DECLINED` | AVS declined |
| `BLOCKED_CARD` | Blocked card |
| `RESTRICTED_CARD` | Restricted card |
| `WITHDRAWAL_AMOUNT_EXCEEDED` | Withdrawal amount exceeded |
| `WITHDRAWAL_COUNT_EXCEEDED` | Withdrawal count exceeded |
| `TRANSACTION_NOT_PERMITTED` | Transaction not permitted |
| `NOT_SUPPORTED` | Not supported |
| `FRAUD` | Fraud |
| `FRAUD_CANCELLED` | Fraud — cancelled |
| `ISSUER_SUSPECTED_FRAUD` | Issuer suspected fraud |
| `ISSUER_UNAVAILABLE` | Issuer unavailable |
| `ACQUIRER_ERROR` | Acquirer error |
| `REVOCATION_OF_AUTH` | Revocation of authorisation |
| `REFERRAL` | Referral |
| `SHOPPER_CANCELLED` | Shopper cancelled |
| `3D_NOT_AUTHENTICATED` | 3D Secure not authenticated |
| `DECLINED_NON_GENERIC` | Declined — non generic |
| `NOT_SUBMITTED` | Not submitted |
---
## Section: Guides
# About Stash Launcher
**URL:** https://docs.stash.gg/guides/stash-launcher/about
**Description:** Discover Stash Launcher - a customizable direct-to-consumer distribution platform for delivering PC games directly to players on Windows and macOS. Experience features like custom branding, incremental updates, in-game purchases, community engagement tools, and seamless management through Stash Studio or CLI automation.
Experience the player journey by downloading our Howling Woods demoshop launcher.
Stash Launcher is a customizable direct-to-consumer (D2C) distribution platform that enables you to deliver PC games directly to players on Windows and macOS. Built for developers who want complete control over their distribution, the launcher supports incremental updates, branded experiences, and seamless integration with your existing game ecosystem.
## Highlights [#highlights]
* **Custom branding**: Fully customize the launcher based on your game-specific branding and design.
* **Incremental updates**: Automatically patch and deliver game updates to players, with smaller downloads.
* **In-game purchases**: Integrate Stash Pay directly in your game binary. The checkout experience stays consistent across your webshop and launcher.
* **Community engagement**: Create features like social hubs to foster player interaction and retention.
* **Seamless management and deployment**: Manage updates through Stash Studio or use the Stash CLI to automate deploys using your existing CI/CD pipeline.
* **Multiple release channels**: Set up separate channels for beta testing, QA, or gated access to specific builds. Control which players can access each version and manage staged rollouts with ease.
## Use cases [#use-cases]
### Direct game distribution [#direct-game-distribution]
Distribute your PC games directly to players without relying on third-party platforms. Maintain complete control over pricing, player relationships, and the download experience while reducing platform fees and restrictions.
### Beta testing and release management [#beta-testing-and-release-management]
Create separate distribution channels for production, beta, and internal testing builds. Control who has access to specific versions and gather feedback from targeted user groups before wider releases.
### Community hub integration [#community-hub-integration]
---
## Section: Guides
# Integrating Stash Launcher
**URL:** https://docs.stash.gg/guides/stash-launcher/integration
**Description:** Learn how to set up Stash Launcher with no coding required. Customize your launcher's appearance, configure release channels, and upload your first build through an intuitive interface in Stash Studio.
Base Stash Launcher setup requires no coding. Simply customize your launcher's appearance,
configure your release channels, and upload your first build—all through an intuitive interface.
## 1. Configure Appearance [#1-configure-appearance]
Open Stash Studio to begin customizing your launcher's appearance and branding.
### Select your game project [#select-your-game-project]
Select your game project in Stash Studio.
### Navigate to Launcher [#navigate-to-launcher]
Click on "Launcher" in the main navigation.
### Open Appearance settings [#open-appearance-settings]
Go to the "Appearance" section in the sub-navigation.
Here, you can set your launcher's background image, logo, and other visual elements. You can also configure how your installers
and download page will look for both Windows and macOS—all from this single interface.
To see your download page live, navigate to General Settings in Stash Studio and find your project URL. Use \/download to access your download hub.
## 2. Create Your Channels [#2-create-your-channels]
In the "Channels" section of Stash Studio, you'll find your default Public channel. This channel can have a build attached,
or not. If no build is attached to the Public channel, players will need an access code to download your game.
You can use the default Public channel or create new channels as needed. When creating a new channel, you can choose whether
it should be code-protected or open to all players.
---
## Section: Guides
# Launcher Concepts
**URL:** https://docs.stash.gg/guides/stash-launcher/launcher-concepts
**Description:** Learn the core concepts behind Stash Launcher including releases and build management, launcher deployment methods, incremental updates using the wharf protocol, silent self-updating capabilities, player authentication, and in-game purchases with Stash Pay.
Before you upload your game build and configure your launcher, let's get familiar with the core concepts behind Stash Launcher.
## Releases and build management [#releases-and-build-management]
Releases are collections of game builds for Windows and macOS, organized into channels. Each channel can include both Windows and Mac builds, letting you manage who gets access to which version—such as "Beta" for testing or "Stable" for production. Upload builds via Stash Studio or the [CLI](#stash-cli).
Every project has a public channel open to all players. For restricted access, create private channels that require access codes, which you can manage in Stash Studio. Codes control who can join a channel and how many times they can be used.
## Launcher deployment [#launcher-deployment]
### Installers [#installers]
Your launcher is deployed to players using a standalone **NSIS installer (Windows)** or **universal disk image (macOS)**. All launcher related binaries are **automatically code signed and notarized by Stash** to ensure players receive a fully compliant binary with no security warning.
Both the Windows installer and Mac disk image are customizable via Stash Studio. You can use customized icons, graphical assets, EULAs, and other extensions like deep link registration, registry entries, or a custom install process.
### Download Hub [#download-hub]
In addition to the installer, Stash automatically creates a fully customizable download hub with always up-to-date links
for every supported platform. You can integrate this download page into your Stash webshop or host it as a completely standalone page. This download page then acts as a default method of delivery.
### Other Methods [#other-methods]
If you prefer to use a custom delivery method or distribute your launcher through platforms like Steam, that's fully supported—you'll
always have access to the latest signed binary download links in Stash Studio.
## Incremental updates [#incremental-updates]
Stash Launcher uses the [**wharf** protocol](https://itch.io/docs/wharf/algorithms/diff.html) for efficient game patching and updates. Wharf is a binary diffing system that enables incremental updates by only downloading and applying changes between game versions, rather than requiring full re-downloads.
### Patching Process [#patching-process]
The patching system operates in several key phases:
### Patch application [#patch-application]
When a new game version is available, the launcher downloads a patch file containing the binary differences between the current and target versions.
### Source validation [#source-validation]
The system validates the existing game installation against the expected source state to ensure patch compatibility.
### Incremental patching [#incremental-patching]
The wharf patcher applies changes file-by-file, creating the new version by combining unchanged files from the source with new or modified content from the patch.
### Progress tracking [#progress-tracking]
Throughout the patching process, players receive real-time progress updates showing the current file being processed and overall completion percentage.
### Atomic updates [#atomic-updates]
The entire patch operation is committed atomically, ensuring the game installation remains in a consistent state even if the process is interrupted.
Learn more about tech behind our patching algorithm:
*
How Stash servers creates binary diffs
*
How launcher applies patches
## Launcher updates [#launcher-updates]
The launcher itself supports completely silent, self-updating capabilities on both platforms. After players install the launcher,
updates are downloaded and installed in the background without any user intervention. Updates are never applied while a game is running,
so gameplay is never interrupted. Instead, the new version is silently installed and activated the next time the launcher is restarted,
ensuring players are always on the latest version with zero disruption to their gaming experience.
### Silent self-updating process [#silent-self-updating-process]
### Self-Update Process [#self-update-process]
The launcher automatically keeps itself up to date through a seamless process:
### Automatic version checking [#automatic-version-checking]
The launcher periodically checks for newer versions by comparing its current build version against the latest available version from Stash's servers.
### Background download [#background-download]
When an update is available, the launcher downloads the new version as a compressed package to a temporary directory without interrupting the player's current session.
### Seamless replacement [#seamless-replacement]
The update process extracts the new launcher executable and replaces the current one atomically, ensuring no downtime or visible interruption to players.
### Platform-specific handling [#platform-specific-handling]
The system handles platform-specific requirements automatically:
* **Windows**: Direct executable replacement
* **macOS**: Proper handling of app bundle structure and code signing
### Zero user interaction [#zero-user-interaction]
The entire process requires no player input, notifications, or restarts. Players continue using the launcher normally while updates happen transparently.
## Player authentication [#player-authentication]
Note: Stash Launcher Authentication is currently in development and will be available soon.
## In-game purchases [#in-game-purchases]
In-game purchases with the Stash Launcher are handled using **Stash Pay**. When a player initiates a purchase from within the game (on either Windows or macOS),
the launcher uses Stash Pay to generate a secure checkout link. This link automatically authenticates the player and redirects them to the Stash Webshop's
checkout page, providing a seamless and consistent purchase experience across both the in-game store and the webshop.
---
## Section: Guides
# About Stash Pay
**URL:** https://docs.stash.gg/guides/stash-pay/about
**Description:** Discover Stash Pay - a direct-to-consumer payment system designed for games and apps that offers a modern alternative to traditional in-app purchases. Integrate through browser checkout, in-game popups, websites, or custom shops.
Stash Pay is a direct-to-consumer (D2C) payment system for games and apps that replaces traditional in-app purchases (IAP) from Apple and Google with a secure, branded web checkout.
You can integrate Stash Pay through a mobile-friendly web checkout or an in-game popup. It also works on websites, custom shops, and desktop or game clients.
See the [Howling Woods demo](https://howlingwoods.shop) for an example of a full Stash Pay purchase flow.
## Use cases [#use-cases]
### In-app purchases [#in-app-purchases]
Sell digital goods directly in your app using Stash Pay’s secure, branded web checkout. It works as a D2C alternative to Apple and Google’s native in-app purchases, so no traditional IAP flow is required. Players are sent to a fast, mobile-friendly page (or in-game dialog) to buy items like
coin packs or skins, following the guidelines that allow external purchases in certain regions.
### Web integration [#web-integration]
You can add Stash Pay checkout to your website or custom store for secure payments. Your site starts the checkout session, and Stash Pay handles the payment processing and session management.
## Customizable [#customizable]
You can customize the Stash Pay checkout experience so it matches the look and feel of your game. Partners can adjust branding elements, localize content, and configure which payment methods are shown. This allows the checkout to feel more integrated with the rest of the game.
---
## Section: Guides
# High-Level Flow
**URL:** https://docs.stash.gg/guides/stash-pay/flow
**Description:** Learn how Stash Pay's purchase flow works and discover three integration patterns for granting purchases based on your existing infrastructure.
This article walks through three Stash Pay integration patterns and when to use each one, based on:
* Your game-specific technical requirements and limitations.
* Your backend architecture (async/event-based vs. synchronous).
* Your preferred in-game purchase-granting behavior.
## Initial Setup [#initial-setup]
### Set up Stash Pay instance [#set-up-stash-pay-instance]
To set up Stash Pay, contact the Stash team. After onboarding, you'll receive access to **Stash Studio**, our developer portal. Your game instance (including payment processing) will be created for you so you can begin the integration.
### Get your API key [#get-your-api-key]
Once you have your Stash Studio instance all set up, the only prerequisite is creating your first API key. You'll use this key to call Stash Pay API endpoints from your game backend. Specifically, you'll need an Ingress API key for the `GetPaymentEvent` endpoint, and an Egress API key for the `ConfirmPayment` endpoint.
## Core Checkout Flow (Common to All Options) [#core-checkout-flow-common-to-all-options]
All three options share the same basic checkout flow:
### Requesting Checkout [#requesting-checkout]
From your game backend, request a checkout session via the Stash API.
### Get Checkout URL [#get-checkout-url]
Receive a customized checkout URL and a **checkout link order ID** (UUID) from Stash. Store this ID on your backend, associated with the player and the pending purchase.
### Show Checkout [#show-checkout]
Display the checkout to the player via redirect, popup, or in-app browser. The player reviews the purchase and completes payment using the configured payment methods.
While these three steps are always consistent, the way you finalize the purchase and grant items can vary. Choose the granting flow that best fits how your game handles reward delivery and payment confirmation below:
## Choosing Your Granting Flow [#choosing-your-granting-flow]
Select the pattern that best matches your backend architecture and reward-granting requirements. The three differ mainly in **when they fire relative to the charge**, and only one of them lets your server reject a purchase:
| Pattern | When it fires | Direction | Can your server reject? | Best for |
| ---------------------------------------------------------- | ------------------------------------------------ | ----------------------- | ------------------------------------- | ---------------------------------------------------------------------------- |
| [`ConfirmPayment`](/api/egress/purchase/ConfirmPayment) | Before the charge is captured | Stash calls your server | **Yes.** See the warning in that tab. | Inventory limits, purchase caps, multi-client locking |
| `PURCHASE_SUCCEEDED` webhook | After the payment completes | Stash calls your server | No | Backends that process events asynchronously through queues, workers, or jobs |
| [`GetPaymentEvent`](/api/ingress/payments/GetPaymentEvent) | After the payment completes, when you ask for it | Your server calls Stash | No | Showing rewards in the client immediately after purchase |
**This is an integration-time choice, not a runtime one.** Which delivery mechanism a shop uses is fixed when the shop is configured, not selected per purchase. A single shop uses one of these patterns rather than switching between them, so treat the table above as a decision you make once per integration.
**Async post-purchase.** Stash sends your backend a `PURCHASE_SUCCEEDED` event *after* the payment completes.
**Direction:** Stash → Game (your backend exposes a webhook endpoint).
**Best for:** Backends that already process events via queues, workers, or background jobs. Rewards may appear slightly after purchase.
**Flow:**
Player completes checkout.
Stash finalizes the payment.
Stash sends a
`PURCHASE_SUCCEEDED`
webhook to your backend.
Your backend consumes the event, runs game logic, and grants rewards.
For full implementation details see the [Webhook guides](/guides/get-started/stash-webhooks/overview).
**Synchronous post-purchase.** Your backend asks Stash for the final payment status as soon as the purchase completes.
This is a targeted lookup, not a background poll. The trigger is the client's completion signal, which depends on how you present the checkout: the `onSuccess` prop or option on [web](/guides/stash-pay/web-integration/web-apps); the `successCallback` argument of `OpenCard` or `OpenModal` (for example `successCallback: OnSuccess`) in [Unity](/guides/stash-pay/ios-android-integration/unity); and, in browser presentation modes such as `openBrowser`, the deep link that returns the player to your game, since those modes have no success callback (see [Presentation Options](/guides/stash-pay/ios-android-integration/presentation-options)). Your backend already holds the checkout link order ID from creating the link, so it can look the purchase up as soon as the client reports completion.
**Direction:** Game → Stash (your backend calls [`GetPaymentEvent`](/api/ingress/payments/GetPaymentEvent)).
**Best for:** Games where the client needs to show rewards immediately, or backends designed for synchronous request-response patterns without incoming webhooks.
**Flow:**
Player completes checkout.
The client receives the completion signal (the SDK success callback, or the deep-link return in browser modes) and notifies your backend.
Your backend calls
[`GetPaymentEvent`](/api/ingress/payments/GetPaymentEvent)
with the purchase ID.
Stash returns the final payment status.
Your backend grants rewards and returns updated state to the client.
See the [`GetPaymentEvent` API Reference](/api/ingress/payments/GetPaymentEvent) for request/response details.
**Validation before the charge is captured.** Stash calls your backend with [`ConfirmPayment`](/api/egress/purchase/ConfirmPayment) *before* capturing the payment, and waits for your response.
This is the only one of the three patterns where your server can **reject** a purchase, and it grants items during the same call. It fires earliest of the three.
**Direction:** Stash → Game (your backend exposes the [`ConfirmPayment`](/api/egress/purchase/ConfirmPayment) endpoint).
**Best for:** Games with per-player inventory limits, multi-client purchase locking, or any validation that must happen before a purchase is finalized.
**Flow:**
Player completes checkout.
Stash sends a
`ConfirmPayment`
request to your backend.
Your backend validates the purchase (inventory, caps, locks), grants the items, and returns them in the response body.
Stash captures the payment.
**There is no approve or deny field.** Your server signals success by returning `200 OK` with the granted results in the body. It rejects by returning an HTTP error status.
**Any failure response fails the purchase.** Stash treats every non-success response the same way, whether it is a deliberate rejection, an unhandled `500`, a timeout, or a malformed body. When that happens the purchase fails and Stash does not retain the funds.
Respond `200 OK` unless you specifically do not want Stash to take the money.
For the full request/response schema see the [`ConfirmPayment` API Reference](/api/egress/purchase/ConfirmPayment).
---
## Section: Guides
# Integrating Stash Pay
**URL:** https://docs.stash.gg/guides/stash-pay/integration
**Description:** Learn how to integrate Stash Pay into your game or app with minimum setup. This guide covers creating checkout links, displaying checkouts in browser or in-app, and handling webhook events for secure payment processing.
This guide explains how to integrate Stash Pay using the basic setup: creating checkout links, showing the checkout to players, and processing purchase events.
The video below provides a quick walkthrough of the integration flow.
**Apple Pay and Google Pay do not work in the test environment without individual setup.** Both require sandbox accounts. Contact your Stash representative to provision them for your test environment if needed.
## Create a checkout link [#create-a-checkout-link]
To create a checkout session, send a POST request from your backend to the [`/sdk/server/checkout_links/generate_quick_pay_url`](/api/ingress/stash-pay/GenerateQuickPayUrl) endpoint.
Please check out the full API reference to see all the payload options.
### Checkout link request [#checkout-link-request]
Here's a sample payload for creating a checkout link:
```json filename="Generate Checkout Payload"
{
"item": {
"id": "",
"pricePerItem": "",
"quantity": 1,
"imageUrl": "",
"name": "",
"description": ""
},
"user": {
"id": "",
"validatedEmail": "",
"profileImageUrl": "",
"displayName": "",
"regionCode": "",
"platform": "UNDEFINED"
},
"transactionId": "",
"regionCode": "",
"currency": ""
}
```
| Parameter | Type | Description |
| ------------- | ------ | ------------------------------------------------------------------------------------------------------------------------------------------------------------------------------------------------------------------------------------------------------------------------------------------------------------------------------------------------------------------------------------------------------------------------------------------------------- |
| item | object | The item being purchased.
Fields:
- `id`: Unique identifier for the item.
- `pricePerItem`: Price per item in the smallest currency unit (e.g., cents).
- `quantity`: Number of items being purchased.
- `imageUrl`: Optional image representing the item.
- `name`: Name of the item.
- `description`: Short description of the item. |
| user | object | Information about the purchasing user.
Fields:
- `id`: Unique user ID (from your system).
- `validatedEmail`: (optional) Email address if available and validated.
- `profileImageUrl`: (optional) Link to the user's avatar image.
- `displayName`: User display name.
- `regionCode`: (optional) User's region code for localization.
- `platform`: Platform string, e.g., `IOS`, `ANDROID`, or `UNDEFINED`. |
| transactionId | string | Unique transaction identifier generated by your backend for idempotency and tracking. |
| regionCode | string | (optional) Region/country code for payment localization (e.g., "US"). |
| currency | string | [ISO 4217 currency code](https://www.newbridgefx.com/currency-codes-symbols/) for the transaction (e.g., "USD", "EUR"). |
### Checkout link response [#checkout-link-response]
If your request succeeds, you will receive a checkout URL that you can present to the user
using any of the methods described below.
```json title="Generate Checkout Response"
{
"url": "https://store.example.com/order/abc123",
"id": "abc123",
"regionCode": "US"
}
```
### Authentication [#authentication]
Authenticate calls to `generate_quick_pay_url` by signing the request body with your **ingress secret** and including the signature in the `x-stash-hmac-signature` header. Your ingress secret is distinct from the egress key used to verify Stash's outbound requests — both are in **Studio → Project Settings → API Secrets** as base64-encoded values; base64-decode before use as the HMAC key.
```
x-stash-hmac-signature: v1;;;
```
| Field | Description |
| :---------------------- | :-------------------------------------------------------------- |
| `v1` | Protocol version |
| `` | Your immutable App ID (Studio → Project Settings → App details) |
| `` | Request timestamp in Unix milliseconds |
| `` | Standard base64-encoded HMAC-SHA256 signature |
The signature covers `"." + `, where `` is the exact JSON bytes you POST. Sign what you transmit — Stash verifies against the bytes received. Requests where `` is more than 5 minutes from the server clock are rejected.
For Node.js, Python, and Go implementation code, see [API Keys → HMAC Signing](/guides/get-started/stash-api-keys/overview#hmac-signing).
Shops and API keys created before 2026-08-15 can still use `X-Stash-Api-Key: ` instead. Keys created on or after 2026-08-15 must use versioned HMAC.
## Displaying the checkout [#displaying-the-checkout]
The simplest option is to open the checkout URL directly in a browser on the user's device. For in-app presentation with native drawers, modals, and callbacks, follow the platform-specific integration guide for your stack.
## Processing Purchase [#processing-purchase]
Once a player completes checkout, your system must process the event to grant items. Stash supports three patterns depending on your game's requirements, always server-side, never on the client.
The three differ mainly in **when they fire relative to the charge**, and only one of them lets your server reject a purchase:
| Pattern | When it fires | Direction | Can your server reject? | Best for |
| ---------------------------------------------------------- | ------------------------------------------------ | ----------------------- | ------------------------------------- | ---------------------------------------------------------------------------- |
| [`ConfirmPayment`](/api/egress/purchase/ConfirmPayment) | Before the charge is captured | Stash calls your server | **Yes.** See the warning in that tab. | Inventory limits, purchase caps, multi-client locking |
| `PURCHASE_SUCCEEDED` webhook | After the payment completes | Stash calls your server | No | Backends that process events asynchronously through queues, workers, or jobs |
| [`GetPaymentEvent`](/api/ingress/payments/GetPaymentEvent) | After the payment completes, when you ask for it | Your server calls Stash | No | Showing rewards in the client immediately after purchase |
**This is an integration-time choice, not a runtime one.** Which delivery mechanism a shop uses is fixed when the shop is configured, not selected per purchase, so a single shop uses one of these patterns rather than switching between them. Pick the row that matches your backend, and see the [High-Level Flow Options](/guides/stash-pay/flow) guide for the full sequence of each.
**Async post-purchase.** Stash sends your backend a `PURCHASE_SUCCEEDED` webhook *after* the payment completes.
**Best for:** Backends that process events asynchronously (queues, workers, background jobs), where it's acceptable for rewards to appear a bit later in the game.
Configure your webhook endpoint in Stash Studio and implement a listener that verifies the signature and grants rewards. See the webhook guides for full implementation details:
* [Webhooks Overview](/guides/get-started/stash-webhooks/overview): configure webhooks in Stash Studio
* [Webhook Listener](/guides/get-started/stash-webhooks/webhook-listener): create a listener and verify signatures
* [Webhook List](/guides/get-started/stash-webhooks/webhook-list): all event types and payload structures
* [Webhook Retries](/guides/get-started/stash-webhooks/retries): retry behavior and idempotent handlers
**Synchronous post-purchase.** Your backend asks Stash for the final payment status as soon as the purchase completes.
This is a targeted lookup, not a background poll. The trigger is the client's completion signal: when the client learns that the purchase completed, it tells your backend, and your backend calls [`GetPaymentEvent`](/api/ingress/payments/GetPaymentEvent) once. What that signal is depends on how you present the checkout:
* Web: the `onSuccess` prop or option. See [Web Apps](/guides/stash-pay/web-integration/web-apps).
* Unity: the `successCallback` argument of `OpenCard` or `OpenModal`, for example `successCallback: OnSuccess`. See [Unity](/guides/stash-pay/ios-android-integration/unity).
* Browser presentation modes (`openBrowser`: Safari View Controller, Chrome Custom Tabs, or the system browser): there is no success callback. The player returns to your game through the deep link, and that return is the signal. See [Presentation Options](/guides/stash-pay/ios-android-integration/presentation-options).
Your backend already holds the checkout link order ID from creating the link, so it can look the purchase up as soon as the client reports completion.
**Best for:** Games where the client needs rewards shown immediately after purchase, backends designed for synchronous request-response patterns, or when you prefer to avoid webhooks.
**How it works:**
1. Player completes checkout.
2. The client receives the completion signal (the SDK success callback, or the deep-link return in browser modes) and notifies your backend.
3. Your backend calls [`GetPaymentEvent`](/api/ingress/payments/GetPaymentEvent) with the purchase ID.
4. Stash returns the final status of the payment.
5. If successful, your backend grants rewards and returns updated state to the client.
```bash title="Query Purchase Status"
GET https://test-api.stash.gg/sdk/server/payment/
```
This is a server-side endpoint. Do not call it from the client. For complete endpoint documentation, see the [`GetPaymentEvent` API Reference](/api/ingress/payments/GetPaymentEvent).
**Validation before the charge is captured.** Stash calls your backend with [`ConfirmPayment`](/api/egress/purchase/ConfirmPayment) *before* capturing the payment, and waits for your response.
This is the only one of the three patterns where your server can **reject** a purchase, and it grants items during the same call. It fires earliest of the three.
**Best for:** Games with per-player inventory limits, multi-client locking, or other validation that must happen before a purchase is finalized.
**How it works:**
1. Player completes checkout.
2. Stash sends a [`ConfirmPayment`](/api/egress/purchase/ConfirmPayment) request to your backend.
3. Your backend validates the purchase, grants the items, and returns them in the response body.
4. Stash captures the payment.
**There is no approve or deny field.** Your server signals success by returning `200 OK` with the granted results in the body. It rejects by returning an HTTP error status.
**Any failure response fails the purchase.** Stash treats every non-success response the same way, whether it is a deliberate rejection, an unhandled `500`, a timeout, or a malformed body. When that happens the purchase fails and Stash does not retain the funds.
Respond `200 OK` unless you specifically do not want Stash to take the money.
For implementation details including request validation and webhook signature verification, see the [Webhook Listener guide](/guides/get-started/stash-webhooks/webhook-listener). For the full request/response schema, see the [`ConfirmPayment` API Reference](/api/egress/purchase/ConfirmPayment).
## Testing your integration [#testing-your-integration]
To test your Stash Pay integration, use [test card numbers](/guides/get-started/test-cards) in the Stash test environment. These cards allow you to complete transactions safely, as no real charges are created, making repeated testing risk-free.
**Environment Requirements:**
* **Test/Development/Staging:** Use test cards only. Test cards function in test environments and will be rejected in production.
* **Production:** Use real, live payment cards only. Real cards are accepted for production transactions and will be rejected in test environments.
* **Apple Pay and Google Pay are not available in the test environment.** These payment methods require live mode and will not function when testing.
### Testing Tools [#testing-tools]
**Link Generator**: Use the [Link Generator](/guides/stash-pay/how-tos/link-generator) in Stash Studio to quickly generate and test checkout links without writing code. The Link Generator allows you to:
---
## Section: Guides
# About Stash Webshop
**URL:** https://docs.stash.gg/guides/stash-webshop/about
**Description:** Learn about Stash Webshop - a direct-to-consumer platform that extends your in-game store to the web. Deliver live, personalized game offers to players through a branded webshop with managed or unified catalog integration modes.
Stash Webshop is a direct-to-consumer (D2C) platform that extends your in-game store to the web. You can deliver live, personalized game offers to players through a branded webshop without duplicating your catalog or managing a separate storefront.
To see Stash Webshop in action, explore the Howling Woods demo. It highlights incentive features and dynamic offer presentation.
## Stash Webshop integration modes [#stash-webshop-integration-modes]
Stash Webshop supports two integration modes:
* **Managed Catalog (Static):** Manage offers directly in Stash Studio or through API calls. This option is ideal for smaller, stable catalogs where quick integration is the priority.
* **Unified Catalog (Dynamic):** Sync your webshop with the live in-game catalog through real-time messaging with your server. This keeps web and in-game offers consistent, reduces manual work, and enables more advanced monetization opportunities.
Start with a static catalog integration and switch to a dynamic, real-time catalog when your needs change.
## Use cases [#use-cases]
### Direct-to-consumer storefront [#direct-to-consumer-storefront]
Create a branded web store that extends your in-game marketplace to the web, allowing players to browse and purchase items from any device. Perfect for games with extensive item catalogs, seasonal events, or limited-time offers that benefit from web-based discovery and shopping experiences.
### Cross-platform monetization [#cross-platform-monetization]
Enable players to make purchases from mobile, desktop, or tablet devices while maintaining a consistent catalog and purchase history. Ideal for games with cross-platform play where players want to manage their inventory and make purchases outside of the game client.
### Promotional campaigns [#promotional-campaigns]
Launch targeted promotional campaigns with web-exclusive offers, bundle deals, or limited-time sales that can be easily shared via social media or email marketing. The web format allows for richer promotional content and easier A/B testing of different offer strategies.
---
## Section: Guides
# High-Level Flow
**URL:** https://docs.stash.gg/guides/stash-webshop/flow
**Description:** Learn how Stash Webshop connects players to your game economy through a web-based storefront. Understand the core flow including account linking, catalog presentation, and event processing, plus the failsafe purchase flow that ensures secure transactions.
Stash Webshop connects players to your game economy through a web-based storefront.
### Core Flow [#core-flow]
Stash Webshop integration has three main steps. Each step defines how players connect, view offers, and complete transactions.
### Account linking [#account-linking]
Players link their in-game account with Apple, Google, Facebook, or a custom JWT/OIDC login provider.
### Catalog presentation [#catalog-presentation]
Players see offers from either **managed catalog** or **real-time catalog**.
### Event Processing [#event-processing]
The webshop sends real-time notifications to your game server through webhooks for item granting and analytics.
## Failsafe purchase flow [#failsafe-purchase-flow]
The failsafe purchase flow ensures players are only charged after your game server confirms item delivery.
Stash pre-authorizes payment, holds the funds, and notifies your game server through a webhook. Your server grants the items and confirms fulfillment before Stash finalizes the charge.
---
## Section: Guides
# Integrating Stash Webshop
**URL:** https://docs.stash.gg/guides/stash-webshop/integration
**Description:** Learn the key steps for integrating Stash Webshop including account linking setup, catalog and assets configuration, and processing events through webhooks. Follow this comprehensive guide to implement your webshop integration.
Use this article to learn the key steps for integrating Stash Webshop. It outlines the main components of the integration and helps you choose the path that fits your setup.
The video below walks you through the process.
**Apple Pay and Google Pay do not work in the test environment without individual setup.** Both require sandbox accounts. Contact your Stash representative to provision them for your test environment if needed.
## Integration overview [#integration-overview]
Stash Webshop integration has three core components. You can implement them in any order, but start with account linking to simplify the integration process.
**1. Setup account linking**
* Implement account linking methods.
* Set up your login provider (Apple, Google, Facebook, custom JWT/OIDC).
**2. Catalog and assets setup**
Select webshop catalog approach:
* **Static (Managed Catalog)**: Set up in Stash Studio. Use this option for stable catalogs.
* **Real-time Catalog**: Sync the catalog in real time from your game server.
**3. Processing events**
* Pre-authorizes payments.
* Notifies your backend to grant items.
* Confirms the transaction before finalizing the charge.
* Uses signed webhooks for secure, reliable communication.
## Setup account linking [#setup-account-linking]
Stash Webshop supports two authentication methods — **Direct Sign-in (SSO)** in the browser, and **Account Linking** via deep links and QR codes for passwordless login through the game client. Pick the method that fits your players, configure one or more identity providers in Stash Studio, then implement the chosen flow.
## Catalog and assets setup [#catalog-and-assets-setup]
Stash Webshop supports two catalog approaches. Pick the one that matches your team's workflow and infrastructure.
**Recommended for new integrations** — configure and launch your webshop entirely in Stash Studio with no code required. Best for stable catalogs that don't change frequently per player.
**Setup:**
In Stash Studio, select your game.
Navigate to
**Webshop**
→
**Products**
.
Create and configure your products with images, descriptions, and pricing.
Organize products into sections and set visibility rules.
For full configuration details, see the [Managed Catalog guide](/guides/stash-webshop/catalog/managed-catalog).
**Advanced** — fetch offers in real time from your game server whenever the webshop loads. Best for personalized catalogs, A/B testing, or when offers depend on player state.
**Setup:**
Create a REST API endpoint on your game backend that returns catalog rows (products + banners) as JSON.
Configure the endpoint URL in Stash Studio.
Test with different player IDs to verify personalization.
For the required JSON schema, attribute reference, and full implementation details, see the [Real-time Catalog guide](/guides/stash-webshop/catalog/real-time-catalog).
## Processing events [#processing-events]
Stash Webshop uses signed webhooks to notify your backend when a purchase completes. The flow follows a **failsafe pattern**: Stash pre-authorizes the charge first, your server grants items, and the charge is only finalized after your server confirms fulfillment — preventing disputes from technical issues.
### Purchase flow [#purchase-flow]
**Pre-authorization**
— Stash pre-authorizes the payment and holds funds.
**Item granting**
— your server receives the
`PURCHASE_SUCCEEDED`
webhook and grants items to the player.
**Confirmation**
— your server confirms fulfillment back to Stash.
**Finalization**
— Stash finalizes the charge only after confirmation.
The primary event for granting items is `PURCHASE_SUCCEEDED`, where the `source` field is `"Cart"` for Webshop purchases.
Stash Webshop also emits optional analytics events (`MUTATE_CART`, `VIEW_ITEM`, `VIEW_CHECKOUT_PAGE`, `VIEW_PRODUCT_DETAIL_PAGE`, `CART_BUTTON_CLICK`, `CREATE_PAYMENT_INTENT`, `FREE_ITEM_REDEEMED`) that you can subscribe to for cart-abandonment tracking, product interest, and promo campaign analytics. See the [Webhook List](/guides/get-started/stash-webhooks/webhook-list) for full payload schemas.
### Configuring webhooks [#configuring-webhooks]
Configure your webhook endpoint URL and authentication in Stash Studio under **Settings** → **Webhooks**, then implement a listener that verifies the signature and grants items idempotently. See the webhook guides for full implementation details:
* [Webhooks Overview](/guides/get-started/stash-webhooks/overview) — configure webhooks in Stash Studio
* [Webhook Listener](/guides/get-started/stash-webhooks/webhook-listener) — create a listener and verify signatures
* [Webhook List](/guides/get-started/stash-webhooks/webhook-list) — all event types and payload structures
* [Webhook Retries](/guides/get-started/stash-webhooks/retries) — retry behavior and idempotent handlers
## Testing your integration [#testing-your-integration]
To test your Stash Webshop integration, use [test card numbers](/guides/get-started/test-cards) that work with Stash's test environment. These test cards allow you to complete transactions without creating real charges, making it safe to test your integration repeatedly.
**Environment Requirements:**
* **Test/Development/Staging:** Use test cards only. Test cards work in test environments and will be rejected in production.
* **Production:** Use real, live payment cards only. Real cards are required for production transactions and will be rejected in test environments.
When testing your webshop:
* Use test cards in your development and staging environments only
* Verify that webhooks are received correctly for test transactions
* Test the complete purchase flow from catalog browsing to item granting
* Confirm that your server properly verifies and grants items after test purchases
* Test account linking flows with different authentication providers
* Always verify you're using the correct environment (test vs production) before processing transactions
For a complete list of test cards and testing guidelines, see [Test Card Numbers](/guides/get-started/test-cards).
## Next steps [#next-steps]
After you complete the core steps, add features to improve your webshop:
* **UI customization**: [Customize the webshop appearance](/guides/stash-webshop/how-tos/customize-webshop-appearance) in Stash Studio to match your brand.
* **Advanced analytics**: Track KPIs and player behavior in [Stash Studio dashboard](/guides/get-started/stash-studio/main-dashboard).
* **Loyalty programs**: Set up [promotions and rewards](/guides/partners/feature-support#loyalty-and-rewards) with web-exclusive offers and promo codes.
* **Performance optimization**: Run load tests and optimize your deployment with [Stash Studio monitoring tools](/guides/partners/stash-studio).
For advanced support or custom solutions, contact the Stash team.
---
## Section: Guides
# API Keys Overview
**URL:** https://docs.stash.gg/guides/get-started/stash-api-keys/overview
**Description:** API key setup, HMAC signing for requests to Stash, HMAC verification for requests from Stash, and migrating from legacy auth.
**Sending `X-Stash-Api-Key` directly in request headers is deprecated.** Shops and API keys created on or after 2026-08-15 cannot use the `X-Stash-Api-Key` header. The API key itself is not deprecated. It is still required as the HMAC secret for all new integrations. See [Migrating from legacy auth](#migrating-from-legacy-auth) if you are on the old header pattern.
API keys are secret credentials used to authenticate server-to-server requests between your game backend and Stash services. They are for **server-side use only**. Never expose them in client-side code, mobile apps, or web browsers.
## What are API keys used for? [#what-are-api-keys-used-for]
API keys serve two distinct authentication roles:
**Ingress secrets** authenticate requests your game backend makes to Stash APIs. Your App ID is in Studio → Project Settings → App details; your ingress secret is in Studio → Project Settings → API Secrets:
* **Stash Pay**: Generating checkout links, Quick Pay URLs, and querying payment status
* **Stash Launcher**: Managing build artifacts and authentication token flows
**Egress keys** are provided by Stash to sign outgoing requests from Stash to your game backend. Your backend verifies these using the `x-stash-hmac-signature` header on each inbound request:
* **Real-time Catalog**: Stash signs every outbound request to your catalog endpoint
* **Webhooks**: Stash signs every webhook delivery to your endpoint
## Creating API Keys [#creating-api-keys]
### Navigate to API Secrets [#navigate-to-api-secrets]
Go to your game in **Stash Studio** → **Project Settings** → **API Secrets**.
### Create a New API Secret [#create-a-new-api-secret]
Click **"Create API Secret"** or **"Add API Secret"**.
### Name Your Key [#name-your-key]
Enter a descriptive name (e.g., "Production Backend", "Test Environment") to help identify the purpose of each key.
### Copy the Secret [#copy-the-secret]
Click **"Create"** and **copy the secret value immediately** - it's only shown once.
The secret value is only displayed once at creation. If you lose the secret, you must create a new API key.
### Security Notes [#security-notes]
* Use descriptive names to identify the purpose of each key
* Create separate keys for different environments (test, staging, production)
* Store keys securely using your secret manager and least-privilege access policies
## HMAC Signing [#hmac-signing]
Use your **ingress secret** (Studio → Project Settings → API Secrets) to sign requests your backend makes to Stash APIs. Base64-decode the secret before using it as the HMAC key.
```
x-stash-hmac-signature: v1;;;
```
| Field | Description |
| :---------------------- | :---------------------------------------------------------------------- |
| `v1` | Protocol version |
| `` | Your immutable App ID (Studio → Project Settings → App details) |
| `` | Request timestamp in Unix milliseconds |
| `` | Standard base64-encoded HMAC-SHA256 of `"."` |
The signature covers `"." + `, where `` is the exact JSON bytes you POST. Sign what you transmit; Stash verifies against the bytes received. Requests where `` is more than 5 minutes from the server clock are rejected.
```javascript filename="sign-request.js"
const crypto = require('crypto');
function signStashRequest(appId, body, ingressSecretB64) {
const unixMs = Date.now().toString();
// base64-decode the ingress secret from Studio → Project Settings → API Secrets
const key = Buffer.from(ingressSecretB64, 'base64');
const sig = crypto
.createHmac('sha256', key)
.update(`${unixMs}.${body}`)
.digest('base64');
return `v1;${appId};${unixMs};${sig}`;
}
// Set as x-stash-hmac-signature header value:
const headerValue = signStashRequest(
process.env.APP_ID, // App ID from Studio → Project Settings → App details
JSON.stringify(requestBody), // exact bytes you will POST (sign what you send)
process.env.INGRESS_SECRET // base64-encoded ingress secret from Studio → Project Settings → API Secrets
);
```
```python filename="sign_request.py"
import base64
import hashlib
import hmac
import json
import os
import time
def sign_stash_request(app_id, body, ingress_secret_b64):
unix_ms = str(int(time.time() * 1000))
# base64-decode the ingress secret from Studio → Project Settings → API Secrets
key = base64.b64decode(ingress_secret_b64)
signed_msg = f"{unix_ms}.{body}"
sig = base64.b64encode(
hmac.new(key, signed_msg.encode('utf-8'), hashlib.sha256).digest()
).decode('utf-8')
return f"v1;{app_id};{unix_ms};{sig}"
# Set as x-stash-hmac-signature header value:
header_value = sign_stash_request(
os.environ['APP_ID'], # App ID from Studio → Project Settings → App details
json.dumps(request_body), # exact bytes you will POST (sign what you send)
os.environ['INGRESS_SECRET'] # base64-encoded ingress secret from Studio → Project Settings → API Secrets
)
```
```go filename="sign_request.go"
package main
import (
"crypto/hmac"
"crypto/sha256"
"encoding/base64"
"fmt"
"os"
"strconv"
"time"
)
func signStashRequest(appID, body, ingressSecretB64 string) (string, error) {
unixMs := strconv.FormatInt(time.Now().UnixMilli(), 10)
// base64-decode the ingress secret from Studio → Project Settings → API Secrets
key, err := base64.StdEncoding.DecodeString(ingressSecretB64)
if err != nil {
return "", err
}
signedMsg := fmt.Sprintf("%s.%s", unixMs, body)
mac := hmac.New(sha256.New, key)
mac.Write([]byte(signedMsg))
sig := base64.StdEncoding.EncodeToString(mac.Sum(nil))
return fmt.Sprintf("v1;%s;%s;%s", appID, unixMs, sig), nil
}
// Set as x-stash-hmac-signature header value:
headerValue, err := signStashRequest(
os.Getenv("APP_ID"), // App ID from Studio → Project Settings → App details
string(requestBodyBytes), // exact bytes you will POST (sign what you send)
os.Getenv("INGRESS_SECRET"), // base64-encoded ingress secret from Studio → Project Settings → API Secrets
)
```
## HMAC Verification [#hmac-verification]
Use your **egress key** (Studio → Project Settings → API Secrets) to verify signed inbound requests from Stash: webhooks and real-time catalog requests. Base64-decode the key before using it as the HMAC key. For GET requests (real-time catalog), the body is an empty string.
```
x-stash-hmac-signature: v1;;;
```
| Field | Description |
| :---------------------- | :---------------------------------------------------------------------- |
| `v1` | Protocol version |
| `` | Your immutable App ID (Studio → Project Settings → App details) |
| `` | Request timestamp in Unix milliseconds |
| `` | Standard base64-encoded HMAC-SHA256 of `"."` |
Reject requests where `` is more than 5 minutes from your server clock.
```javascript filename="verify-signature.js"
const crypto = require('crypto');
function verifyStashSignature(headerValue, body, egressSecretB64) {
const [version, appId, unixMs, receivedSig] = headerValue.split(';');
// Reject requests outside the 5-minute clock-skew window
if (Math.abs(Date.now() - Number(unixMs)) > 5 * 60 * 1000) return false;
// base64-decode the egress key from Studio → Project Settings → API Secrets
const key = Buffer.from(egressSecretB64, 'base64');
// body is empty string for GET requests; raw bytes for POST
const signedMsg = `${unixMs}.${body}`;
const expected = crypto
.createHmac('sha256', key)
.update(signedMsg)
.digest('base64');
return crypto.timingSafeEqual(Buffer.from(expected), Buffer.from(receivedSig));
}
```
```python filename="verify_signature.py"
import base64
import hashlib
import hmac
import time
def verify_stash_signature(header_value, body, egress_secret_b64):
parts = header_value.split(';', 3)
version, app_id, unix_ms, received_sig = parts[0], parts[1], parts[2], parts[3]
# Reject requests outside the 5-minute clock-skew window
if abs(time.time() * 1000 - int(unix_ms)) > 5 * 60 * 1000:
return False
# base64-decode the egress key from Studio → Project Settings → API Secrets
key = base64.b64decode(egress_secret_b64)
# body is empty string for GET requests
signed_msg = f"{unix_ms}.{body}"
expected = base64.b64encode(
hmac.new(key, signed_msg.encode('utf-8'), hashlib.sha256).digest()
).decode('utf-8')
return hmac.compare_digest(expected, received_sig)
```
```go filename="verify_signature.go"
package main
import (
"crypto/hmac"
"crypto/sha256"
"encoding/base64"
"fmt"
"math"
"strconv"
"strings"
"time"
)
func verifyStashSignature(headerValue string, body []byte, egressSecretB64 string) bool {
parts := strings.SplitN(headerValue, ";", 4)
if len(parts) != 4 {
return false
}
unixMs, receivedSig := parts[2], parts[3]
// Reject requests outside the 5-minute clock-skew window
ts, err := strconv.ParseInt(unixMs, 10, 64)
if err != nil || math.Abs(float64(time.Now().UnixMilli()-ts)) > 5*60*1000 {
return false
}
// base64-decode the egress key from Studio → Project Settings → API Secrets
key, err := base64.StdEncoding.DecodeString(egressSecretB64)
if err != nil {
return false
}
// body is empty for GET requests
signedMsg := fmt.Sprintf("%s.%s", unixMs, body)
mac := hmac.New(sha256.New, key)
mac.Write([]byte(signedMsg))
expected := base64.StdEncoding.EncodeToString(mac.Sum(nil))
return hmac.Equal([]byte(expected), []byte(receivedSig))
}
```
## Migrating from Legacy Auth [#migrating-from-legacy-auth]
No new API secrets are required to migrate. The same API key works with the versioned HMAC header.
### Before you migrate: update your stored secret (optional, recommended) [#before-you-migrate-update-your-stored-secret-optional-recommended]
This step applies to any **API auth migration**: `X-Stash-Api-Key` ingress auth and legacy `stash-hmac-signature` egress auth for APIs such as real-time catalog. It does **not** apply to webhook migration: webhook secrets have always been base64-encoded.
If your backend stores the raw secret value (used with legacy API key header auth and legacy API HMAC auth), update it to store the **base64-encoded value copied from Studio** → Project Settings → API Secrets before migrating.
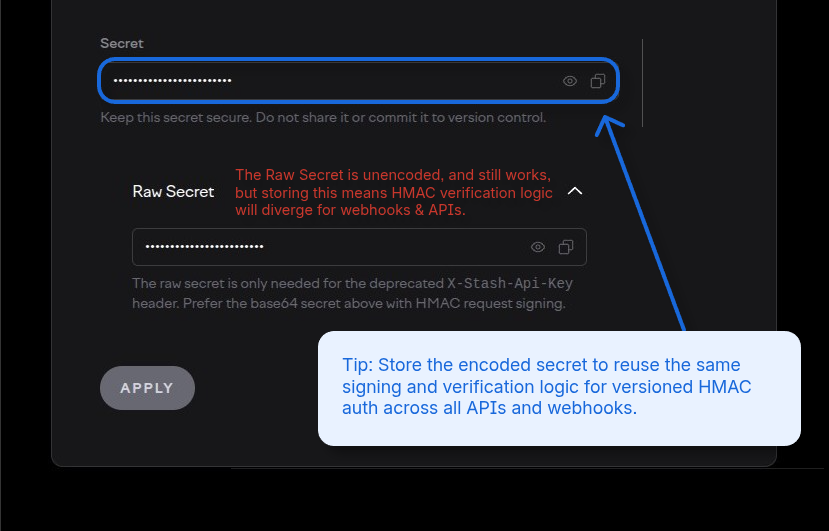 **Why this matters:** Versioned HMAC code base64-decodes the secret before computing the signature. If your stored value is already base64-encoded, the same decoding step works uniformly for ingress signing (API calls to Stash) and egress verification (APIs and webhooks from Stash):
```javascript
const key = Buffer.from(secretB64, 'base64'); // same line works for all
```
If you skip this step and keep the raw secret, you must omit the base64-decode step in your HMAC code for these APIs. This means you can avoid storing the new encoded value in your database, but your API and webhook verification implementations will diverge.
### From X-Stash-Api-Key header [#from-x-stash-api-key-header]
Replace `X-Stash-Api-Key: ` with a versioned HMAC signature. Your **App ID** is in **Studio → Project Settings → App details**:
```
// Before
X-Stash-Api-Key:
// After
x-stash-hmac-signature: v1;;;
```
See [HMAC Signing](#hmac-signing) for the full format and implementation code.
### From legacy HMAC (stash-hmac-signature) [#from-legacy-hmac-stash-hmac-signature]
Update your webhook listener and real-time catalog request handler to verify `x-stash-hmac-signature` instead of `stash-hmac-signature`. The same egress key is used; the change is adding the timestamp and App ID to the signed message. Your **App ID** is in **Studio → Project Settings → App details**:
```
// Before (legacy)
stash-hmac-signature:
// After (versioned)
x-stash-hmac-signature: v1;;;
```
See [HMAC Verification](#hmac-verification) for the updated format and implementation code.
### Migration rollout strategy [#migration-rollout-strategy]
Test the new HMAC signing and verification in your test shop before releasing to production. All shop environments already send the versioned `x-stash-hmac-signature` header on egress APIs and webhooks and validate it on all SDK ingress APIs. You can start sending and checking the new header at any time without coordinating with Stash.
**If you did the optional preparation step** (you updated your stored secret to the base64-encoded value):
Keep **both** the old raw secret and the new base64-encoded value stored in every environment until the rollout is fully complete and 100% of server-to-server traffic is using the new versioned HMAC. Replacing the raw secret before the new code is live in production will break auth for active users mid-rollout.
Store the base64-encoded value as a new column or row in your database table. Do **not** overwrite the raw secret value until the new code is deployed and verified working in production.
Recommended sequence:
1. Add the base64-encoded secret as a new column or row in your secret store (keep the raw value).
2. Deploy the new HMAC signing and verification code in your test environment. Point it at the base64-encoded value.
3. Verify auth works end-to-end in your test shop.
4. Deploy to production. Verify auth works.
5. Remove the raw secret from your secret store.
**If you skipped the optional preparation step** (you kept the raw secret):
You can roll out without managing two copies of each secret. Your API and webhook verification implementations will diverge slightly, but there is no DB migration required during the rollout.
## Next Steps [#next-steps]
* [HMAC Signing](#hmac-signing): sign your backend calls to Stash (ingress)
* [HMAC Verification](#hmac-verification): verify Stash's signed requests to your backend (egress)
* [Stash Pay → Authentication](/guides/stash-pay/integration#authentication): Stash Pay checkout link signing
* [Stash Launcher Integration](/guides/stash-launcher/integration): apply ingress auth in launcher backend flows
* [Real-time Catalog → Authentication](/guides/stash-webshop/catalog/real-time-catalog#authentication): verify Stash's signed catalog requests
* [Webhook Listener](/guides/get-started/stash-webhooks/webhook-listener): implement HMAC Verification for incoming webhooks
---
## Section: Guides
# Getting Started with Stash Studio
**URL:** https://docs.stash.gg/guides/get-started/stash-studio/getting-started
**Description:** Learn how to get started with Stash Studio, the centralized web-based developer portal for managing your Stash integration. Understand key features including integration management, project settings, monitoring, authentication setup, and catalog control.
At this moment, you can't self-register for Stash Studio. Please reach out to us to set up your account.
Stash Studio (studio.stash.gg) is your centralized platform for everything related to Stash and is probably the best way to get started
as you need to navigate through it when integrating any of Stash's products.
As a web-based developer portal, Stash Studio lets you manage every aspect of your Stash integration.
With its no-code interface, game teams can easily configure, monitor, and optimize their webshop, payments,
and catalog—no engineering changes required.
It was built from the ground up not to only serve as a management platform, but as a debugging tool
that help you through initial integration and when debugging any issues that occur.
## Key features [#key-features]
* **Integration Management**: Set up and maintain API keys, configure webhooks, and data flow in your integration.
* **Project Settings**: Configure visuals, branding, and presentation to match your game's identity across all Stash products.
* **Monitoring & Insights**: See and debug messaging between Stash and game backend.
* **Testing Tools**: Use the [Link Generator](/guides/stash-pay/how-tos/link-generator) to quickly generate and test Stash Pay checkout links without writing code.
* **Authentication Setup**: Connect third-party or custom login systems to enable seamless player sign-in in webshops.
* **Catalog Control**: Create, edit, and manage the offers and products displayed in your webshop.
## Core navigation [#core-navigation]
When you login to your stash studio account, you can manage your "instances". These instances represent your games, you can
create and delete instances as needed.
**Why this matters:** Versioned HMAC code base64-decodes the secret before computing the signature. If your stored value is already base64-encoded, the same decoding step works uniformly for ingress signing (API calls to Stash) and egress verification (APIs and webhooks from Stash):
```javascript
const key = Buffer.from(secretB64, 'base64'); // same line works for all
```
If you skip this step and keep the raw secret, you must omit the base64-decode step in your HMAC code for these APIs. This means you can avoid storing the new encoded value in your database, but your API and webhook verification implementations will diverge.
### From X-Stash-Api-Key header [#from-x-stash-api-key-header]
Replace `X-Stash-Api-Key: ` with a versioned HMAC signature. Your **App ID** is in **Studio → Project Settings → App details**:
```
// Before
X-Stash-Api-Key:
// After
x-stash-hmac-signature: v1;;;
```
See [HMAC Signing](#hmac-signing) for the full format and implementation code.
### From legacy HMAC (stash-hmac-signature) [#from-legacy-hmac-stash-hmac-signature]
Update your webhook listener and real-time catalog request handler to verify `x-stash-hmac-signature` instead of `stash-hmac-signature`. The same egress key is used; the change is adding the timestamp and App ID to the signed message. Your **App ID** is in **Studio → Project Settings → App details**:
```
// Before (legacy)
stash-hmac-signature:
// After (versioned)
x-stash-hmac-signature: v1;;;
```
See [HMAC Verification](#hmac-verification) for the updated format and implementation code.
### Migration rollout strategy [#migration-rollout-strategy]
Test the new HMAC signing and verification in your test shop before releasing to production. All shop environments already send the versioned `x-stash-hmac-signature` header on egress APIs and webhooks and validate it on all SDK ingress APIs. You can start sending and checking the new header at any time without coordinating with Stash.
**If you did the optional preparation step** (you updated your stored secret to the base64-encoded value):
Keep **both** the old raw secret and the new base64-encoded value stored in every environment until the rollout is fully complete and 100% of server-to-server traffic is using the new versioned HMAC. Replacing the raw secret before the new code is live in production will break auth for active users mid-rollout.
Store the base64-encoded value as a new column or row in your database table. Do **not** overwrite the raw secret value until the new code is deployed and verified working in production.
Recommended sequence:
1. Add the base64-encoded secret as a new column or row in your secret store (keep the raw value).
2. Deploy the new HMAC signing and verification code in your test environment. Point it at the base64-encoded value.
3. Verify auth works end-to-end in your test shop.
4. Deploy to production. Verify auth works.
5. Remove the raw secret from your secret store.
**If you skipped the optional preparation step** (you kept the raw secret):
You can roll out without managing two copies of each secret. Your API and webhook verification implementations will diverge slightly, but there is no DB migration required during the rollout.
## Next Steps [#next-steps]
* [HMAC Signing](#hmac-signing): sign your backend calls to Stash (ingress)
* [HMAC Verification](#hmac-verification): verify Stash's signed requests to your backend (egress)
* [Stash Pay → Authentication](/guides/stash-pay/integration#authentication): Stash Pay checkout link signing
* [Stash Launcher Integration](/guides/stash-launcher/integration): apply ingress auth in launcher backend flows
* [Real-time Catalog → Authentication](/guides/stash-webshop/catalog/real-time-catalog#authentication): verify Stash's signed catalog requests
* [Webhook Listener](/guides/get-started/stash-webhooks/webhook-listener): implement HMAC Verification for incoming webhooks
---
## Section: Guides
# Getting Started with Stash Studio
**URL:** https://docs.stash.gg/guides/get-started/stash-studio/getting-started
**Description:** Learn how to get started with Stash Studio, the centralized web-based developer portal for managing your Stash integration. Understand key features including integration management, project settings, monitoring, authentication setup, and catalog control.
At this moment, you can't self-register for Stash Studio. Please reach out to us to set up your account.
Stash Studio (studio.stash.gg) is your centralized platform for everything related to Stash and is probably the best way to get started
as you need to navigate through it when integrating any of Stash's products.
As a web-based developer portal, Stash Studio lets you manage every aspect of your Stash integration.
With its no-code interface, game teams can easily configure, monitor, and optimize their webshop, payments,
and catalog—no engineering changes required.
It was built from the ground up not to only serve as a management platform, but as a debugging tool
that help you through initial integration and when debugging any issues that occur.
## Key features [#key-features]
* **Integration Management**: Set up and maintain API keys, configure webhooks, and data flow in your integration.
* **Project Settings**: Configure visuals, branding, and presentation to match your game's identity across all Stash products.
* **Monitoring & Insights**: See and debug messaging between Stash and game backend.
* **Testing Tools**: Use the [Link Generator](/guides/stash-pay/how-tos/link-generator) to quickly generate and test Stash Pay checkout links without writing code.
* **Authentication Setup**: Connect third-party or custom login systems to enable seamless player sign-in in webshops.
* **Catalog Control**: Create, edit, and manage the offers and products displayed in your webshop.
## Core navigation [#core-navigation]
When you login to your stash studio account, you can manage your "instances". These instances represent your games, you can
create and delete instances as needed.
All settings and configurations always happen on the game level, so create an instance or select an existing one before you
---
## Section: Guides
# Main Dashboard
**URL:** https://docs.stash.gg/guides/get-started/stash-studio/main-dashboard
**Description:** Learn how to use the main dashboard in Stash Studio to understand revenue, player purchase activity, account linking, and more. Explore analytics and operational metrics to monitor your integration health and optimize performance.
When selecting your game in Stash Studio the first view that is presented is your **main dashboard**.
Dashboard helps you understand your revenue, player purchase activity, account linking, and more at a glance.
The dashboard is split into two main tabs **Analytics** and **Operational** overview.
## Analytics tab [#analytics-tab]
### All time saved by using Stash [#all-time-saved-by-using-stash]
This number reflects the amount of money you've earned over traditional platforms that offer in-app purchases (IAPs). Because Stash charges less than these platforms, you retain more of the money from each purchase.
### Avg revenue per paying user [#avg-revenue-per-paying-user]
This is the all-time average revenue per paying user. This metric depends on many factors such as purchase frequency, average order value, and user lifespans. To be included, users have to complete at least one purchase in your webshop. Use this value to better understand how much users spend, and to help gauge the overall effectiveness of your shop.
### Gross Revenue [#gross-revenue]
This chart breaks down different revenue metrics:
* The gross revenue, which is the total amount paid by users.
* The net revenue, which is the amount left after tax and payment processing fees.
* The net revenue that would have been obtained through traditional platforms like Google and Apple.
### Average Order Value [#average-order-value]
This chart displays the average amount spent on each order or purchase. It also includes the total number of transactions on each day. Similar to the gross revenue chart, it compares the current value to the last value for the specified time period (either the last 7 or 28 days). Use this chart to better understand how much users spend per order over time.
The values displayed in this chart are often inversely proportional. For example, if the number of purchases goes up, the average order value goes down. This happens during events when you discount prices.
### New Linked Accounts [#new-linked-accounts]
This chart displays several things:
* The number of users that linked their accounts to your webshop.
* The number of users that made their first purchase (their account could have been linked on a previous day, not necessarily on the same day as the purchase).
* The number of returning users that made a purchase.
This chart helps you understand conversion (the number of users making their first purchase), and how many transactions are made by returning users. When you run promotions and other acquisition events, review these values to better understand the impact of these efforts.
## Operations tab [#operations-tab]
Operations data includes transaction and outgoing events metrics. You can use this data help monitor the health of your integration. The visualizations are interactive, and you can specify timeframes for the data. You can also click individual elements to view more detailed information.
### Transaction status [#transaction-status]
The **Transaction** graph provides a real-time view of all payment events in your webshop. Transactions are categorized into the following statuses:
| Status | Description |
| ----------------------- | --------------------------------------------------------------------------- |
| Succeeded | Successfully completed payments |
| Canceled | Transactions canceled by the developer |
| Requires Action | Payments requiring additional player actions (e.g., 3D Secure verification) |
| Requires Capture | Authorized payments that failed to complete (player was not charged) |
| Requires Payment Method | Transactions awaiting payment information |
| Unknown | Transactions that failed for unspecified reasons |
The graph displays the total number of transactions and the percentage breakdown by status. You can click on any status to view detailed event logs for transactions in that category.
### Outgoing events [#outgoing-events]
The **Outgoing Events** graph tracks webhooks and other external notifications. Use this visualization to monitor integration points between Stash and your infrastructure.
| Status | Description |
| ------- | ------------------------------------------- |
| Success | Percentage of events successfully delivered |
| Failed | Percentage of events that failed to deliver |
Click individual events to view detailed logs. This can help identify and troubleshoot integration issues or failed notifications.
---
## Section: Guides
# Project Settings
**URL:** https://docs.stash.gg/guides/get-started/stash-studio/project-settings
**Description:** Learn how to manage project settings that span across Stash products including webhooks, API keys, theme settings, and more. Understand how to configure general settings, customize themes, manage receipts, set up game backend communication, and handle API secrets.
Project settings span across the Stash products you use. They include webhooks, API keys, theme settings, and more. You can edit these settings at any time, and they take effect immediately.
## General [#general]
In **General** settings, you configure your game name, logo, shop handle, page title, and page description. These settings are editable and you can change them at any time.
The shop handle field controls the URL for your shop, and it's also used in API calls to Stash. If you change this value, make sure to also:
* Update links that referenced the previous URL
* Update any API calls that used the previous shop handle
## Theme [#theme]
Customize appearance settings across Stash products in the **Theme** section. You can modify colors and other general settings. For webshop-specific settings, see the [customize your webshop's appearance](/guides/webshop/how-tos/customize-webshop-appearance) page.
## Receipts [#receipts]
Use the **Receipts** section to test email receipts. In production, receipt emails are sent to players immediately after successful purchases (applies to both Web Shop and Stash Pay).
## Game backend [#game-backend]
The **Game Backend** section is where you configure the server URL and headers that Stash uses to communicate with your backend. You can only set a single server URL, but you can add multiple headers.
You will learn a lot more about the game backend and webhook configuration later in the integration process.
## Webhooks [#webhooks]
In this section, you can:
* Add webhooks
* Enable or disable existing webhooks
* Delete existing webhooks
* Select individual webhooks to view more detailed information (outgoing events sent to the webhook, the webhook ID, etc.)
The URL configured for each webhook is where Stash sends event data to. You can configure multiple webhooks and update them at any time.
## API secrets [#api-secrets]
Generate and manage API secrets in this section. These secrets are used in the `X-Stash-Api-Key` header to authenticate API requests to Stash. You can view and delete existing secrets, or create new ones. Always keep API secrets secure, and never expose them in client-side code.
For detailed information on creating, using, and managing API keys, including code examples, security best practices, and troubleshooting, see the [API Keys guide](/guides/get-started/stash-api-keys/overview).
---
## Section: Guides
# Roles & Permissions
**URL:** https://docs.stash.gg/guides/get-started/stash-studio/roles-and-permissions
**Description:** Understand how app-scoped roles and account-wide ownership work in Stash Studio, including what each role can access.
Stash Studio uses role-based access control (RBAC) to help teams collaborate safely.
Most roles are assigned **per app**, which means a user can have different permissions on different apps.
## Roles in Stash Studio [#roles-in-stash-studio]
Stash Studio currently supports four app-scoped roles:
* **Admin**
* **Developer**
* **Finance / Analytics**
* **Product / Live Ops**
Each role controls what a user can view or manage for a specific app.
## Owner role (account-wide) [#owner-role-account-wide]
The **Owner** role is separate from app-scoped roles.
* The first user on a Studio account is automatically assigned as **Owner**.
* Stash can also assign the Owner role to a user by email.
* Owner has access to everything across **all apps**.
## Per-app role assignments [#per-app-role-assignments]
Roles are assigned per app, not globally.
That means the same user can have different responsibilities in different apps. For example:
* **Admin** on App A
* **Finance / Analytics** on App B
When users switch between apps, their available pages and actions update based on their role for the selected app.
## Capability matrix [#capability-matrix]
The matrix below summarizes access by role:
| Capability | Admin | Developer | Finance / Analytics | Product / Live Ops | Owner |
| ------------------ | ----- | --------- | ------------------- | ------------------ | ----- |
| Technical settings | Yes | Yes | No | No | Yes |
| Payouts | Yes | No | Yes | No | Yes |
| Analytics | Yes | No | Yes | Yes | Yes |
| Product / catalog | Yes | No | No | Yes | Yes |
| Logs | Yes | Yes | No | No | Yes |
| User management | Yes | No | No | No | Yes |
## Restricted route behavior [#restricted-route-behavior]
If a user tries to access a route they do not have permission to view for the selected app, Studio blocks access and shows a restricted message:
**"No access for this app — contact an Admin."**
If this happens:
1. Switch to the correct app (where you may have a different role), or
2. Contact an Admin to request access for this app.
---
## Section: Guides
# View Logs in Stash Studio
**URL:** https://docs.stash.gg/guides/get-started/stash-studio/view-logs
**Description:** Learn how to use Stash Studio's comprehensive logging tools to inspect events, debug communication between Stash API and your game backend, and identify integration issues. Access logs for outgoing events, incoming events, payments, and linked accounts.
Stash Studio provides comprehensive logging tools that are invaluable for engineers. You can inspect various types of
events directly within the platform, making it easy to debug communication between the Stash API and your game backend
or to identify hidden integration issues.
# Logs Page [#logs-page]
Access your game's log by clicking the **"Logs"** icon in the main navigation.
| Log Type | Description |
| --------------- | ---------------------------------------------------------------- |
| Outgoing Events | Logs for calls made from Stash to your backend. |
| Incoming Events | Logs for calls made from your backend to Stash. |
| Payments | Logs related to payments. |
| Linked Accounts | Logs that track when players link their accounts to the webshop. |
Clicking individual events opens a detailed view with information like the URL, request body, a timestamp, and more. You also have several options for filtering logs by status, user ID, timeframe, etc.
---
## Section: Guides
# Stash Webhooks
**URL:** https://docs.stash.gg/guides/get-started/stash-webhooks/overview
**Description:** Learn about Stash webhooks - automated notifications sent to your backend when events occur across Stash products. Understand how to configure webhooks in Stash Studio and handle webhook events for player interactions, purchases, and more.
Webhooks are automated notifications that Stash sends to your backend when certain events occur in Stash products.
They are a core component of integrating Stash Pay and Stash Webshop. When an event is triggered—such as a player
making a purchase—Stash sends an HTTP POST request (with a JSON payload) to the webhook URL you've configured in
Stash Studio.
Common webhook event examples include:
* Purchase completed successfully
* Items added or removed from cart
* User views a product
* Payment intent created
* Subscription created, renewed, or canceled
By handling these webhook notifications, your backend can:
* Grant items to players after successful purchases
* Track user behavior and analytics
* Maintain synchronization between your game and Stash
* Manage subscription access and renewals
* Process refunds and handle edge cases
The following diagram illustrates a typical webhook flow:
## Webhook formats [#webhook-formats]
Stash webhooks use two payload formats:
### v1 format (existing) [#v1-format-existing]
Used by purchase and webshop events (`PURCHASE_SUCCEEDED`, `MUTATE_CART`, etc.). These use uppercase event types with camelCase nested objects:
```json
{
"type": "PURCHASE_SUCCEEDED",
"purchaseSucceeded": { ... }
}
```
### v2 format (new) [#v2-format-new]
Used by subscription events (`subscription.created`, `subscription.canceled`, etc.). These use lowercase dot-notation event types with a `data` object:
```json
{
"type": "subscription.created",
"data": { ... }
}
```
**New webhook events will use the v2 format.** Your webhook handler should support both formats. See the [Webhook List](/guides/get-started/stash-webhooks/webhook-list) for detailed payload examples.
## Configure webhooks [#configure-webhooks]
To start receiving webhooks, you need to set them up in your Stash Studio project settings:
### Open your project [#open-your-project]
Open your game project in Stash Studio.
### Navigate to Settings [#navigate-to-settings]
Go to the **Settings** section in the main navigation.
### Configure Webhooks [#configure-webhooks-1]
Click on **Webhooks**.
Here, you can add a new webhook by entering the URL of your webhook listener endpoint. Stash Studio will also provide you with a unique webhook secret, which you should use to verify the signature of each incoming webhook message.
---
## Section: Guides
# Webhook Retries and Idempotency
**URL:** https://docs.stash.gg/guides/get-started/stash-webhooks/retries
**Description:** Learn about webhook retry behavior, how many retries are attempted, what happens on failure, and best practices for implementing idempotent webhook handlers.
Stash uses Google Cloud Tasks to deliver webhooks, which implements automatic retry logic with exponential backoff. Understanding retry behavior is crucial for building reliable webhook handlers.
## How Many Retries [#how-many-retries]
The exact number of retries depends on Cloud Tasks queue configuration, but typically:
* **Initial attempt**: Immediate
* **Retry 1**: \~1 minute after initial failure
* **Retry 2**: \~2 minutes after retry 1
* **Retry 3**: \~4 minutes after retry 2
* **Retry 4**: \~8 minutes after retry 3
* **Retry 5**: \~16 minutes after retry 4
* **Maximum retries**: Typically 5-10 attempts over \~24 hours
The retry count is included in the `stash-retry-count` header (see [Webhook Headers](#webhook-headers) below).
## What Happens on Failure [#what-happens-on-failure]
When a webhook delivery fails after all retry attempts are exhausted:
1. **No further automatic retries**: The webhook will not be automatically retried again
2. **Event is logged**: The failure is logged in Stash's internal systems for monitoring
3. **Manual reconciliation**: You may need to manually reconcile missed events by:
* Querying the Stash API for transaction status
* Checking your purchase history endpoints
* Reviewing transaction logs in the Stash Studio dashboard
**Important:** Webhook delivery failures do **not** affect the underlying transaction. If a `PURCHASE_SUCCEEDED` webhook fails to deliver, the purchase is still valid and the payment was processed. You should implement idempotent webhook handlers and have a reconciliation process to catch missed events.
## Webhook Headers [#webhook-headers]
Each webhook request includes the following HTTP headers:
### `Content-Type` [#content-type]
* **Value**: `application/json`
* **Description**: Indicates the request body is JSON
### `Stash-Hmac-Signature` [#stash-hmac-signature]
* **Value**: Base64-encoded HMAC-SHA256 signature of the request body
* **Description**: Used for signature verification (optional but recommended)
* **Format**: Base64-encoded string
* **See**: [Signature Verification](/guides/get-started/stash-webhooks/webhook-listener#signature-verification)
### `stash-retry-count` [#stash-retry-count]
* **Value**: Integer string (e.g., `"0"`, `"1"`, `"2"`)
* **Description**: Current retry attempt number (0 = initial attempt, 1 = first retry, etc.)
* **Use Case**: Track retry attempts, implement retry-specific logic, debugging
You can use the `stash-retry-count` header to:
* Log retry attempts for debugging
* Implement different handling logic for retries vs initial attempts
* Monitor webhook delivery reliability
## Best Practices [#best-practices]
### 1. Idempotent Handlers [#1-idempotent-handlers]
Design your webhook handlers to be **idempotent** (safe to process the same event multiple times). This ensures that if a webhook is retried, you don't accidentally:
* Grant items twice
* Charge a user multiple times
* Create duplicate records
**Example:**
```javascript
async function handlePurchaseSucceeded(event) {
const { orderId, userId, items } = event.purchaseSucceeded;
// Check if this order has already been processed
const existingOrder = await db.getOrder(orderId);
if (existingOrder && existingOrder.status === 'completed') {
// Already processed, return success
return { status: 'ok', message: 'Already processed' };
}
// Process the order
await grantItemsToUser(userId, items);
await db.saveOrder(orderId, { status: 'completed', ...event });
return { status: 'ok' };
}
```
### 2. Use Transaction IDs [#2-use-transaction-ids]
Use `orderId` or `transactionId` to deduplicate events:
```javascript
// Use orderId as a unique key
const orderId = event.purchaseSucceeded.orderId;
// Check if already processed
if (await isOrderProcessed(orderId)) {
return; // Skip duplicate
}
// Process and mark as complete
await processOrder(orderId, event);
await markOrderProcessed(orderId);
```
### 3. Reconciliation [#3-reconciliation]
Periodically query transaction status to catch missed webhooks:
```javascript
// Run this periodically (e.g., daily)
async function reconcileMissedWebhooks() {
const recentOrders = await stashApi.getRecentOrders();
for (const order of recentOrders) {
if (!await isOrderProcessed(order.id)) {
// Webhook was missed, process manually
await handlePurchaseSucceeded({
purchaseSucceeded: order
});
}
}
}
```
### 4. Monitoring [#4-monitoring]
Monitor webhook delivery success rates and set up alerts for failures:
* Track the `stash-retry-count` header to identify frequently retried webhooks
* Set up alerts for webhook delivery failures
* Monitor your endpoint's response times (should be \< 30 seconds)
* Track error rates and response codes
### 5. Fast Response [#5-fast-response]
Respond quickly (within 30 seconds) to avoid timeouts:
```javascript
// Good: Process asynchronously and respond immediately
app.post('/webhook', async (req, res) => {
// Verify signature first
if (!verifySignature(req)) {
return res.status(401).send();
}
// Respond immediately
res.status(200).json({ received: true });
// Process asynchronously
processWebhookAsync(req.body).catch(err => {
console.error('Webhook processing error:', err);
// Handle error (e.g., queue for retry, send alert)
});
});
```
## Handling Retries [#handling-retries]
You can use the `stash-retry-count` header to implement retry-specific logic:
```javascript
app.post('/webhook', async (req, res) => {
const retryCount = parseInt(req.headers['stash-retry-count'] || '0');
if (retryCount > 0) {
console.log(`Processing retry attempt ${retryCount} for webhook`);
// You might want to log this differently or handle retries with extra care
}
// Process webhook...
res.status(200).json({ received: true });
});
```
## Common Issues [#common-issues]
### Duplicate Processing [#duplicate-processing]
**Problem:** Webhook is processed multiple times due to retries.
**Solution:** Implement idempotent handlers using `orderId` or `transactionId` as unique keys.
### Slow Processing [#slow-processing]
**Problem:** Webhook processing takes too long, causing timeouts and retries.
**Solution:**
* Respond immediately with `200 OK`
* Process the webhook asynchronously
* Use background jobs or queues for heavy processing
### Missing Events [#missing-events]
**Problem:** Some webhooks are never received even after retries.
**Solution:**
* Implement reconciliation process
* Monitor webhook delivery logs in Stash Studio
* Set up alerts for delivery failures
---
## Section: Guides
# Webhook List
**URL:** https://docs.stash.gg/guides/get-started/stash-webhooks/webhook-list
**Description:** Comprehensive list of all webhook events that Stash can send to your backend, including event types, triggers, payload structures, and detailed examples for purchase, subscription, and payment webhooks across Stash products.
This page lists all webhook events Stash can send to your backend. Each event is triggered by a specific user action or system event. Use the table below to see what's available, then expand the tabs for full payload examples.
**Product-specific events:** Some events are specific to Stash Pay or Stash
Webshop. See the [Stash Pay integration guide](/guides/stash-pay/integration)
or [Stash Webshop integration guide](/guides/stash-webshop/integration) for
product-specific webhook details.
## Available webhooks [#available-webhooks]
`PURCHASE_SUCCEEDED` is the **primary event for granting items**; always subscribe to it. `PURCHASE_REFUNDED` should be handled to revoke or adjust granted items. The remaining events are **optional** and used mainly for analytics, marketing, and behavior tracking.
| Event Type | Required | Products | Description |
| --------------------------- | ----------- | ------------ | --------------------------------------------------------------------------------------------------------- |
| `PURCHASE_SUCCEEDED` | **Yes** | Pay, Webshop | Purchase successfully completed. Use to grant items to the player. `source` is `"StashPay"` or `"Cart"`. |
| `PURCHASE_REFUNDED` | Recommended | Pay, Webshop | Full or partial refund processed. Use to revoke or adjust granted items. |
| `CREATE_PAYMENT_INTENT` | No | Pay, Webshop | Payment process initiated (user starts checkout). |
| `FREE_ITEM_REDEEMED` | No | Pay, Webshop | A free item was claimed (promotional rewards, etc.). |
| `MUTATE_CART` | No | Webshop | Cart contents changed (add/remove/quantity). |
| `VIEW_ITEM` | No | Webshop | User viewed an item (debounced once per 100s per item). |
| `VIEW_CHECKOUT_PAGE` | No | Webshop | User opened the checkout page. |
| `VIEW_PRODUCT_DETAIL_PAGE` | No | Webshop | User opened a product detail page. |
| `CART_BUTTON_CLICK` | No | Webshop | User interacted with a cart button. |
| `LOYALTY_MILESTONE_CLAIMED` | No | Webshop | Player claimed a loyalty milestone. Only fires when the loyalty program uses async webhook delivery mode. |
## Payload structure [#payload-structure]
All v1 webhooks follow a consistent base structure:
```json title="Base Webhook Structure"
{
"type": "EVENT_TYPE",
"environment": "test",
"eventData": {
// Event-specific payload data
}
}
```
The `environment` field is always present. Possible values: `"test"` (test/staging) or `"production"` (live). Use it to distinguish test traffic from real transactions.
## Detailed payload examples [#detailed-payload-examples]
Pick the event you're integrating to see its full JSON payload.
Triggered when a purchase is successfully completed. The `source` field is `"StashPay"` for Stash Pay or `"Cart"` for Webshop.
```json title="Purchase Succeeded Event (Stash Pay example)"
{
"type": "PURCHASE_SUCCEEDED",
"environment": "test",
"purchaseSucceeded": {
"timeMillis": 1640995200000,
"orderId": "order_abc123",
"checkoutLinkId": "checkout_xyz789",
"currency": "USD",
"userId": "user_123",
"items": [
{
"id": "item_456",
"quantity": 2,
"price": "9.99",
"metadata": {
"category": "weapons",
"rarity": "legendary"
}
}
],
"tax": "1.50",
"total": "21.48",
"taxDetails": {
"items": [
{
"label": "Sales Tax",
"isInclusive": false,
"amount": "1.50",
"percentage": "7.5",
"country": "US",
"state": "CA"
}
]
},
"emailMarketingOptIn": true,
"regionCode": "US",
"source": "StashPay",
"ipAddress": "192.168.1.1"
}
}
```
Triggered when a refund is successfully processed for a previous purchase. Both full and partial refunds fire this event; multiple partial refunds on the same order each generate a separate event.
The `items` array contains all items from the original purchase, not just refunded ones. The `total` field reflects the actual refund amount.
```json title="Purchase Refunded Event"
{
"type": "PURCHASE_REFUNDED",
"environment": "test",
"purchaseRefunded": {
"timeMillis": 1640995200000,
"orderId": "order_abc123",
"userId": "user_123",
"items": [
{
"id": "item_456",
"quantity": 2,
"price": "9.99",
"metadata": {
"category": "weapons",
"rarity": "legendary"
}
}
],
"total": "21.48",
"currency": "USD",
"reason": "Customer requested refund",
"regionCode": "US",
"source": "StashPay"
}
}
```
Triggered when the payment process is initiated. The `source` field is `"StashPay"` for Stash Pay or `"Cart"` for Webshop.
```json title="Create Payment Intent Event"
{
"type": "CREATE_PAYMENT_INTENT",
"environment": "test",
"openPayment": {
"cartId": "cart_789",
"userId": "user_123",
"items": [
{
"id": "item_456",
"quantity": 2
}
],
"source": "StashPay"
}
}
```
Triggered when a free item is redeemed (promotional rewards, claim-codes, etc.).
`itemId` is the catalog item that was granted. `claimId` is the claim it consumed, for catalogs that declare a stable claim identity on free items; it appears only when it differs from `itemId`. See [Free items and claim identity](/guides/stash-webshop/catalog/real-time-catalog#free-items-and-claim-identity).
```json title="Free Item Redeemed Event"
{
"type": "FREE_ITEM_REDEEMED",
"environment": "test",
"freeItemRedeemed": {
"userId": "user_123",
"itemId": "item_free_001_gold_tier",
"claimId": "daily_gift",
"ipAddress": "192.168.1.1",
"metadata": {
"promotionId": "summer_promo",
"redeemCode": "SUMMER2024"
}
}
}
```
Triggered when cart contents are modified. Quantity deltas can be negative (removal) or positive (addition).
```json title="Mutate Cart Event"
{
"type": "MUTATE_CART",
"environment": "test",
"mutateCart": {
"cartId": "cart_789",
"timeMillis": 1640995200000,
"userId": "user_123",
"items": [
{
"id": "item_456",
"quantity": 3
},
{
"id": "item_789",
"quantity": -1
}
],
"regionCode": "US",
"source": "Cart",
"ipAddress": "192.168.1.1"
}
}
```
Triggered when a user views an item. Debounced to once per 100 seconds per item per user.
```json title="View Item Event"
{
"type": "VIEW_ITEM",
"environment": "test",
"viewItem": {
"userId": "user_123",
"itemId": "item_456",
"regionCode": "US"
}
}
```
Triggered when the checkout page is viewed.
```json title="View Checkout Page Event"
{
"type": "VIEW_CHECKOUT_PAGE",
"environment": "test",
"viewCheckoutPage": {
"userId": "user_123",
"regionCode": "US"
}
}
```
Triggered when a product detail page is viewed.
```json title="View Product Detail Page Event"
{
"type": "VIEW_PRODUCT_DETAIL_PAGE",
"environment": "test",
"viewProductDetailsPage": {
"userId": "user_123",
"itemId": "item_456",
"regionCode": "US"
}
}
```
Triggered when a cart-related button (icon, badge, etc.) is clicked.
```json title="Cart Button Click Event"
{
"type": "CART_BUTTON_CLICK",
"environment": "test",
"sendCartButtonClick": {
"userId": "user_123",
"regionCode": "US"
}
}
```
Triggered when a player claims a loyalty milestone. Only fires when your loyalty program is configured for async webhook delivery mode (not synchronous API mode). This event carries the shared `loyalty` payload and a `milestoneTierId`. See [Loyalty webhooks](/guides/stash-webshop/how-tos/loyalty/analytics-app-integration) for the full contract and the [loyalty guide](/guides/stash-webshop/how-tos/loyalty) for configuration.
```json title="Loyalty Milestone Claimed Event"
{
"type": "LOYALTY_MILESTONE_CLAIMED",
"environment": "production",
"shopId": "your-shop-uuid",
"loyaltyMilestoneClaimed": {
"timeMillis": 1748476800000,
"userId": "player_external_account_id",
"milestoneId": "milestone_uuid",
"rewards": [
{
"itemId": "reward_type_id",
"quantity": 500
}
]
}
}
```
## Common fields [#common-fields]
Several fields appear across multiple webhook types:
| Field | Type | Description |
| ------------- | ------ | ------------------------------------------------------------------------------ |
| `type` | string | Event type identifier (e.g. `"PURCHASE_SUCCEEDED"`). |
| `environment` | string | Environment that sent the webhook. Always present. `"test"` or `"production"`. |
| `userId` | string | External user identifier from your system. |
| `regionCode` | string | Unicode CLDR region code (e.g. `"US"`, `"FR"`) based on user location. |
| `ipAddress` | string | User's IP address when the event occurred. |
| `timeMillis` | number | Timestamp in milliseconds since Unix epoch. |
***
## Subscription Events (v2) [#subscription-events-v2]
Subscription webhooks use a **v2 payload format** with lowercase dot-notation
event types, unlike the v1 format used by purchase and webshop events above.
Subscription events notify your system of subscription lifecycle changes. See the [Subscriptions guide](/guides/stash-pay/subscriptions/about) for full integration details.
### Available subscription events [#available-subscription-events]
| Event Type | Description | Trigger |
| -------------------------------- | ------------------------ | -------------------------------------------------------------- |
| `subscription.created` | New subscription created | Player completes subscription checkout |
| `subscription.updated` | Subscription changed | Plan or status was modified |
| `subscription.canceled` | Subscription canceled | Player cancels their subscription |
| `subscription.reactivated` | Subscription reactivated | Canceled subscription was reactivated before expiration |
| `subscription.expired` | Subscription expired | Subscription reached terminal state |
| `subscription.payment_failed` | Payment failed | Renewal payment attempt failed; subscription enters `past_due` |
| `subscription.payment_succeeded` | Payment succeeded | Renewal payment processed successfully |
### v2 Payload structure [#v2-payload-structure]
Subscription webhooks use a different structure from v1 events:
```json title="v2 Webhook Structure"
{
"type": "subscription.event_name",
"data": {
// Subscription object
}
}
```
### Detailed subscription payloads [#detailed-subscription-payloads]
Triggered when a new subscription is created.
```json title="subscription.created"
{
"type": "subscription.created",
"data": {
"id": "sub_xyz789",
"external_account_id": "player_123",
"plan_id": "plan_abc123",
"status": "active",
"period": {
"value": 1,
"unit": "month"
},
"trial_end": "2024-02-01T00:00:00Z",
"access_end_date": "2024-03-01T00:00:00Z",
"current_period_end": "2024-03-01T00:00:00Z",
"next_billing_date": "2024-03-01T00:00:00Z",
"cancel_at_period_end": false,
"canceled_at": null,
"created_at": "2024-01-01T00:00:00Z"
}
}
```
Triggered when a subscription's plan or status changes.
```json title="subscription.updated"
{
"type": "subscription.updated",
"data": {
"id": "sub_xyz789",
"external_account_id": "player_123",
"plan_id": "plan_abc123",
"status": "active",
"period": {
"value": 1,
"unit": "month"
},
"trial_end": null,
"access_end_date": "2024-04-01T00:00:00Z",
"current_period_end": "2024-04-01T00:00:00Z",
"next_billing_date": "2024-04-01T00:00:00Z",
"cancel_at_period_end": false,
"canceled_at": null,
"created_at": "2024-01-01T00:00:00Z"
}
}
```
Triggered when a player cancels their subscription.
```json title="subscription.canceled"
{
"type": "subscription.canceled",
"data": {
"id": "sub_xyz789",
"external_account_id": "player_123",
"plan_id": "plan_abc123",
"status": "canceled",
"period": {
"value": 1,
"unit": "month"
},
"trial_end": null,
"access_end_date": "2024-03-01T00:00:00Z",
"current_period_end": "2024-03-01T00:00:00Z",
"next_billing_date": "2024-03-01T00:00:00Z",
"cancel_at_period_end": true,
"canceled_at": "2024-02-15T14:30:00Z",
"created_at": "2024-01-01T00:00:00Z"
}
}
```
Triggered when a canceled subscription is reactivated before expiration.
```json title="subscription.reactivated"
{
"type": "subscription.reactivated",
"data": {
"id": "sub_xyz789",
"external_account_id": "player_123",
"plan_id": "plan_abc123",
"status": "active",
"period": {
"value": 1,
"unit": "month"
},
"trial_end": null,
"access_end_date": "2024-03-01T00:00:00Z",
"current_period_end": "2024-03-01T00:00:00Z",
"next_billing_date": "2024-03-01T00:00:00Z",
"cancel_at_period_end": false,
"canceled_at": null,
"created_at": "2024-01-01T00:00:00Z"
}
}
```
Triggered when a subscription reaches its terminal state.
```json title="subscription.expired"
{
"type": "subscription.expired",
"data": {
"id": "sub_xyz789",
"external_account_id": "player_123",
"plan_id": "plan_abc123",
"status": "expired",
"period": {
"value": 1,
"unit": "month"
},
"trial_end": null,
"access_end_date": "2024-03-01T00:00:00Z",
"current_period_end": "2024-03-01T00:00:00Z",
"next_billing_date": "2024-03-01T00:00:00Z",
"cancel_at_period_end": true,
"canceled_at": "2024-02-15T14:30:00Z",
"created_at": "2024-01-01T00:00:00Z"
}
}
```
Triggered when a renewal payment attempt fails. The subscription enters `past_due` status and Stash will retry. The `reason` field gives a normalized failure reason; see [Testing payment declines and reasons](/guides/stash-pay/subscriptions/integration#testing-payment-declines-and-reasons) for the full list of values and test cards.
```json title="subscription.payment_failed"
{
"type": "subscription.payment_failed",
"data": {
"id": "sub_xyz789",
"external_account_id": "player_123",
"plan_id": "plan_abc123",
"status": "past_due",
"reason": "insufficient_funds",
"retry_count": 0,
"period": {
"value": 1,
"unit": "month"
},
"trial_end": null,
"access_end_date": "2024-03-03T00:00:00Z",
"current_period_end": "2024-03-01T00:00:00Z",
"next_billing_date": "2024-03-02T00:00:00Z",
"cancel_at_period_end": false,
"canceled_at": null,
"created_at": "2024-01-01T00:00:00Z"
}
}
```
Triggered when a renewal payment is processed successfully.
```json title="subscription.payment_succeeded"
{
"type": "subscription.payment_succeeded",
"data": {
"id": "sub_xyz789",
"external_account_id": "player_123",
"plan_id": "plan_abc123",
"status": "active",
"period": {
"value": 1,
"unit": "month"
},
"trial_end": null,
"access_end_date": "2024-04-01T00:00:00Z",
"current_period_end": "2024-04-01T00:00:00Z",
"next_billing_date": "2024-04-01T00:00:00Z",
"cancel_at_period_end": false,
"canceled_at": null,
"created_at": "2024-01-01T00:00:00Z"
}
}
```
### Subscription object fields [#subscription-object-fields]
| Field | Type | Description |
| ---------------------- | ----------------- | ------------------------------------------------------------------------------------- |
| `id` | string | Unique identifier for the subscription. |
| `external_account_id` | string | Identifier for the player/user. |
| `plan_id` | string | Plan identifier. |
| `status` | string | `active`, `past_due`, `canceled`, or `expired`. |
| `period` | object | Billing period with `value` (integer) and `unit` (`day` / `week` / `month` / `year`). |
| `trial_end` | string (nullable) | ISO 8601 timestamp when trial ends. |
| `access_end_date` | string | ISO 8601 timestamp when access expires. |
| `current_period_end` | string | ISO 8601 timestamp for current period end. |
| `next_billing_date` | string | ISO 8601 timestamp for next billing attempt. |
| `cancel_at_period_end` | boolean | Whether cancellation is scheduled. |
| `canceled_at` | string (nullable) | ISO 8601 timestamp when canceled. |
| `created_at` | string | ISO 8601 timestamp when created. |
***
## Payment Events (v2) [#payment-events-v2]
Payment webhooks notify your backend about individual payment outcomes. They use the same v2 payload format as subscription events (`type` + `data`). These events fire for subscription payments and other Stash Pay checkout flows.
### Available payment events [#available-payment-events]
| Event Type | Description | Trigger |
| ------------------- | ------------------------------ | ---------------------------------------------- |
| `payment.succeeded` | Payment completed successfully | A payment is captured |
| `payment.failed` | Payment attempt failed | A payment is declined or fails |
| `payment.refunded` | Payment was refunded | A refund is processed |
| `dispute.opened` | Dispute opened | A cardholder disputes a payment |
| `dispute.closed` | Dispute closed | A dispute is resolved (includes `won` boolean) |
### Detailed payment payloads [#detailed-payment-payloads]
Triggered when a payment completes successfully.
```json title="payment.succeeded"
{
"type": "payment.succeeded",
"data": {
"id": "pay_abc123",
"external_account_id": "player_123",
"currency": "USD",
"subscription_id": "sub_xyz789",
"succeeded_at": "2024-01-01T00:00:00Z",
"tax": "1.50",
"total": "10.99",
"metadata": {
"custom-key": "customer-value"
}
}
}
```
Triggered when a payment attempt fails. The `reason` field gives a normalized failure reason; see [Testing payment declines and reasons](/guides/stash-pay/subscriptions/integration#testing-payment-declines-and-reasons) for the full list of values and test cards.
```json title="payment.failed"
{
"type": "payment.failed",
"data": {
"id": "pay_abc456",
"external_account_id": "player_123",
"currency": "USD",
"subscription_id": "sub_xyz789",
"reason": "insufficient_funds",
"failed_at": "2024-01-01T00:00:00Z",
"tax": "1.50",
"total": "10.99",
"metadata": {
"custom-key": "customer-value"
}
}
}
```
Triggered when a payment is refunded.
```json title="payment.refunded"
{
"type": "payment.refunded",
"data": {
"id": "pay_abc789",
"external_account_id": "player_123",
"currency": "USD",
"subscription_id": "sub_xyz789",
"refunded_at": "2024-01-01T00:00:00Z",
"total_refunded": "10.99",
"metadata": {
"custom-key": "customer-value"
}
}
}
```
Triggered when a dispute is opened.
```json title="dispute.opened"
{
"type": "dispute.opened",
"data": {
"id": "pay_abc123",
"external_account_id": "player_123",
"currency": "USD",
"subscription_id": "sub_xyz789",
"total_disputed": "10.99",
"metadata": {
"custom-key": "custom-value"
}
}
}
```
Triggered when a dispute is closed. The `won` field indicates whether you won the dispute.
```json title="dispute.closed"
{
"type": "dispute.closed",
"data": {
"id": "pay_abc123",
"won": true,
"external_account_id": "player_123",
"currency": "USD",
"subscription_id": "sub_xyz789",
"total_disputed": "10.99",
"metadata": {
"custom-key": "custom-value"
}
}
}
```
### Payment object fields [#payment-object-fields]
| Field | Type | Description |
| --------------------- | ----------------- | ---------------------------------------------------------------------------------- |
| `id` | string | Payment identifier. |
| `external_account_id` | string | Identifier for the player/user. |
| `currency` | string | Currency code (e.g. `"USD"`, `"EUR"`). |
| `subscription_id` | string (optional) | Subscription identifier when the payment is related to a subscription. |
| `succeeded_at` | string | ISO 8601 timestamp when payment succeeded (`payment.succeeded` only). |
| `failed_at` | string | ISO 8601 timestamp when payment failed (`payment.failed` only). |
| `reason` | string | Normalized failure reason (`payment.failed` only). |
| `refunded_at` | string | ISO 8601 timestamp when payment was refunded (`payment.refunded` only). |
| `tax` | string (optional) | Tax amount as decimal string (`payment.succeeded` and `payment.failed`). |
| `total` | string | Total payment amount as decimal string (`payment.succeeded` and `payment.failed`). |
| `total_refunded` | string | Total refunded amount as decimal string (`payment.refunded` only). |
| `total_disputed` | string | Total disputed amount as decimal string (`dispute.opened` and `dispute.closed`). |
| `won` | boolean | Whether you won the dispute (`dispute.closed` only). |
| `metadata` | object (optional) | Custom metadata attached to the payment. |
---
## Section: Guides
# Webhook Listener
**URL:** https://docs.stash.gg/guides/get-started/stash-webhooks/webhook-listener
**Description:** Learn how to create a webhook listener on your backend to receive incoming Stash webhook requests, verify their authenticity using HMAC SHA-256 signatures, and respond appropriately to process events securely.
Begin by creating a webhook listener on your backend. A webhook listener is a server-side program that receives
incoming Stash webhook requests at a designated URL, verifies their authenticity (checking the signature),
and responds appropriately (if needed) to the Stash.
## Example webhook [#example-webhook]
```json filename="Purchase Succeeded Webhook Payload"
{
"type": "PURCHASE_SUCCEEDED",
"purchaseSucceeded": {
"timeMillis": 1753993257000,
"orderId": "8ZVBabLrnCMm9zPdu9QpfCWzNaA",
"currency": "usd",
"userId": "user_id",
"items": [
{
"id": "item_id",
"quantity": 1,
"price": "199"
}
],
"tax": "0",
"total": "199",
"regionCode": "US",
"source": "StashPay"
}
}
```
**Note:** The `source` field indicates which product generated the webhook. It will be `"StashPay"` for Stash Pay events or `"Cart"` for Stash Webshop events. See the [webhook event list](/guides/get-started/stash-webhooks/webhook-list) for all available events and their product associations.
Each webhook payload includes a `type` field that indicates the event type enum (ex: `PURCHASE_SUCCEEDED`). The payload also contains a corresponding object with
event-specific details. For a complete overview of all available webhook event types and their payload structures,
refer to the [webhook event list](/guides/get-started/stash-webhooks/webhook-list).
## Signature verification [#signature-verification]
Stash signs every webhook with HMAC-SHA256. New apps (created on or after 2026-08-15) receive only the versioned header; earlier apps receive both during the migration window:
* **`x-stash-hmac-signature`** — versioned, self-describing format; use this for all new integrations
* **`stash-hmac-signature`** — legacy format; still sent for apps created before 2026-08-15
### Versioned signature (x-stash-hmac-signature) [#versioned-signature-x-stash-hmac-signature]
The versioned header carries the protocol version, your App ID, a request timestamp, and the base64 HMAC:
```
x-stash-hmac-signature: v1;;;
```
| Field | Description |
| :---------------------- | :-------------------------------------------------------------- |
| `v1` | Protocol version |
| `` | Your immutable App ID (Studio → Project Settings → App details) |
| `` | Request timestamp in Unix milliseconds |
| `` | Standard base64-encoded HMAC-SHA256 signature |
The signature covers `"." + `, where `` is the exact raw webhook body bytes. The HMAC key is your webhook secret base64-decoded: copy the value from Studio → Project Settings → API Secrets and decode it with `Buffer.from(secret, 'base64')`. Reject requests where `` is more than 5 minutes from your server clock.
For Node.js, Python, and Go implementation code, see [API Keys → HMAC Verification](/guides/get-started/stash-api-keys/overview#hmac-verification).
### Legacy signature (stash-hmac-signature) [#legacy-signature-stash-hmac-signature]
The legacy header contains only the base64 HMAC of the raw request body, without a timestamp or version:
```
stash-hmac-signature:
```
**Verification steps:**
### Retrieve the signature [#retrieve-the-signature]
Extract the signature from the `stash-hmac-signature` header of the incoming Stash webhook request.
### Obtain the request body [#obtain-the-request-body]
Read the raw JSON payload of the webhook request exactly as received (do not parse and re-serialize, as this may change whitespace or formatting).
### Generate your own signature [#generate-your-own-signature]
Compute HMAC-SHA256 of the raw request body, keyed by your webhook secret base64-decoded (copy from Studio → Project Settings → API Secrets). Encode the result as standard base64.
### Compare signatures [#compare-signatures]
Compare your generated signature to the header value using a constant-time comparison. If they match, the webhook is authentic.
Always use the exact raw request body as received. Never expose your webhook secret in client-side code or logs. Reject any request where signatures do not match.
## Security Best Practices [#security-best-practices]
1. **Always verify signatures in production**: Even if optional, signature verification should be enabled for production endpoints
2. **Use timing-safe comparison**: Use constant-time comparison functions (e.g., `crypto.timingSafeEqual`, `hmac.compare_digest`, `hmac.Equal`) to prevent timing attacks
3. **Store secrets securely**: Never commit webhook secrets to version control; use environment variables or secret management services
4. **Rotate secrets periodically**: Periodically rotate webhook secrets and update endpoints
## Disabling Signature Verification [#disabling-signature-verification]
If you choose not to verify signatures (not recommended for production), you can simply ignore the `Stash-Hmac-Signature` header. However, this leaves your endpoint vulnerable to fake webhook events. Always enable signature verification in production environments.
---
## Section: Guides
# Manage Builds, Releases, and Channels
**URL:** https://docs.stash.gg/guides/stash-launcher/build-management/build-management
**Description:** Learn how to organize and distribute your game binaries using Stash Launcher. Understand how to create and update builds, manage channels for different audiences, and control player access with public or restricted configurations.
The launcher is currently in beta.
Use Stash Launcher to organize and distribute your game binaries. A release contains one or more builds, and builds are assigned to channels that control how players access them.
## Create and update builds [#create-and-update-builds]
A build connects to a specific game binary. To create a build, add a name, upload the binary, and assign channels.
You can update or archive builds at any time. Use Stash Studio or the [Stash CLI](/guides/stash-launcher/build-management/stash-cli) to upload binaries and create builds.
## Create and update channels [#create-and-update-channels]
Channels organize and distribute builds to different audiences. For example, use one channel for production builds and another for testing or beta builds.
---
## Section: Guides
# Stash CLI
**URL:** https://docs.stash.gg/guides/stash-launcher/build-management/stash-cli
**Description:** Learn how to use the Stash CLI to integrate build uploads and release management into your pipelines and CI/CD workflows. Download the CLI for Windows or macOS and automate your game distribution.
Use the Stash CLI to integrate build uploads and release management into your pipelines and CI/CD workflows.
## One-line installers [#one-line-installers]
Run the following one-line installers to set up the Stash CLI:
**Windows:**
```bash filename="Windows"
powershell.exe -ExecutionPolicy Bypass -Command "IEX (Invoke-WebRequest 'https://cli.stash.gg/install.ps1')"
```
**Unix (macOS, Linux):**
```bash filename="Unix"
/bin/bash -c "$(curl -fsSL https://cli.stash.gg/install.sh)"
```
After installation, run the CLI with `stash-cli`.
## Upload builds [#upload-builds]
Use the Stash CLI to upload and configure builds. Run a separate command for each target platform.
```bash filename="Upload a build"
stash-cli upload --env= \
--secret= \
--file_path= \
--executable_path="Build\my_game.exe" \
--platform=
--channel=
```
### Parameters [#parameters]
The following table lists the parameters for the upload command.
| Parameter | Description | Example | Required |
| :---------------- | :-------------------------------------------------------------- | :--------------------------------------------------------------------------------------- | :------- |
| `secret` | Your Stash Studio secret. Find it in **Settings > API Secrets** | `HFeMGWYd-Tn` | Yes |
| `file_path` | Local path to the ZIP file you want to upload | `/Users/dev/builds/test.zip` | Yes |
| `executable_path` | The path to the game executable within the zip folder | `/build/test-build.exe` (Windows) `/build/test-build.app/Contents/MacOS/TestBuild` (Mac) | Yes |
| `platform` | The platform for the binary | `windows` or `mac` | Yes |
| `env` | The environment to upload the binary | `test` or `prod` | No |
| `channel` | The release channel ID. Find it in **Launcher > Channels** | `933e5aae-2e9-c8bd30` | No |
## Maintenance mode [#maintenance-mode]
The Stash CLI can also turn launcher maintenance mode on and off, so your maintenance automation can block game downloads and launches while your servers are down. See [Launcher Maintenance Mode](/guides/stash-launcher/how-tos/launcher-maintenance-mode) for the commands and behavior.
## CI/CD [#cicd]
The Stash CLI is great for CI/CD pipelines to automate your build uploads to the launcher. Here is a simple GitHub Actions / Jenkins sample:
```yaml filename="GitHub Actions example"
# Install Stash CLI on Unix runner
- name: Install Stash CLI
run: |
/bin/bash -c "$(curl -fsSL https://cli.stash.gg/install.sh)"
echo "Stash CLI installed"
stash-cli --version
# Upload macOS build to Stash Studio using Stash CLI
- name: Upload macOS build to Stash Studio
run: |
stash-cli upload \
--env=test \
--secret="${{ secrets.STASH_API_KEY }}" \
--file_path="${{ github.workspace }}/StandaloneOSX-latest.zip" \
--executable_path="${{ env.EXECUTABLE_PATH }}" \
--platform=mac \
--channel="${{ env.LAUNCHER_CHANNEL_ID }}"
echo "Build uploaded to Stash Studio"
```
---
## Section: Guides
# Customize Your Launcher's Appearance
**URL:** https://docs.stash.gg/guides/stash-launcher/how-tos/customize-launcher-appearance
**Description:** Learn how to customize and preview your launcher's appearance in Stash Studio, including general settings like background images, platform-specific configurations for Windows and Mac installers, and the download page customization.
The launcher is currently in beta.
In Stash Studio, you can customize and preview how your launcher looks in the **Appearance** settings. This includes general settings like the background image, but also platform-specific configurations for Windows and Mac installers. You can also customize the page that players use to download your launcher.
---
## Section: Guides
# Launcher Maintenance Mode
**URL:** https://docs.stash.gg/guides/stash-launcher/how-tos/launcher-maintenance-mode
**Description:** Learn how to enable maintenance mode for your Stash Launcher from Stash Studio or the Stash CLI. Block game downloads and launches during server maintenance while keeping the launcher itself updatable.
The launcher is currently in beta.
When your game servers are down for maintenance, you can put the launcher into maintenance mode. While it is on, players see a standard maintenance screen in your launcher's branding, and game downloads, updates, and launches are blocked. You can turn it on and off from Stash Studio, or from the Stash CLI so your maintenance tooling can automate it.
## What players see [#what-players-see]
Players see a full screen message in the launcher, styled with your game's logo and background:
> **Down for maintenance**
>
> The game is temporarily unavailable while maintenance is performed. Please check back soon.
This copy is standardized and translated automatically in the launcher. It cannot be customized, and there is no message field to fill in.
While maintenance mode is on:
* New game downloads, game updates, and game launches are blocked.
* Players already in a running game are not affected. Maintenance mode only blocks new launches.
* Launcher self updates keep working, so a launcher fix can still ship during your maintenance window.
* The launcher download page keeps working, so new players can still install the launcher itself.
Maintenance mode applies to your whole game: every release channel, every platform, every build. It cannot be enabled for a single channel.
Launcher maintenance mode is separate from web shop maintenance mode. Enabling one does not affect the other.
## Enable maintenance mode in Stash Studio [#enable-maintenance-mode-in-stash-studio]
1. In Stash Studio, go to **Launcher > Maintenance**.
2. Turn on the **Maintenance Mode** switch.
3. Confirm in the dialog. The page shows a preview of the exact message players will see.
Turning it off works the same way: turn the switch off and confirm.
You need the Admin or Developer role for the game to change maintenance mode. The switch always shows the current state, including changes made through the CLI.
## Enable maintenance mode with the Stash CLI [#enable-maintenance-mode-with-the-stash-cli]
Use the [Stash CLI](/guides/stash-launcher/build-management/stash-cli) to control maintenance mode from scripts and pipelines, for example as part of the same automation that takes your game servers down and brings them back up.
The CLI reads your API secret from the `STASH_API_SECRET` environment variable. It is never passed as a command line flag, so it cannot leak through process listings or CI logs. Find your secret in **Settings > API Secrets** in Stash Studio.
```bash filename="Enable maintenance mode"
export STASH_API_SECRET=
stash-cli maintenance --env=prod --on
```
```bash filename="Disable maintenance mode"
stash-cli maintenance --env=prod --off
```
```bash filename="Check the current state"
stash-cli maintenance --env=prod
```
### Parameters [#parameters]
| Parameter | Description | Required |
| :-------- | :------------------------------------------ | :------- |
| `env` | The environment to target: `test` or `prod` | Yes |
| `on` | Enable maintenance mode | No |
| `off` | Disable maintenance mode | No |
Run the command with neither `--on` nor `--off` to print the current state. Passing both is an error.
The command is idempotent: enabling maintenance mode when it is already on succeeds without changing anything, so pipeline retries are safe. The command exits with code `1` for usage or connection problems and `2` when the request is rejected, so your scripts can fail loudly.
## How quickly it takes effect [#how-quickly-it-takes-effect]
* Launchers that are open pick up the change within about five minutes, or as soon as the player brings the launcher window back into focus.
* Any attempt to launch the game checks the live state first, so a player cannot start the game in the window between you enabling maintenance mode and their launcher showing the screen.
* Players who go offline keep the last state their launcher saw, so an offline launcher still shows the maintenance screen.
* Turning maintenance mode off clears the screen the same way. Players do not need to restart the launcher.
---
## Section: Guides
# Customize the Checkout Appearance
**URL:** https://docs.stash.gg/guides/stash-pay/how-tos/customize-checkout-appearance
**Description:** Learn how to customize the colors and brand assets of your Stash Pay checkout page to match your game or webshop branding. Follow these steps to ensure visual consistency and improve the user experience.
You can customize the **colors** and **brand assets** of your Stash Pay checkout page to match your game or webshop branding.
Customizing the checkout helps keep the visual style aligned with your game or webshop, which also improves the overall user experience.
## Steps to customize the checkout appearance [#steps-to-customize-the-checkout-appearance]
Follow these steps to customize your Stash Pay checkout. The animation below walks you through the full process.
### Open Stash Studio [#open-stash-studio]
Open **Stash Studio**.
### Navigate to Appearance [#navigate-to-appearance]
Go to **Stash Pay → Appearance**.
### Customize colors and brand assets [#customize-colors-and-brand-assets]
Customize the **Colors** and **Brand Assets** to match your product branding.
### Save your changes [#save-your-changes]
Save your changes.
If you're using external images for brand assets and they appear broken, make sure you've configured the image domains. See [Configure Image Domains](/guides/stash-pay/how-tos/image-domains) for details.
---
## Section: Guides
# Configure Image Domains
**URL:** https://docs.stash.gg/guides/stash-pay/how-tos/image-domains
**Description:** Learn how to configure image domains in Stash Pay to control which external domains can serve images in your shop. Images from allowed domains are automatically optimized.
Image domains control which external domains can serve images in your Stash Pay shop. When you add an image domain, Stash Pay validates that all external images come from allowed domains. Images from unauthorized domains are blocked.
Images from allowed domains are automatically optimized through Stash Pay's image proxy: resized, compressed, and converted to modern formats (AVIF/WebP) when supported by the browser.
## Domain Patterns [#domain-patterns]
Image domains support two pattern types:
**Exact Domain**: `example.com`
* Matches only `example.com`
* Does not match subdomains like `cdn.example.com`
**Wildcard Domain**: `*.example.com`
* Matches `example.com` and all subdomains
* Matches `cdn.example.com`, `assets.cdn.example.com`, etc.
## Configure Image Domains [#configure-image-domains]
### Navigate to Image Domains [#navigate-to-image-domains]
Go to your shop in **Stash Studio** → **Project Settings** → **Image Domains**.
### Add a Domain [#add-a-domain]
Click **"Add Image Domain"**, enter your domain pattern, then click **"Add image domain"**.
* For a specific domain: `example.com`
* For all subdomains: `*.example.com`
### Wait for Activation [#wait-for-activation]
After adding a domain, images from that domain will be available in **10-15 minutes**. This delay is due to configuration propagation and cache updates.
New domains take 10-15 minutes to become active. Plan accordingly when deploying new image sources.
### Domain Format Requirements [#domain-format-requirements]
| Requirement | Description |
| :----------- | :--------------------------------------------- |
| Format | Valid domain name (e.g., `example.com`) |
| Wildcard | Can include `*.` prefix for subdomain matching |
| Protocol | Cannot include `http://` or `https://` |
| IP Addresses | Not allowed (must use domain names) |
| Length | Maximum 1024 characters |
**Valid examples:**
* `example.com`
* `*.example.com`
* `cdn.example.com`
* `*.stash.gg`
**Invalid examples:**
* `http://example.com` (includes protocol)
* `192.168.1.1` (IP address)
* `example` (no TLD)
## Using Images [#using-images]
Stash Pay uses Next.js `` component with a custom loader. Images are automatically optimized when loaded:
```tsx title="Using Next.js Image Component"
import Image from 'next/image';
```
### Image Optimization [#image-optimization]
The image proxy automatically:
* **Resizes** images to requested dimensions
* **Converts** to AVIF (best) or WebP (good) when browser supports them, falls back to original format
* **Compresses** with quality settings (default: 75%)
* **Caches** optimized images for 4 hours in production
### Supported Formats [#supported-formats]
* **Input**: JPEG, PNG, GIF, WebP, AVIF, SVG
* **Output**: AVIF (if browser supports), WebP (if browser supports), or original format
## Best Practices [#best-practices]
**Use wildcards for CDN subdomains**: If you use multiple CDN subdomains, use `*.yourcdn.com` to match all subdomains.
**Be specific when possible**: For security, prefer specific domains over wildcards when you only need one subdomain (e.g., `cdn.example.com` instead of `*.example.com`).
**Add domains before going live**: Add all required image domains during development/testing to avoid broken images in production.
**Test after adding**: Wait 10-15 minutes, then test loading an image from that domain and check the browser console for errors.
## Troubleshooting [#troubleshooting]
### Images Not Loading [#images-not-loading]
If images from an allowed domain are not loading:
1. **Verify domain configuration**: Check that the domain is added in **Stash Studio** → **Project Settings** → **Image Domains** and the pattern matches exactly (case-sensitive)
2. **Wait for activation**: New domains take 10-15 minutes to activate
3. **Check image URL**: Ensure the URL uses HTTPS and the hostname matches your configured domain pattern
4. **Check browser console**: Look for 403 errors (domain not allowed) or other network errors
### Common Errors [#common-errors]
**"Image domain already exists"**: The domain is already configured. Check the Image Domains table in **Stash Studio** → **Project Settings** → **Image Domains**.
**"Invalid domain name pattern"**:
* Remove `http://` or `https://` prefix
* Ensure the domain has a valid TLD (e.g., `.com`, `.net`)
* Don't use IP addresses
* Check for typos
**Images loading slowly**:
* First request may be slower as the proxy fetches and optimizes the image
* Subsequent requests are cached for 4 hours
* Very large source images take longer to process
**Images not optimized**:
* Check if your browser supports AVIF/WebP
* Clear browser cache to see newly optimized images
* Very small images may not benefit from optimization
* SVG files are passed through without conversion
## API Reference [#api-reference]
### Add Image Domain [#add-image-domain]
**Endpoint**: `POST /studio/partner/{partner_id}/shop/{shop_id}/image-domains/add`
```json title="Request Body"
{
"domain_name_pattern": "example.com"
}
```
**Response**: `200 OK` (empty body)
### List Image Domains [#list-image-domains]
**Endpoint**: `GET /studio/partner/{partner_id}/shop/{shop_id}/image-domains/all`
```json title="Response"
{
"domain_name_patterns": [
"example.com",
"*.cdn.example.com"
]
}
```
### Delete Image Domain [#delete-image-domain]
**Endpoint**: `DELETE /studio/partner/{partner_id}/shop/{shop_id}/image-domains/{domain_name_pattern}/delete`
**Response**: `200 OK` (empty body)
## Security and Limitations [#security-and-limitations]
**Security**:
* Only domains you explicitly allow can serve images
* External images must use HTTPS
* IP addresses are not allowed (must use domain names)
* Wildcard patterns (`*.example.com`) allow all subdomains—use carefully
**Limitations**:
* New domains take 10-15 minutes to become active
* Optimized images are cached for 4 hours
* Some exotic image formats may not be optimized
* Very large images may take longer to process
---
## Section: Guides
# Link Generator
**URL:** https://docs.stash.gg/guides/stash-pay/how-tos/link-generator
**Description:** Use the Stash Pay Link Generator in Stash Studio to quickly generate, test, and debug checkout links using the Server SDK integration without writing code.
The Stash Pay Link Generator is a testing and development tool in Stash Studio that enables you to quickly generate, test, and debug checkout links using the Server SDK integration method.
**Key Benefits:**
* **Rapid Testing**: Generate checkout links without writing code
* **Visual Preview**: See how checkouts appear in-game with iOS mobile preview
* **Configuration Management**: Save and reuse common test scenarios
* **Team Collaboration**: Export and share configurations with teammates
* **Multi-Environment**: Automatically detects test vs production environments
## Accessing the Link Generator [#accessing-the-link-generator]
Navigate to **Stash Studio** → **Stash Pay** → **Link Generator**.
The Link Generator automatically detects your environment (test or production) and uses the appropriate API base URL. Test environment uses `https://test-api.stash.gg`, while production uses `https://api.stash.gg`.
## Quick Start [#quick-start]
### Select a configuration [#select-a-configuration]
Select a saved configuration from the left panel, or click **New** to create a fresh configuration.
### Fill in the form [#fill-in-the-form]
Enter your checkout details in the form on the right panel. The form is organized into sections:
1. **Configuration Name** (required) - Name your test configuration
2. **Base URL** - Auto-detected based on environment, can be overridden
3. **API Key** - Select an API key from the dropdown (fetched from Studio settings)
4. **User** (accordion, expanded by default):
* User ID (required)
* Email (optional)
* Display Name (optional)
* Profile Image URL (optional)
* Platform (iOS, Android, or Undefined)
5. **Item** (accordion, expanded by default):
* Item ID (required)
* Item Name (required)
* Price (required)
* Quantity (required, defaults to 1)
* Image URL (required)
* Description (optional)
6. **Advanced** (accordion, collapsed by default):
* Currency (optional, defaults to USD)
* Transaction ID (optional, with "Generate ID" button)
* Region Code (optional)
### Generate the checkout link [#generate-the-checkout-link]
Click **Generate** to create a checkout link. The CURL command appears in the center panel, and the checkout preview displays in the iOS mobile frame.
### Test and save [#test-and-save]
Review the checkout in the preview, copy the CURL command if needed, and save your configuration for future use.
## Integration Type [#integration-type]
The Link Generator supports **Server SDK** integration only. This is the recommended and most common integration method for Stash Pay, where your backend creates checkout links server-to-server.
**Why Server SDK only?** The Link Generator focuses on Server SDK because it's the standard integration method. Server SDK provides secure, server-side checkout link generation using API keys, which keeps credentials private and is suitable for production use. For other integration methods, you'll need to test using your own code or API tools.
**Configuration includes:**
* API Key (fetched from Studio settings)
* Base URL (auto-detected: test or prod)
* Item details (ID, name, price, quantity, image)
* User information (ID, email, platform)
* Currency and region settings
**Endpoint:** `/sdk/server/checkout_links/generate_quick_pay_url`
## Interface Overview [#interface-overview]
The interface is split into three main areas:
### Right Panel: Configuration Management [#right-panel-configuration-management]
* **Save/Delete buttons** - Manage the current configuration
* **Form fields** - Enter checkout details (items, pricing, user info)
* **Generate button** - Execute the API request
### Center Panel: CURL Command [#center-panel-curl-command]
* View the generated CURL command with syntax highlighting
* Show/hide API keys for security
* Copy command to clipboard
* Fullscreen mode for long commands
### Center Panel: Checkout Preview [#center-panel-checkout-preview]
* iOS mobile frame showing the live checkout
* Scale controls (60%, 80%, 100%)
* Copy checkout URL
* Open in new tab
* Fullscreen mode
## Configuration Management [#configuration-management]
### Save Configurations [#save-configurations]
Save your test scenarios for easy reuse:
1. Fill in the form with your test data
2. Click **Save** (or **Save As** for new configurations)
3. Enter a descriptive name for your configuration
4. Configurations save automatically to browser localStorage
Configurations are stored locally in your browser and organized by shop. They persist across page refreshes and browser restarts.
### Load Saved Configurations [#load-saved-configurations]
Click any saved configuration card in the left panel to load it. Form fields populate instantly, and previous results clear to avoid confusion.
### New Configuration [#new-configuration]
Click the **New** button to start fresh. The form resets to default values, and the base URL auto-detects based on your environment.
### Export & Import [#export--import]
Share configurations with your team using JSON export/import:
**Export:**
1. Click the download icon in the header tabs
2. Downloads as `stash-pay-link-configs-{shopHandle}.json`
3. Contains all saved configurations for the current shop
**Import:**
1. Click the upload icon in the header tabs
2. Select a JSON file from your file system
3. Configurations merge with existing (duplicates skipped)
4. Success toast confirms import
## Checkout Preview [#checkout-preview]
The checkout preview displays your generated checkout in an iOS mobile frame, allowing you to see exactly how it will appear to players.
### Preview Features [#preview-features]
* **iOS Mobile Frame**: Authentic iOS device borders and styling (393px width × 852px height)
* **Scale Controls**: Adjust preview size (60%, 80%, 100%) to fit your screen
* **Copy URL**: Copy the checkout URL to clipboard
* **Open in New Tab**: Launch checkout in a full browser for testing payments
* **Fullscreen**: Maximize preview for detailed inspection
### Preview Actions [#preview-actions]
* **Copy URL** - Copy checkout URL to clipboard
* **Open in New Tab** - Launch checkout in browser
* **Fullscreen** - Maximize preview for detailed inspection
Some merchant services don't allow iframes for security reasons. If the preview doesn't load, use "Open in New Tab" to test the full checkout flow.
## CURL Command Display [#curl-command-display]
The CURL command panel shows the exact API request you can use to generate the checkout link:
* **Syntax-highlighted** curl command
* **Show/Hide API key** toggle for security
* **Copy to clipboard** with toast notification
* **Fixed height** (160px) with scrolling
* **Fullscreen mode** for long commands
You can copy the CURL command and use it in a terminal or Postman for automated testing.
## Error Handling [#error-handling]
The Link Generator provides clear feedback for different scenarios:
* **Success**: Green indicator, displays preview
* **Error**: Red indicator, shows error details in separate panel
* **Network issues**: Clear error messages with retry guidance
**Common Issues:**
* **Missing required fields** → Review form validation
* **Invalid JSON in request** → Check CURL command
* **Network errors** → Verify API endpoint accessibility
* **Invalid API key** → Verify API key in Studio settings
## Best Practices [#best-practices]
### Configuration Naming [#configuration-naming]
Use descriptive names for saved configurations:
* ✅ "1000 gems purchase - iOS user"
* ✅ "VIP subscription - monthly"
* ✅ "Special offer - new users"
* ❌ "Test 1", "Config 2"
### Environment Testing [#environment-testing]
**Test Environment:**
* Hostname: `localhost` or `studio-test.stash.gg`
* API Base: `https://test-api.stash.gg`
* Use test API keys
* Safe for experimentation
**Production Environment:**
* Hostname: `studio.stash.gg`
* API Base: `https://api.stash.gg`
* Use production API keys with caution
* Validate thoroughly before shipping
Always verify you're using the correct environment (test vs production) before processing transactions. Check your API endpoints and Stash Studio configuration to confirm which environment you're using.
### Team Workflows [#team-workflows]
**Before Shipping:**
1. Create test configurations for edge cases
2. Export and share with QA team
3. Everyone tests same scenarios
4. Document any issues found
5. Re-test after fixes
**For Debugging:**
1. Reproduce issue with specific configuration
2. Export configuration
3. Attach to bug report
4. Engineering can import and debug locally
## Troubleshooting [#troubleshooting]
### Preview Not Loading [#preview-not-loading]
**Check:**
* API key is valid and not expired
* Base URL matches your environment
* Item details are complete and valid
* User information is properly formatted
**Common Issues:**
* Missing required fields → Review form validation
* Invalid JSON in request → Check CURL command
* Network errors → Verify API endpoint accessibility
### Import Failures [#import-failures]
**Reasons:**
* Invalid JSON format in file
* File corrupted or incomplete
* Version mismatch (export from different feature version)
**Solutions:**
* Validate JSON with a linter
* Re-export from source
* Check file wasn't truncated during transfer
### CURL Command Not Working [#curl-command-not-working]
**Verify:**
* API key is correct (toggle show to verify)
* Shell escaping is intact (single quotes handled)
* URL encoding is correct
* Headers are properly formatted
## Technical Details [#technical-details]
### Supported Platforms [#supported-platforms]
* **iOS** - Full support with native preview
* **Android** - Supported (preview uses iOS styling)
* **Web** - Not applicable (mobile-only checkout)
### API Endpoint [#api-endpoint]
**Server SDK:**
* Endpoint: `/sdk/server/checkout_links/generate_quick_pay_url`
* Method: POST
* Auth: API Key (x-stash-api-key header)
### Data Storage [#data-storage]
**Storage:**
* Configurations stored in browser localStorage
* Scoped per shop: `stash-pay-configs-${shopId}`
* Survives page refreshes and browser restarts
* Last used configuration remembered
**Security:**
* API key secrets never stored (only IDs)
* Secrets fetched at runtime from Studio
* Masked display by default in CURL commands
---
## Section: Guides
# Managed Catalog
**URL:** https://docs.stash.gg/guides/stash-pay/how-tos/managed-catalog
**Description:** Create and publish Stash Pay products in Stash Studio, then reference them by ID in checkout links. No catalog backend required.
Managed Catalog lets you define Stash Pay products entirely in Stash Studio. Pass a `catalogItems` list in your checkout link request; Stash resolves the product name, price, and images server-side. No catalog backend or inline item data required.
Managed Catalog is enabled per shop. To enable it for your shop, contact your Stash engineering partner.
## Create and publish products [#create-and-publish-products]
### Open the Products section [#open-the-products-section]
In Stash Studio, select your game, then navigate to **Stash Pay → Products** and click **Add New Product**.
### Fill in product details [#fill-in-product-details]
| Field | Required | Notes |
| ------------------- | -------- | ----------------------------------------------------------------------- |
| ID | Yes | Unique identifier. Use this value as the `id` in `catalogItems`. |
| Product Name | Yes | Internal name for management. |
| Display Name | Yes | Shown to players at checkout. |
| Product Description | Yes | Shown to players at checkout. |
| Main Image | Yes | Primary product image. |
| Background Image | No | Optional secondary visual. |
| Items | Yes | One or more items the player receives. Set image and quantity per item. |
| Price (USD) | Yes | Player-facing price. Stash Pay is USD only. |
### Publish [#publish]
Products start as **Draft**. Once all required fields are set, click **Publish**. Only published products can be resolved in checkout links.
***
## Reference products in a checkout link [#reference-products-in-a-checkout-link]
Pass `catalogItems` instead of `item` in your [`GenerateQuickPayUrl`](/api/ingress/stash-pay/GenerateQuickPayUrl) request. Each entry references a published product by its ID and the quantity being purchased.
```json title="GenerateQuickPayUrl: catalog items request"
{
"catalogItems": [
{
"id": "starter-pack-usd",
"quantity": 1
}
],
"user": {
"id": "player-123",
"displayName": "Player One",
"platform": "IOS"
},
"transactionId": "txn-abc-001"
}
```
### `catalogItems` parameters [#catalogitems-parameters]
| Parameter | Type | Description |
| ---------- | ------ | ------------------------------------------------------------------ |
| `id` | string | Product ID as set in Stash Studio. Must match a published product. |
| `quantity` | number | Number of units to purchase. |
`catalogItems` and `item` are mutually exclusive. Providing both returns a `400 Bad Request`. You must provide exactly one.
If managed catalog is not enabled for your shop, the request returns `FAILED_PRECONDITION`. Contact your Stash engineering partner to enable it.
***
## Test with the Link Generator [#test-with-the-link-generator]
When managed catalog is enabled for your shop, the [Link Generator](/guides/stash-pay/how-tos/link-generator) in Stash Studio shows a **Product** dropdown in the item section. Select any published product to generate a test checkout link using `catalogItems`. No manual JSON required.
***
---
## Section: Guides
# Stash Pay Opt-In
**URL:** https://docs.stash.gg/guides/stash-pay/how-tos/opt-in
**Description:** Learn how to configure and implement the Stash Pay opt-in experience, including Studio configuration, Unity SDK implementation, user preference management, and customization options.
Stash Pay Opt-In allows users to choose Stash Pay as their preferred payment method instead of using their platform's native in-app purchase (IAP) system. When users opt-in, they gain access to exclusive rewards, bonuses, and a unified payment experience across games.
## How It Works [#how-it-works]
When a user initiates a purchase and hasn't set a payment channel preference, they see a channel selection screen where they can choose:
* **Stash Pay**: Enables Stash Pay for future purchases (opt-in)
* **Native IAP**: Continues using platform's default payment method
Once a user opts in, they bypass the selection screen and go directly to Stash Pay checkout for future purchases.
The channel selection screen appears when a user hasn't set a payment channel preference yet. Once opted in, users won't see it again unless they change their preference.
## Behavior and Effects [#behavior-and-effects]
### When Opt-In is Enabled (Stash Pay Selected) [#when-opt-in-is-enabled-stash-pay-selected]
* Users skip the channel selection screen on future purchases
* All purchases go through Stash Pay checkout flow
* Users can earn Stash Pay rewards and bonuses
* Payment methods available: Cards, Apple Pay, Google Pay, PayPal (if configured)
* Unified payment experience across games using Stash Pay
### When Opt-In is Not Enabled (Native IAP Selected) [#when-opt-in-is-not-enabled-native-iap-selected]
* Users continue using platform's native payment system
* Platform-specific payment methods (e.g., App Store, Google Play)
* No Stash Pay rewards or bonuses
* Standard platform purchase flow
### Changing Preferences [#changing-preferences]
Users can change their preference at any time:
* If they previously selected Native IAP, they'll see the channel selection screen again on their next purchase
* If they previously selected Stash Pay, you can manually change it in the Payment Channels table
## Requirements [#requirements]
### Prerequisites [#prerequisites]
* **Stash Pay Enabled**: Your shop must have Stash Pay enabled and configured
* **Payment Processing**: Stripe or Adyen must be configured
* **Studio Access**: You need admin access to Studio for your shop
* **Feature Flag**: The Payment Channels feature must be enabled (contact Stash support if you don't see it)
## Configure Channel Selection [#configure-channel-selection]
### Navigate to Channel Selection [#navigate-to-channel-selection]
Go to **Stash Studio** → **Stash Pay** → **Appearance** → **Channel Selection**.
### Upload Reward Image [#upload-reward-image]
In the **Reward Image** section, click to upload an image that encourages users to opt-in to Stash Pay.
**Recommended size**: 333px width × 135px height\
**Format**: PNG, JPG, or WebP
### Preview and Save [#preview-and-save]
Use the preview pane to see how the channel selection screen looks. Click **Save** when done.
### Reward Image Best Practices [#reward-image-best-practices]
* Use high-quality images that clearly show rewards or bonuses
* Keep file sizes reasonable for fast loading (\< 500KB recommended)
* Ensure text on images is readable at the recommended size
* Test the image appearance on both light and dark themes
* Show tangible rewards users will receive
* Use crisp, professional images
* Preview on both mobile and desktop views
* Refresh images to keep content current
## Customization [#customization]
The opt-in experience can be customized through the Appearance settings. All customization options are found under **Stash Pay** → **Appearance**:
### Channel Selection Reward Image [#channel-selection-reward-image]
**Location**: **Stash Pay** → **Appearance** → **Channel Selection**
Configure the reward image displayed on the channel selection screen. This is separate from the checkout banner image.
**Recommended size**: 333px width × 135px height\
**Format**: PNG, JPG, or WebP
For general checkout customization (colors and brand assets), see [Customize the Checkout Appearance](/guides/stash-pay/how-tos/customize-checkout-appearance). The colors and brand assets you configure there also apply to the channel selection screen.
### Customization Limitations [#customization-limitations]
**What Cannot Be Customized**:
* Channel selection screen layout and structure
* Button text and messaging (standardized for consistency)
* Screen flow and navigation
* Font families and typography (uses system fonts)
* Spacing and positioning of elements
**What Can Be Customized**:
* ✅ Reward image on channel selection screen (333×135px)
* ✅ All color values (background, text, buttons, cards) - configured in [Checkout Appearance](/guides/stash-pay/how-tos/customize-checkout-appearance)
* ✅ Banner image in checkout flow - configured in [Checkout Appearance](/guides/stash-pay/how-tos/customize-checkout-appearance)
* ✅ Visual branding elements
The channel selection screen layout and messaging are standardized to ensure a consistent, accessible user experience across all games. Visual customization (colors and images) allows you to brand the experience while maintaining usability.
## View and Manage User Opt-Ins [#view-and-manage-user-opt-ins]
You can view and manage which users have opted in to Stash Pay through the Payment Channels page.
**Navigation**: **Stash Studio** → **Stash Pay** → **Payment Channels**
### Payment Channels Table [#payment-channels-table]
The table shows:
* **User ID**: The external user ID from your game
* **Channel**: Current payment channel preference (Stash Pay or Native IAP)
* **Date Updated**: When the preference was last updated
### Edit User Preference [#edit-user-preference]
1. Navigate to **Stash Pay** → **Payment Channels**
2. Click on a user in the table
3. Select the desired payment channel (Stash Pay or Native IAP)
4. Click **Save**
The user's preference will be updated immediately.
## Unity SDK Implementation [#unity-sdk-implementation]
For the opt-in flow to work, your game must integrate the Stash SDK. This section covers Unity-specific implementation.
This guide assumes you have already set up the Stash Pay Unity SDK. If you haven't, see the [Unity Integration](/guides/stash-pay/ios-android-integration/unity) guide first.
### Opening an Opt-in Popup [#opening-an-opt-in-popup]
Use `OpenPopup()` to display payment channel selection opt-in dialogs. Always handle the `OnOptinResponse` event:
```csharp title="Opening an Opt-in Popup"
using StashPopup;
void ShowPaymentChannelSelection()
{
// Subscribe to opt-in response
StashPayCard.Instance.OnOptinResponse += OnChannelSelected;
StashPayCard.Instance.OpenPopup(
"https://your-site.com/pay/channel-selection",
dismissCallback: () => {
// Unsubscribe when popup closes
StashPayCard.Instance.OnOptinResponse -= OnChannelSelected;
}
);
}
void OnChannelSelected(string channel)
{
// Receives "native_iap" or "stash_pay"
string paymentMethod = channel.ToUpper();
// Save user preference
PlayerPrefs.SetString("PaymentMethod", paymentMethod);
PlayerPrefs.Save();
Debug.Log($"User selected: {paymentMethod}");
}
```
Use `OpenPopup()` exclusively for payment channel selection opt-in flows. For checkout flows, use `OpenCheckout()` instead.
### Configuring Popup Size [#configuring-popup-size]
`OpenPopup()` supports optional custom size configuration. By default, it uses platform-specific default sizing. You can customize the size using `PopupSizeConfig`:
```csharp title="Custom Popup Size Configuration"
var customSize = new PopupSizeConfig
{
portraitWidthMultiplier = 0.9f, // 90% of base width in portrait
portraitHeightMultiplier = 1.2f, // 120% of base height in portrait
landscapeWidthMultiplier = 1.4f, // 140% of base width in landscape
landscapeHeightMultiplier = 0.85f // 85% of base height in landscape
};
StashPayCard.Instance.OpenPopup(
url,
dismissCallback: OnDismiss,
customSize: customSize
);
```
**Note:** The popup automatically adjusts its size when the device rotates between portrait and landscape orientations. Custom multipliers are applied relative to the calculated base size (which depends on device type and screen dimensions).
### Unity SDK API Reference [#unity-sdk-api-reference]
**`OpenPopup(string url, Action onDismiss = null, Action onSuccess = null, Action onFailure = null, PopupSizeConfig? customSize = null)`**
Opens Stash opt-in and other remote Stash dialogs in a centered modal popup. Size can be customized using `PopupSizeConfig`. If not provided, uses platform-specific default sizing.
**`OnOptinResponse`** (event Action\)
* Fired when user selects a payment channel in opt-in popup. Receives `"native_iap"` or `"stash_pay"`.
**`PopupSizeConfig`** (struct)
* `portraitWidthMultiplier` (float) - Width multiplier for portrait orientation
* `portraitHeightMultiplier` (float) - Height multiplier for portrait orientation
* `landscapeWidthMultiplier` (float) - Width multiplier for landscape orientation
* `landscapeHeightMultiplier` (float) - Height multiplier for landscape orientation
**Note:** Each platform (iOS and Android) has its own default sizing. When `customSize` is not provided, the platform-specific defaults are used.
## Troubleshooting [#troubleshooting]
### Users Can't Opt-In [#users-cant-opt-in]
**Problem**: Users click "Enable Stash Pay" but nothing happens
**Solutions**:
1. Verify SDK method is available (`StashSdk.hasSetPaymentChannel()`)
2. Check browser/console for errors
3. Verify API connectivity
4. Check Payment Channels table to see if preference was saved
### Reward Image Not Displaying [#reward-image-not-displaying]
**Problem**: Reward image doesn't appear on channel selection screen
**Solutions**:
1. Verify image is uploaded in **Channel Selection** settings
2. Check image URL is valid
3. Clear browser cache
4. Re-upload the image if necessary
## Best Practices [#best-practices]
### User Communication [#user-communication]
* Ensure users understand what Stash Pay offers
* Emphasize rewards and bonuses
* Make it clear users can change their preference
* Provide support contact for questions
### Monitoring [#monitoring]
* Track opt-in rates via Payment Channels table
* Periodically review user preferences
* Test different reward images to optimize conversion
* Collect feedback on the opt-in experience
---
## Section: Guides
# Unity Opt-in Dialog
**URL:** https://docs.stash.gg/guides/stash-pay/how-tos/unity-opt-in-dialog
**Description:** Learn how to implement payment channel selection opt-in dialogs in your Unity project using the Stash Pay Unity SDK.
Use `OpenPopup()` to display payment channel selection opt-in dialogs in your Unity project. This allows players to choose between native IAP and Stash Pay payment methods.
## Before you begin [#before-you-begin]
This guide assumes you have already set up the Stash Pay Unity SDK. If you haven't, see the [Unity integration guide](/guides/stash-pay/ios-android-integration/unity) first.
## Opening an Opt-in Popup [#opening-an-opt-in-popup]
Use `OpenPopup()` for payment channel selection opt-in dialogs. Always handle the `OnOptinResponse` event:
```csharp title="Opening an Opt-in Popup"
using StashPopup;
void ShowPaymentChannelSelection()
{
// Subscribe to opt-in response
StashPayCard.Instance.OnOptinResponse += OnChannelSelected;
StashPayCard.Instance.OpenPopup(
"https://your-site.com/pay/channel-selection",
dismissCallback: () => {
// Unsubscribe when popup closes
StashPayCard.Instance.OnOptinResponse -= OnChannelSelected;
}
);
}
void OnChannelSelected(string channel)
{
// Receives "native_iap" or "stash_pay"
string paymentMethod = channel.ToUpper();
// Save user preference
PlayerPrefs.SetString("PaymentMethod", paymentMethod);
PlayerPrefs.Save();
Debug.Log($"User selected: {paymentMethod}");
}
```
Use `OpenPopup()` exclusively for payment channel selection opt-in flows. For checkout flows, use `OpenCheckout()` instead.
## Configuring Popup Size [#configuring-popup-size]
`OpenPopup()` supports optional custom size configuration. By default, it uses platform-specific default sizing. You can customize the size using `PopupSizeConfig`:
```csharp title="Custom Popup Size Configuration"
var customSize = new PopupSizeConfig
{
portraitWidthMultiplier = 0.9f, // 90% of base width in portrait
portraitHeightMultiplier = 1.2f, // 120% of base height in portrait
landscapeWidthMultiplier = 1.4f, // 140% of base width in landscape
landscapeHeightMultiplier = 0.85f // 85% of base height in landscape
};
StashPayCard.Instance.OpenPopup(
url,
dismissCallback: OnDismiss,
customSize: customSize
);
```
**Note:** The popup automatically adjusts its size when the device rotates between portrait and landscape orientations. Custom multipliers are applied relative to the calculated base size (which depends on device type and screen dimensions).
## API Reference [#api-reference]
### Methods [#methods]
**`OpenPopup(string url, Action onDismiss = null, Action onSuccess = null, Action onFailure = null, PopupSizeConfig? customSize = null)`**
Opens Stash opt-in and other remote Stash dialogs in a centered modal popup. Size can be customized using `PopupSizeConfig`. If not provided, uses platform-specific default sizing.
### Events [#events]
**`OnOptinResponse`** (event Action\)
* Fired when user selects a payment channel in opt-in popup. Receives `"native_iap"` or `"stash_pay"`.
### Types [#types]
**`PopupSizeConfig`** (struct)
* `portraitWidthMultiplier` (float) - Width multiplier for portrait orientation
* `portraitHeightMultiplier` (float) - Height multiplier for portrait orientation
* `landscapeWidthMultiplier` (float) - Width multiplier for landscape orientation
* `landscapeHeightMultiplier` (float) - Height multiplier for landscape orientation
**Note:** Each platform (iOS and Android) has its own default sizing. When `customSize` is not provided, the platform-specific defaults are used.
---
## Section: Guides
# Native Apps Integration
**URL:** https://docs.stash.gg/guides/stash-pay/ios-android-integration/native-apps
**Description:** Integrate Stash Pay in native iOS and Android apps and custom game engines using the Stash Native SDK.
## Requirements [#requirements]
* Android API 21+ (target/compile SDK 34)
* iOS 13.0+
## Install the SDK [#install-the-sdk]
### Android (AAR) [#android-aar]
1. Download the latest AAR from [stash-native releases](https://github.com/stashgg/stash-native/releases).
2. Add it to your Android project (for example in `libs/`).
3. Reference it in your app module:
```groovy
dependencies {
implementation files('libs/StashNative-.aar')
implementation 'androidx.appcompat:appcompat:1.6.1'
// Optional, recommended for Custom Tabs:
// implementation 'androidx.browser:browser:1.7.0'
}
```
### iOS (XCFramework or SPM) [#ios-xcframework-or-spm]
Use one of the following:
* **XCFramework**: download `StashNative.xcframework.zip` from [releases](https://github.com/stashgg/stash-native/releases), add it to your project, then set it to **Embed & Sign**.
* **Swift Package Manager**: add `https://github.com/stashgg/stash-native.git` in Xcode (**File -> Add Packages...**).
## Presentation methods [#presentation-methods]
The SDK lets you present Stash Pay checkout links using three modes: `openCard`, `openModal`, and `openBrowser`.
Just provide your generated checkout URL, and you can also pass an optional config object to customize the presentation and subscribe to callbacks.
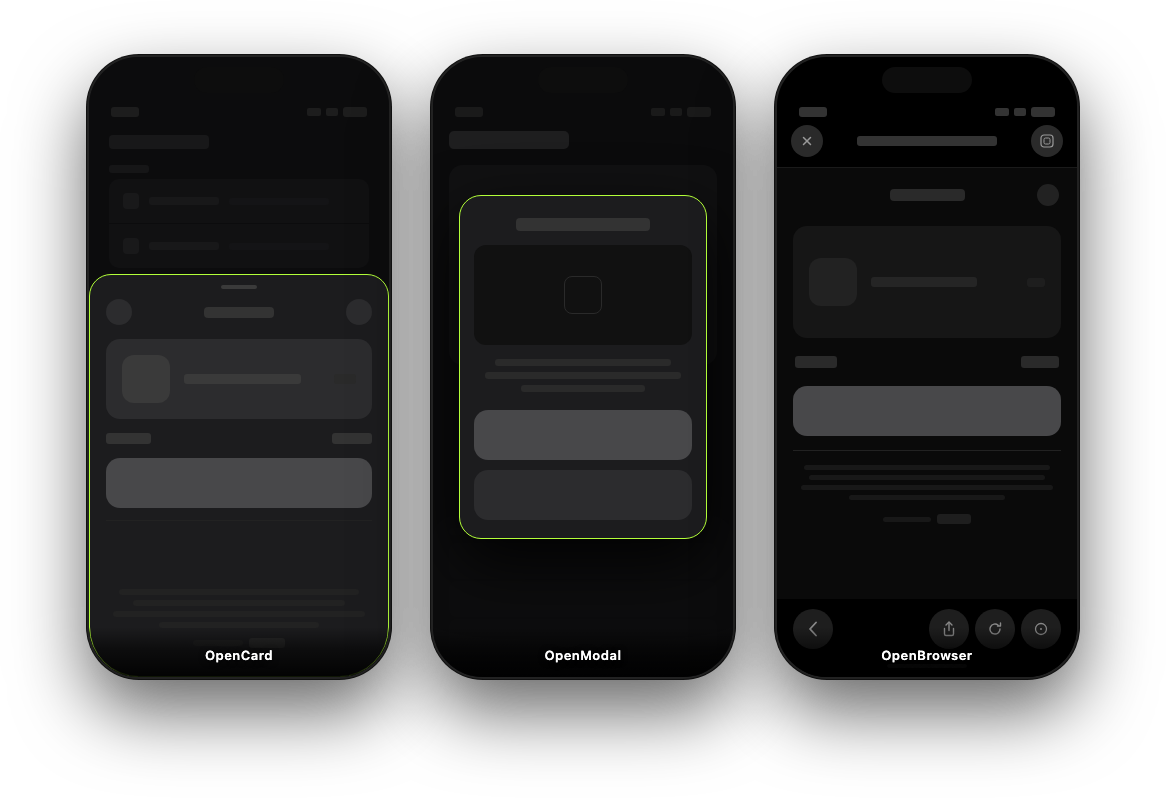
### `openCard` (Drawer/sheet) [#opencard-drawersheet]
Use this when you want an in-app checkout view with callbacks for success/failure/dismiss.
```java
StashNativeCard.CardConfig config = new StashNativeCard.CardConfig(); // or null
StashNativeCard.getInstance().openCard(checkoutUrl, config);
```
```swift
let config = StashNativeCardConfig() // or nil
StashNativeCard.sharedInstance().openCard(withURL: checkoutUrl, config: config)
```
```objc
StashNativeCardConfig *config = [[StashNativeCardConfig alloc] init]; // or nil
[[StashNativeCard sharedInstance] openCardWithURL:checkoutUrl config:config];
```
### `openModal` (Centered modal) [#openmodal-centered-modal]
Use this when you want a centered dialog style with the same callback model as `openCard`.
```java
StashNativeCard.ModalConfig config = new StashNativeCard.ModalConfig(); // or null
StashNativeCard.getInstance().openModal(checkoutUrl, config);
```
```swift
let config = StashNativeModalConfig() // or nil
StashNativeCard.sharedInstance().openModal(withURL: checkoutUrl, config: config)
```
```objc
StashNativeModalConfig *config = [[StashNativeModalConfig alloc] init]; // or nil
[[StashNativeCard sharedInstance] openModalWithURL:checkoutUrl config:config];
```
### `openBrowser` (Safari View Controller / Chrome Custom Tabs) [#openbrowser-safari-view-controller--chrome-custom-tabs]
Use this when you prefer a browser-based checkout (`SFSafariViewController` on iOS, Chrome Custom Tabs/system browser on Android).
```java
StashNativeCard.getInstance().openBrowser(checkoutUrl);
```
```swift
StashNativeCard.sharedInstance().openBrowser(withURL: checkoutUrl)
// Optional on deeplink return:
StashNativeCard.sharedInstance().closeBrowser()
```
```objc
[[StashNativeCard sharedInstance] openBrowserWithURL:checkoutUrl];
// Optional on deeplink return:
[[StashNativeCard sharedInstance] closeBrowser];
```
## Callbacks and verification [#callbacks-and-verification]
`openCard` and `openModal` use the same callback/delegate model. Typical events:
* Payment success
* Payment failure
* Dialog dismissed
* External payment started
* Opt-in response
* Page loaded
* Network error
Always verify purchases on your backend before granting items. Client callbacks should drive UX, not final entitlement decisions.
## Landscape and orientation notes [#landscape-and-orientation-notes]
Use `forcePortrait` in card config if your host app is landscape-locked and checkout should appear in portrait.
* On Android, this opens a portrait checkout activity in the same app process.
* On iOS, the SDK unlocks portrait for its own checkout/browser windows.
For Android landscape projects, an optional backdrop API (`setBackdropBitmap` / `setBackdropBytes`) can reduce visual artifacts during rotation.
## Android keep-alive (optional) [#android-keep-alive-optional]
For browser-based flows on memory-constrained devices, you can enable keep-alive:
```java
StashNativeCard.getInstance().setKeepAliveEnabled(true);
StashNativeCard.KeepAliveConfig config = new StashNativeCard.KeepAliveConfig();
config.notificationTitle = "Payment in progress";
config.notificationText = "Tap to return to the app";
config.notificationIconResId = 0; // 0 = SDK default icon
StashNativeCard.getInstance().setKeepAliveConfig(config);
```
This starts a short foreground service during external browser checkout. Review Play Console declarations if you enable this mode.
## Detailed references [#detailed-references]
* Full SDK docs and examples: [stash-native README](https://github.com/stashgg/stash-native/blob/main/README.md)
* Platform and policy notes: [stash-native COMPATIBILITY.md](https://github.com/stashgg/stash-native/blob/main/COMPATIBILITY.md)
* Stash Pay backend integration flow: [/guides/stash-pay/integration](/guides/stash-pay/integration)
---
## Section: Guides
# Presentation Options
**URL:** https://docs.stash.gg/guides/stash-pay/ios-android-integration/presentation-options
**Description:** Compare Stash Pay presentation options for iOS and Android and choose the right integration mode for your game or app.
## iOS presentation options [#ios-presentation-options]
### In-app dialog [#in-app-dialog]
Use the Stash SDK dialog when you need tighter in-app UX and direct success/failure callbacks to your app or game.
### Safari View Controller [#safari-view-controller]
Use this when you want a browser-based checkout that still feels in-app. Users do not have to switch between app and the browser and the
checkout still happens in the context of your game or application. User returns back in the game using deeplinks.
### External system browser [#external-system-browser]
Use this for the simplest linkout flow. Users leave the app for checkout inside the system browser and return via deeplink.
## Android presentation options [#android-presentation-options]
### In-app dialog [#in-app-dialog-1]
Use the Stash SDK dialog when you need tighter in-app UX and direct success/failure callbacks to your app or game.
### Chrome Custom Tabs (CCT) [#chrome-custom-tabs-cct]
Use this when you want a browser-based checkout that still feels in-app. Users do not have to switch between app and the browser and the
checkout still happens in the context of your game or application. User returns back in the game using deeplinks.
### External system browser [#external-system-browser-1]
Use this for the simplest linkout flow. Users leave the app for checkout and return via deeplink.
## Specific Integration guides [#specific-integration-guides]
* [Native iOS/Android Apps](/guides/stash-pay/ios-android-integration/native-apps)
* [Unity](/guides/stash-pay/ios-android-integration/unity)
* [Unreal Engine](/guides/stash-pay/ios-android-integration/unreal)
---
## Section: Guides
# Unity Integration
**URL:** https://docs.stash.gg/guides/stash-pay/ios-android-integration/unity
**Description:** Integrate Stash Pay in Unity projects using the Stash Unity package wrapper.
The Unity package is a wrapper around [stash-native](https://github.com/stashgg/stash-native). We recommend reading the native SDK docs to understand the full capability set and platform-specific behavior.
## Requirements [#requirements]
* Unity 2021.3+ (LTS recommended)
* iOS 13.0+
* Android API 21+
## Install with UPM [#install-with-upm]
### Add from Git URL (recommended) [#add-from-git-url-recommended]
In Unity:
1. Open **Window -> Package Manager**
2. Select **+ -> Add package from git URL**
3. Enter:
```text
https://github.com/stashgg/stash-unity.git?path=Packages/gg.stash.unity
```
### Add via `manifest.json` (alternative) [#add-via-manifestjson-alternative]
In `Packages/manifest.json`, add:
```json
"gg.stash.unity": "https://github.com/stashgg/stash-unity.git?path=Packages/gg.stash.unity"
```
### (Optional) Import sample [#optional-import-sample]
From Package Manager, open **Stash for Unity -> Samples -> Stash Integration Sample -> Import**.
## Android dependency recommendation [#android-dependency-recommendation]
For browser flows and to ensure compatibility since some older Unity versions may bundle outdated Android libraries add these dependencies in your `Assets/Plugins/Android/mainTemplate.gradle`:
```groovy
dependencies {
implementation 'androidx.browser:browser:1.7.0'
implementation 'androidx.core:core:1.12.0'
**DEPS**
}
```
`androidx.browser` is optional but recommended for Chrome Custom Tabs. `androidx.core:1.12.0+` helps avoid compatibility issues when older plugin trees pin outdated AndroidX versions.
## Presentation modes [#presentation-modes]
Use `StashNative.Instance` from `Stash.Native` to call one of the checkout presentation methods offered by the native package.
### `OpenCard` [#opencard]
```csharp
using Stash.Native;
void OpenCardCheckout(string checkoutUrl)
{
var config = StashNativeCardConfig.Default;
StashNative.Instance.OpenCard(
checkoutUrl,
dismissCallback: OnDismissed,
successCallback: OnSuccess,
failureCallback: OnFailure,
config: config
);
}
```
### `OpenModal` [#openmodal]
```csharp
StashNative.Instance.OpenModal(
checkoutUrl,
dismissCallback: OnDismissed,
successCallback: OnSuccess,
failureCallback: OnFailure
);
```
### `OpenBrowser` [#openbrowser]
```csharp
StashNative.Instance.OpenBrowser(checkoutUrl);
// iOS only when returning to app:
StashNative.Instance.CloseBrowser();
```
## Landscape games and portrait checkout [#landscape-games-and-portrait-checkout]
If your game is landscape-locked but you want checkout in portrait, enable `forcePortrait` for Stash SDK to swizzle the screen rotation logic at the runtime.
```csharp
var config = StashNativeCardConfig.Default;
config.forcePortrait = true;
```
Recommended pattern for stable behavior:
1. Save current `Screen.orientation` and autorotation settings.
2. Lock orientation in Unity while card is presented.
3. Restore settings in dismiss/success/failure callbacks after the checkout is over.
### Android Backdrop [#android-backdrop]
On Android, to avoid visual glitches (black or stretched Unity surface) when rotating from landscape to portrait checkout, you should capture a screenshot of the
game and set it as the checkout backdrop by calling `setBackdropBytes(...)` before `OpenCard(...)`. Use the simply use the following snippet to do this:
```csharp
IEnumerator OpenPortraitCheckoutWithBackdrop(string checkoutUrl)
{
var config = StashNativeCardConfig.Default;
config.forcePortrait = true;
#if UNITY_ANDROID && !UNITY_EDITOR
// Capture a frame right before opening checkout.
yield return new WaitForEndOfFrame();
var snap = new Texture2D(Screen.width, Screen.height, TextureFormat.RGB24, false);
snap.ReadPixels(new Rect(0, 0, Screen.width, Screen.height), 0, 0);
snap.Apply();
byte[] imageBytes = snap.EncodeToPNG();
Destroy(snap);
using (var stashCard = new AndroidJavaClass("com.stash.stashnative.StashNativeCard"))
{
stashCard.CallStatic("setBackdropBytes", (object)imageBytes);
}
#endif
StashNative.Instance.OpenCard(
checkoutUrl,
dismissCallback: () =>
{
#if UNITY_ANDROID && !UNITY_EDITOR
using (var stashCard = new AndroidJavaClass("com.stash.stashnative.StashNativeCard"))
{
// Clear to avoid reusing a stale image in later checkouts.
stashCard.CallStatic("setBackdropBytes", (object)null);
}
#endif
},
config: config
);
}
```
If you see JNI warnings for `byte[]` on specific Unity/Android stacks, convert to `sbyte[]` before calling `setBackdropBytes`.
## Android keep-alive service [#android-keep-alive-service]
Use keep-alive for checkout flows where users temporarily leave the Unity surface (It can be different payment methods, verification or browser absed checkout). On some Android devices, Unity can be suspended or killed while checkout runs in Custom Tabs or the system browser, and keep-alive reduces that risk by running a short foreground service during the payment window.
```csharp
#if UNITY_ANDROID && !UNITY_EDITOR
StashNative.Instance.SetKeepAliveEnabled(true);
StashNative.Instance.SetKeepAliveConfig(new StashNativeKeepAliveConfig
{
notificationTitle = "Payment in progress",
notificationText = "Tap to return to the app",
notificationIconResId = 0
});
#endif
```
## Unity Editor simulator [#unity-editor-simulator]
The package includes an editor simulator for `OpenCard` and `OpenModal` so you can test flow and callbacks without deploying to a device.
* Supported editor platforms: Windows and macOS
* `OpenBrowser` is not simulated (it opens the system browser)
## Detailed references [#detailed-references]
* Unity package docs and API: [stash-unity README](https://github.com/stashgg/stash-unity/blob/main/README.md)
* Native SDK behavior underneath Unity: [stash-native](https://github.com/stashgg/stash-native)
* Stash Pay server integration flow: [/guides/stash-pay/integration](/guides/stash-pay/integration)
---
## Section: Guides
# Unreal Engine Integration
**URL:** https://docs.stash.gg/guides/stash-pay/ios-android-integration/unreal
**Description:** Integrate Stash Pay in Unreal Engine projects using the Stash plugin wrapper.
The Unreal plugin is a wrapper around [stash-native](https://github.com/stashgg/stash-native). We recommend reading the native SDK docs to understand the full capability set and platform-specific behavior.
## Requirements [#requirements]
* Unreal Engine 5.0+
* iOS 12.0+ / Android API 21+
If you maintain an Unreal Engine 4 project, use the `4.27-plus` branch: [stash-unreal/tree/4.27-plus](https://github.com/stashgg/stash-unreal/tree/4.27-plus).
This is a experimental branch and we only actively mainatin Unreal Engine 5 support.
## Install the plugin [#install-the-plugin]
### Copy the plugin into your project [#copy-the-plugin-into-your-project]
Copy `Plugins/Stash/` from the [stash-unreal repository](https://github.com/stashgg/stash-unreal) into your Unreal project's `Plugins/` directory.
### Enable plugin in Unreal Editor [#enable-plugin-in-unreal-editor]
1. Open your project
2. Go to **Edit -> Plugins**
3. Search for **Stash**
4. Enable it and restart the editor
### Verify nodes are available [#verify-nodes-are-available]
In a Blueprint, confirm the **Stash** category exists and includes nodes such as:
* `Open Card` / `Open Card With Config`
* `Open Modal` / `Open Modal With Config`
* `Open Browser` / `Close Browser`
## Presentation modes [#presentation-modes]
Unreal wrapper exposes the same three core modes as native SDK: `OpenCard`, `OpenModal`, and `OpenBrowser`.
### `OpenCard` [#opencard]
```cpp
#include "StashBlueprint.h"
// Default config
UStashBlueprint::OpenCard(CheckoutURL);
// Custom config
FStashCardConfig Config = UStashBlueprint::MakeStashCardConfig(
false, // bForcePortrait
0.68f, // CardHeightRatioPortrait
0.9f, // CardWidthRatioLandscape
0.6f, // CardHeightRatioLandscape
0.6f, 0.8f, 0.8f, 0.65f
);
UStashBlueprint::OpenCardWithConfig(CheckoutURL, Config);
```
Use `Open Card` or `Open Card With Config` from the **Stash** Blueprint category.
### `OpenModal` [#openmodal]
```cpp
UStashBlueprint::OpenModal(URL);
FStashModalConfig Config;
Config.bAllowDismiss = true;
UStashBlueprint::OpenModalWithConfig(URL, Config);
```
Use `Open Modal` or `Open Modal With Config` from the **Stash** Blueprint category.
### `OpenBrowser` [#openbrowser]
```cpp
UStashBlueprint::OpenBrowser(URL);
// Optional on iOS:
UStashBlueprint::CloseBrowser();
```
`CloseBrowser()` is iOS-only in practice; on Android it is a no-op.
## Callbacks and verification [#callbacks-and-verification]
Bind callbacks for payment success/failure, dialog dismissed, and related lifecycle events.
Use `Get Stash Subsystem`, then bind events on that subsystem object (`Add On Payment Success`, `Add On Dialog Dismissed`, etc.).\
The static function library nodes are not where you bind delegates.
```cpp
UStashBlueprint::OnPaymentSuccess.AddDynamic(this, &AYourClass::OnStashPaymentSuccess);
// or
if (UStashSubsystem* Stash = UStashBlueprint::GetStashSubsystem(this))
{
Stash->OnPaymentSuccess.AddDynamic(this, &AYourClass::OnStashPaymentSuccess);
}
```
Always verify purchases on your backend before granting items. Client callbacks should only drive UX updates and refresh logic.
## Open checkout from Unreal [#open-checkout-from-unreal]
Add dependency in your module `Build.cs`:
```csharp
PublicDependencyModuleNames.Add("Stash");
```
Then open checkout:
```cpp
#include "StashBlueprint.h"
void AYourPlayerController::OpenCardCheckout(const FString& CheckoutURL)
{
UStashBlueprint::OpenCard(CheckoutURL);
}
```
If you need a Blueprint-first flow, bind in C++ and forward to `BlueprintImplementableEvent`:
```cpp
UFUNCTION(BlueprintImplementableEvent, Category = "Store")
void OnPaymentSucceeded();
void AYourPlayerController::OnPaymentSuccessReceived()
{
OnPaymentSucceeded();
}
```
## Landscape games and portrait checkout [#landscape-games-and-portrait-checkout]
For landscape-only games on iOS, use `SetLandscapeLockWhenCardClosed(true)` so gameplay stays landscape while the checkout overlay can rotate to portrait when needed.
```cpp
UStashBlueprint::SetLandscapeLockWhenCardClosed(true);
```
Recommended setup:
1. Enable portrait orientation in iOS project settings so checkout is allowed to rotate.
2. Call `SetLandscapeLockWhenCardClosed(true)` once during startup.
3. Keep your gameplay camera/UI logic in landscape; let only the checkout overlay rotate.
### Android backdrop for landscape-to-portrait transitions [#android-backdrop-for-landscape-to-portrait-transitions]
When Android rotates from landscape gameplay into portrait checkout, you may see a brief black or stretched frame behind the overlay.\
In Unity we handle this with `setBackdropBytes(...)` before opening checkout. Unreal wrapper does not expose that helper as a first-class Blueprint node today, so this is an advanced bridge customization.
If you need the same behavior in Unreal, extend the Android bridge (`StashHelper` / Java side) to pass a captured frame to the underlying native SDK before `OpenCard`, and clear it after dismiss to avoid stale backdrop reuse.
Only implement Android backdrop customization if you actually observe transition artifacts on your device matrix. Most teams can ship without it.
## Android keep-alive service (optional) [#android-keep-alive-service-optional]
Use keep-alive for browser-based flows where users temporarily leave the Unreal surface (Custom Tabs or external browser). On some Android devices, the OS can suspend or kill your game process during payment; keep-alive reduces that risk by running a short foreground service while checkout is external.
Enable `Set Android Keep Alive Enabled(true)` and optionally set `Stash Keep Alive Config` (`Notification Title`, `Notification Text`) to control notification copy.
```cpp
UStashBlueprint::SetAndroidKeepAliveEnabled(true);
FStashKeepAliveConfig KA;
KA.NotificationTitle = TEXT("Payment in progress");
KA.NotificationText = TEXT("Tap to return to the app");
UStashBlueprint::SetAndroidKeepAliveConfig(KA);
```
Keep-alive is off by default. Enable it for flows that leave the app surface, then test on low-memory and OEM-customized Android devices where background process kills are more common.
## Detailed references [#detailed-references]
* Unreal plugin docs and sample project: [stash-unreal README](https://github.com/stashgg/stash-unreal/blob/main/README.md)
* Native SDK reference: [stash-native README](https://github.com/stashgg/stash-native/blob/main/README.md)
* Stash Pay backend setup: [/guides/stash-pay/integration](/guides/stash-pay/integration)
---
## Section: Guides
# About Subscriptions
**URL:** https://docs.stash.gg/guides/stash-pay/subscriptions/about
**Description:** Learn about Stash Subscriptions - a recurring billing system for games that enables battle passes, VIP memberships, and premium tiers with automatic renewals and flexible billing periods.
Stash Subscriptions is a recurring billing system for games that handles automatic renewals, grace periods, and subscription lifecycle management. Players subscribe to plans and get continuous access to premium content until they cancel or their subscription expires.
**Integration requirement:** Your app or game must provide in-app subscription management. Users need to be able to:
* View their active subscription and next billing date
* Cancel their subscription
* Reactivate a canceled subscription before it expires
This is required to maintain compliance. See the [Integration guide](/guides/stash-pay/subscriptions/integration#manage-subscriptions) for implementation details.
## Use cases [#use-cases]
### Battle passes [#battle-passes]
Recurring offers that automatically renew each season. Players subscribe once and get continuous access to premium rewards, challenges, and exclusive content without needing to repurchase each period.
### VIP memberships [#vip-memberships]
Create tiered VIP memberships with monthly or annual billing. Members get ongoing benefits like bonus currency, exclusive items, priority queue access, or ad-free experiences.
### Premium subscriptions [#premium-subscriptions]
Sell premium game access or content subscriptions. Players pay a recurring fee for access to premium servers, extended content, or enhanced gameplay features.
## Key concepts [#key-concepts]
### Plans [#plans]
A **Plan** defines what players subscribe to. Each plan has:
* A unique identifier (e.g., `monthly_premium`, `annual_vip`)
* A billing period (e.g., 1 month, 1 year)
* Pricing in multiple currencies
* Optional trial period
Plans are configured in Stash Studio and retrieved via the [Plans API](/api/ingress/subscription-plans/ListPlans).
### Subscriptions [#subscriptions]
A **Subscription** is an instance of a player subscribing to a plan. It tracks:
* Current status (`trialing`, `active`, `past_due`, `canceled`, `expired`)
* Billing dates and next renewal
* Whether cancellation is scheduled
### Price locking [#price-locking]
When a player subscribes, their price is locked. If you later change the plan's price, existing subscribers continue paying their original rate until they cancel and resubscribe, however you can indicate if you don't want to honor grandfathered prices.
### Grace periods [#grace-periods]
If a renewal payment fails, the subscription enters `past_due` status. During the grace period, the player retains access while Stash retries the payment. If all retries fail, the subscription expires.
The default grace period is 48 hours with payment retries at 24h and 48h. Grace period duration and retry schedule can be configured based on your needs.
## Subscription lifecycle [#subscription-lifecycle]
Subscriptions move through these statuses:
| Status | Description |
| ---------- | ------------------------------------------------ |
| `trialing` | Subscription is in free trial period |
| `active` | Subscription is active and user has access |
| `past_due` | Payment failed, retrying during grace period |
| `canceled` | User canceled, access continues until period end |
| `expired` | Subscription ended, no more access |
See the [Subscription Flow](/guides/stash-pay/subscriptions/flow) guide for details on state transitions and lifecycle events.
---
## Section: Guides
# Subscription Flow
**URL:** https://docs.stash.gg/guides/stash-pay/subscriptions/flow
**Description:** Understand the subscription lifecycle, state transitions, and how subscriptions move between trialing, active, past_due, canceled, and expired states. Learn about billing periods, grace periods, and renewal processing.
This guide explains how subscriptions move through their lifecycle, from creation to expiration.
## Subscription states [#subscription-states]
A subscription is always in one of these states:
| State | Description | Access |
| ---------- | ------------------------------------- | ------ |
| `trialing` | Subscription is in free trial period | Yes |
| `active` | Subscription is current and paid | Yes |
| `past_due` | Payment failed, in grace period | Yes |
| `canceled` | Cancellation scheduled for period end | Yes |
| `expired` | Subscription ended | No |
## State machine [#state-machine]
## Lifecycle events [#lifecycle-events]
### New subscription [#new-subscription]
When a user subscribes through a checkout link:
1. Subscription created with `active` status
2. `current_period_end` set based on billing period
3. `next_billing_date` scheduled for renewal
4. Webhook `subscription.created` sent
### Successful renewal [#successful-renewal]
When a subscription renews successfully:
1. Payment processed on `next_billing_date`
2. `current_period_end` extended by billing period
3. `next_billing_date` updated
4. Webhook `subscription.payment_succeeded` sent
### Failed payment [#failed-payment]
When a renewal payment fails:
1. Status changes to `past_due`
2. User retains access during grace period
3. Stash retries payment automatically
4. Webhook `subscription.payment_failed` sent
The default grace period is 48 hours with payment retries at 24h and 48h.
During this time, the user keeps access while Stash attempts to recover the
payment. Grace period duration and retry schedule can be configured based on
your needs.
If payment succeeds during grace period:
* Status returns to `active`
* Webhook `subscription.payment_succeeded` sent
If all retries fail:
* Status changes to `expired`
* Webhook `subscription.expired` sent
* User loses access
### Cancellation [#cancellation]
When a user cancels:
1. Status changes to `canceled`
2. `cancel_at_period_end` set to `true`
3. `canceled_at` timestamp recorded
4. Webhook `subscription.canceled` sent
5. User keeps access until `current_period_end`
When the period ends:
* Status changes to `expired`
* Webhook `subscription.expired` sent
### Plan change / upgrade checkout [#plan-change--upgrade-checkout]
Players can upgrade a subscription via a **subscription change checkout link** created with [Create a subscription change checkout link](/api/ingress/subscription-checkout-links/CreateSubscriptionChangeCheckoutLink) (`POST /sdk/subscriptions/{subscriptionId}/change-checkout-links`). While `active`, `trialing`, or **canceled but still before `current_period_end`**, they can open that link and complete checkout; creating the link does not by itself reactivate a canceled subscription.
If they **complete** checkout successfully, Stash applies the change (and reactivates if they were canceled-in-period). If they **abandon** checkout, subscription state is unchanged.
### Reactivation [#reactivation]
A canceled subscription can be reactivated before it expires:
1. Call [Reactivate Subscription](/api/ingress/subscriptions/ReactivateSubscription), **or** complete a subscription change checkout successfully (upgrade flow).
2. Status returns to `active`
3. `cancel_at_period_end` set to `false`
4. Webhook `subscription.reactivated` sent (when applicable)
Reactivation is only possible while the subscription is in `canceled` status.
Once it reaches `expired`, the user must create a new subscription.
## Billing period [#billing-period]
The `period` object defines how often the subscription renews:
```json
{
"period": {
"value": 1,
"unit": "month"
}
}
```
Supported units: `day`, `week`, `month`, `year`
Examples:
* Weekly: `{ "value": 1, "unit": "week" }`
* Monthly: `{ "value": 1, "unit": "month" }`
* Quarterly: `{ "value": 3, "unit": "month" }`
* Yearly: `{ "value": 1, "unit": "year" }`
## Key dates [#key-dates]
| Field | Description |
| -------------------- | ------------------------------------------ |
| `current_period_end` | When the current billing period ends |
| `next_billing_date` | When the next payment will be attempted |
| `access_end_date` | When user access expires |
| `trial_end` | When the trial period ends (if applicable) |
| `canceled_at` | When the subscription was canceled |
---
## Section: Guides
# Integrating Subscriptions
**URL:** https://docs.stash.gg/guides/stash-pay/subscriptions/integration
**Description:** Learn how to integrate Stash Subscriptions into your game. This guide covers listing plans, creating subscription checkouts, handling webhooks, and managing subscription lifecycle.
This guide explains how to integrate Stash Subscriptions into your game, from displaying available plans to handling subscription lifecycle events.
## Integration overview [#integration-overview]
### Display available plans [#display-available-plans]
Fetch plans from the API and show them to players.
### Create subscription checkout When a player selects a plan, create a [#create-subscription-checkout-when-a-player-selects-a-plan-create-a]
subscription checkout link.
### Handle webhooks Process subscription lifecycle events on your backend. [#handle-webhooks-process-subscription-lifecycle-events-on-your-backend]
### Manage subscriptions [#manage-subscriptions]
Let players view, cancel, or reactivate their subscriptions.
## Display available plans [#display-available-plans-1]
Fetch available subscription plans using the [List Plans](/api/ingress/subscription-plans/ListPlans) endpoint.
```bash title="List Plans Request"
curl -X GET "https://api.stash.gg/sdk/plans" \
-H "X-Stash-Api-Key: YOUR_API_KEY"
```
### Plan response [#plan-response]
```json title="List Plans Response"
{
"plans": [
{
"id": "plan_abc123",
"code": "monthly_premium",
"name": "Premium Monthly",
"description": "Access to all premium features",
"billingPeriodValue": 1,
"billingPeriodUnit": "month",
"prices": [
{ "currency": "USD", "amountCents": 999 },
{ "currency": "EUR", "amountCents": 899 }
],
"trialPeriodValue": 7,
"trialPeriodUnit": "day",
"status": "active"
}
]
}
```
Display these plans in your game UI, showing the name, description, price, and trial period (if any).
Use the `code` field (e.g., `monthly_premium`) to identify plans in your game
logic. The `id` is Stash's internal identifier.
## Create subscription checkout [#create-subscription-checkout]
When a player selects a plan, create a subscription checkout link using the [Create Subscription Checkout Link](/api/ingress/subscription-checkout-links/CreateSubscriptionCheckoutLink) endpoint.
Checkout creation should be done from your server to keep your API key
private.
```bash title="Create Subscription Checkout Link"
curl -X POST "https://api.stash.gg/sdk/subscriptions/checkout-links" \
-H "X-Stash-Api-Key: YOUR_API_KEY" \
-H "Content-Type: application/json" \
-d '{
"plan": "plan_abc123",
"user": {
"id": "player_123"
},
"currency": "USD"
}'
```
The response includes a checkout URL to present to the player:
```json title="Checkout Link Response"
{
"url": "https://checkout.stash.gg/subscribe/abc123",
"id": "checkout_abc123"
}
```
### Initial payment discounts [#initial-payment-discounts]
You can customize the first payment amount using the `initialPayment` field. This is useful for offering promotional pricing, trials with reduced cost, or custom first-month deals.
**Discount by fixed amount:**
```bash title="Initial Payment with Fixed Discount"
curl -X POST "https://api.stash.gg/sdk/subscriptions/checkout-links" \
-H "X-Stash-Api-Key: YOUR_API_KEY" \
-H "Content-Type: application/json" \
-d '{
"plan": "plan_abc123",
"user": {
"id": "player_123"
},
"currency": "USD",
"initialPayment": {
"discount": {
"amountOffCents": 500
}
}
}'
```
**Discount by percentage:**
```bash title="Initial Payment with Percentage Discount"
curl -X POST "https://api.stash.gg/sdk/subscriptions/checkout-links" \
-H "X-Stash-Api-Key: YOUR_API_KEY" \
-H "Content-Type: application/json" \
-d '{
"plan": "plan_abc123",
"user": {
"id": "player_123"
},
"currency": "USD",
"initialPayment": {
"discount": {
"percentOff": 50
}
}
}'
```
**Custom initial amount:**
```bash title="Initial Payment with Custom Amount"
curl -X POST "https://api.stash.gg/sdk/subscriptions/checkout-links" \
-H "X-Stash-Api-Key: YOUR_API_KEY" \
-H "Content-Type: application/json" \
-d '{
"plan": "plan_abc123",
"user": {
"id": "player_123"
},
"currency": "USD",
"initialPayment": {
"customAmountCents": 199
}
}'
```
The `initialPayment` only affects the first billing cycle. Subsequent renewals
will be charged at the plan's regular price.
After the player completes the checkout, Stash creates the subscription and sends a `subscription.created` webhook to your backend.
## Subscription change (upgrade) checkout [#subscription-change-upgrade-checkout]
To change an **existing** subscription (plan upgrade and/or payment method), create a **subscription change checkout link** with [Create a subscription change checkout link](/api/ingress/subscription-checkout-links/CreateSubscriptionChangeCheckoutLink):
```bash title="Create Subscription Change Checkout Link"
curl -X POST "https://api.stash.gg/sdk/subscriptions/sub_xyz789/change-checkout-links" \
-H "X-Stash-Api-Key: YOUR_API_KEY" \
-H "Content-Type: application/json" \
-d '{
"newPlan": "plan_higher_tier"
}'
```
The response includes `url` and `id` (for example a checkout URL like `https://checkout.stash.gg/subscription/change/{checkoutLinkId}`). At least one of `newPlan` or `updatePaymentMethod` must be set; see the API reference for optional fields such as `billingAnchor`, `initialPayment`, and `paymentMethod`.
**Eligibility:** `active`, `trialing`, or `canceled` with `current_period_end` still in the future (canceled but still in the paid window). If the subscription is canceled **after** that paid window, create a **new** subscription with [Create Subscription Checkout Link](/api/ingress/subscription-checkout-links/CreateSubscriptionCheckoutLink) instead.
**Behavior:** Creating the link only validates eligibility and stores the link—it does **not** reactivate a canceled subscription or apply the plan change. If the buyer abandons checkout, the subscription stays as-is (for example, still canceled). When checkout **completes successfully**, Stash applies the upgrade and, if the subscription was canceled-but-not-expired, reactivates it as part of that update.
See the API reference for full request and response fields.
## Handle webhooks [#handle-webhooks]
Set up a webhook endpoint to receive subscription lifecycle events. See the [Webhooks guide](/guides/get-started/stash-webhooks/overview) for general webhook setup.
### Subscription webhook events [#subscription-webhook-events]
| Event | Description |
| -------------------------------- | ------------------------------------- |
| `subscription.created` | New subscription created |
| `subscription.updated` | Subscription plan or status changed |
| `subscription.canceled` | Player canceled their subscription |
| `subscription.reactivated` | Canceled subscription was reactivated |
| `subscription.expired` | Subscription reached terminal state |
| `subscription.payment_failed` | Renewal payment failed |
| `subscription.payment_succeeded` | Renewal payment succeeded |
### Webhook payload (v2) [#webhook-payload-v2]
Subscription webhooks use a v2 payload format:
```json title="subscription.created Webhook"
{
"type": "subscription.created",
"data": {
"id": "sub_xyz789",
"external_account_id": "player_123",
"plan_id": "plan_abc123",
"status": "active",
"period": {
"value": 1,
"unit": "month"
},
"trial_end": "2024-02-01T00:00:00Z",
"access_end_date": "2024-03-01T00:00:00Z",
"current_period_end": "2024-03-01T00:00:00Z",
"next_billing_date": "2024-03-01T00:00:00Z",
"cancel_at_period_end": false,
"canceled_at": null,
"created_at": "2024-01-01T00:00:00Z"
}
}
```
### Handling subscription.created [#handling-subscriptioncreated]
When you receive `subscription.created`:
1. Store the subscription ID and player mapping
2. Grant the player access to subscription benefits
3. Update your game's subscription UI
```javascript title="Handle subscription.created"
app.post('/webhooks/stash', (req, res) => {
const { type, data } = req.body;
if (type === 'subscription.created') {
// Grant subscription benefits to player
await grantSubscriptionAccess(data.external_account_id, data.plan_id);
// Store subscription for later reference
await saveSubscription(data);
}
res.status(200).send('OK');
});
```
### Handling subscription.expired [#handling-subscriptionexpired]
When you receive `subscription.expired`:
1. Revoke the player's subscription benefits
2. Update your game's subscription UI
3. Optionally prompt the player to resubscribe
### Payment webhook events [#payment-webhook-events]
Payment webhooks (`payment.succeeded`, `payment.failed`, `payment.refunded`, `dispute.opened`, `dispute.closed`) use the same v2 payload format as subscription events. See [Payment Events](/guides/get-started/stash-webhooks/webhook-list#payment-events-v2) in the webhook list for event types and payload schemas.
## Manage subscriptions [#manage-subscriptions-1]
### Check subscription status [#check-subscription-status]
Use [List Subscriptions](/api/ingress/subscriptions/ListSubscriptions) to check a player's active subscriptions:
```bash title="List Player Subscriptions"
curl -X GET "https://api.stash.gg/sdk/subscriptions?external_account_id=player_123" \
-H "X-Stash-Api-Key: YOUR_API_KEY"
```
Filter by status to find only active subscriptions:
```bash title="List Active Subscriptions"
curl -X GET "https://api.stash.gg/sdk/subscriptions?external_account_id=player_123&status=active" \
-H "X-Stash-Api-Key: YOUR_API_KEY"
```
### Cancel a subscription [#cancel-a-subscription]
Allow players to cancel their subscription using [Cancel Subscription](/api/ingress/subscriptions/CancelSubscription):
```bash title="Cancel Subscription"
curl -X POST "https://api.stash.gg/sdk/subscriptions/sub_xyz789/cancel" \
-H "X-Stash-Api-Key: YOUR_API_KEY"
```
After cancellation:
* `cancel_at_period_end` becomes `true`
* Player keeps access until `current_period_end`
* Webhook `subscription.canceled` is sent
### Reactivate a subscription [#reactivate-a-subscription]
If a player changes their mind before the period ends, reactivate with [Reactivate Subscription](/api/ingress/subscriptions/ReactivateSubscription):
```bash title="Reactivate Subscription"
curl -X POST "https://api.stash.gg/sdk/subscriptions/sub_xyz789/reactivate" \
-H "X-Stash-Api-Key: YOUR_API_KEY"
```
Reactivation only works while the subscription is `canceled`. Once it's
`expired`, the player must create a new subscription.
## Testing renewal scenarios [#testing-renewal-scenarios]
In the **test environment**, Stash supports simulation cards that return scripted payment outcomes for subscription initial payments and renewals. Use these cards to exercise grace periods, retry recovery, declines, and system errors without waiting on a real PSP.
Simulation cards only apply in the test environment. Use any future expiration
date and a valid CVC (for example, `03/30` and `737`) with the card numbers
below. For one-off checkout testing, see [Test Card
Numbers](/guides/get-started/test-cards).
Simulated payments do not go through the PSP, even in the test environment.
Stash will **not** send `payment.succeeded`, `payment.failed`, or other
`payment.*` webhook events for these cards. Rely on `subscription.*` lifecycle
events where they apply — but note that the system-error card (`0028`) does
**not** emit `subscription.payment_failed` either; see [System errors vs
payment declines](#system-errors-vs-payment-declines) below.
### How simulation works [#how-simulation-works]
Each simulation card defines a sequence of outcomes keyed by **billing period** and **retry attempt**:
| Index | Meaning |
| ------------ | ---------------------------------------- |
| **Period 0** | Initial subscription payment at checkout |
| **Period 1** | First renewal |
| **Period 2** | Second renewal |
| **Period N** | Nth renewal |
Within each period, **retry count** tracks payment attempts during that billing cycle:
| Retry count | Meaning |
| ----------- | ---------------------------------------------- |
| **0** | First payment attempt for the period |
| **1** | First retry (for example, during grace period) |
| **2** | Second retry |
### Simulation test cards [#simulation-test-cards]
| Card number | Scenario | Expected behavior |
| --------------------- | --------------------------------- | ------------------------------------------------------------------------------------------------------------------------------------------------------------------------------------------------------------------------------------------------------------ |
| `4000 0000 0000 0002` | Grace period and retry exhaustion | Initial payment succeeds. First renewal succeeds. From the second renewal onward, every attempt declines with **Insufficient Funds** — including retries during the grace period. Subscription moves to `past_due`, then `expired` if retries are exhausted. |
| `4000 0000 0000 0010` | Retry recovery | Initial payment succeeds. First renewal fails on the first attempt (**Card Expired**), then succeeds on the first retry. All subsequent renewals succeed. |
| `4000 0000 0000 0036` | Immediate decline | Every attempt declines with **Do Not Honor**. |
### Testing payment declines and reasons [#testing-payment-declines-and-reasons]
The simulation cards above exercise subscription *lifecycle* transitions but do not produce `payment.*` webhooks. To test the payment-failure webhooks themselves, and the `reason` they carry, use the decline cards below. Each is declined with a specific reason, and Stash delivers a [`payment.failed`](/guides/get-started/stash-webhooks/webhook-list#payment-events-v2) webhook (and, when a renewal on an existing subscription is declined, a [`subscription.payment_failed`](/guides/get-started/stash-webhooks/webhook-list#subscription-events-v2) webhook) whose `reason` field is set to the value shown.
These test cards use a new payment implementation that is currently enabled
for newer partners. If a card below doesn't produce the expected decline,
reach out to your Stash representative to confirm your account has access.
Enter any future expiration date (for example, `03/30`) and any valid CVC — the card number alone decides the outcome.
| Card number | `reason` | Meaning |
| ------------------- | ------------------------- | ---------------------------------------------- |
| 4544 2491 6767 3670 | `insufficient_funds` | The card has insufficient funds. |
| 4485 3815 7718 2090 | `invalid_card` | Invalid card number or account. |
| 4897 4535 6848 5113 | `suspected_fraud` | The payment was flagged as potential fraud. |
| 4818 9242 5013 1070 | `card_blocked` | The card is restricted or blocked. |
| 4941 2020 6099 9329 | `card_lost_or_stolen` | The card was reported lost or stolen. |
| 4539 4679 8710 9256 | `issuer_declined` | The bank declined the payment. |
| 4276 0385 7859 6818 | `transaction_not_allowed` | This payment is not permitted for the card. |
| 4556 2945 9375 7189 | `limit_exceeded` | An amount or frequency limit was exceeded. |
| 4500 6228 6834 1387 | `authentication_required` | The card requires 3D Secure authentication. |
| 4485 8998 0515 6040 | `payment_stopped` | The cardholder stopped or revoked the payment. |
| 4556 2537 5271 2245 | `declined_other` | Declined for another reason. |
Treat any `reason` value you don't recognize as `declined_other` — new values
may be added over time.
To test `card_expired`, use any card number above with an expiration date in the past; the payment is declined as an expired card and `reason` is `card_expired`. A failed first-time payment delivers `payment.failed` only; `subscription.payment_failed` is sent when a renewal on an existing subscription fails.
## Best practices [#best-practices]
### Validate access server-side [#validate-access-server-side]
Always validate subscription access on your game server, not just the client. Check the subscription status and `access_end_date` before granting premium features.
### Handle payment failures gracefully [#handle-payment-failures-gracefully]
When you receive `subscription.payment_failed`, don't immediately revoke access. The player is in a grace period and Stash is retrying the payment. Only revoke access when you receive `subscription.expired`.
### Cache subscription status [#cache-subscription-status]
Cache subscription status locally to avoid API calls on every game action. Update the cache when you receive webhook events or when the player opens subscription UI.
### Provide clear subscription UI [#provide-clear-subscription-ui]
Show players:
* Their current plan and status
* Next billing date
* Option to cancel or manage payment method
* Clear indication if they're in a trial period
---
## Section: Guides
# Web Apps & WebGL
**URL:** https://docs.stash.gg/guides/stash-pay/web-integration/web-apps
**Description:** Integrate Stash Pay in websites, web apps, and WebGL games using the Stash Pay web SDK.
## Install the SDK [#install-the-sdk]
```bash
npm install @stashgg/stash-pay
```
The package supports three integration modes from one install:
* React component (`@stashgg/stash-pay`)
* Framework-agnostic API (`@stashgg/stash-pay/vanilla`)
* Script-tag UMD bundle (`window.StashPay.open(...)`)
## Presentation modes [#presentation-modes]
### React component [#react-component]
Use this when checkout state is controlled by your app UI and component lifecycle.
```tsx
import { StashPay } from '@stashgg/stash-pay';
import '@stashgg/stash-pay/styles';
console.log('paid', e.orderId)}
onFailure={(e) => console.log('failed', e.message)}
onClose={() => setIsOpen(false)}
/>
```
### Vanilla API [#vanilla-api]
Use this when you want framework-agnostic control.
```ts
import { open } from '@stashgg/stash-pay/vanilla';
import '@stashgg/stash-pay/styles';
open({
checkoutUrl,
onSuccess: (e) => console.log('paid', e.orderId),
onFailure: (e) => console.log('failed', e.message),
onClose: () => console.log('closed')
});
```
### Script-tag UMD (WebGL-friendly) [#script-tag-umd-webgl-friendly]
Use this in plain HTML or embedded game contexts (including Unity WebGL pages).
```html
```
## Available parameters [#available-parameters]
The SDK options are shared across React, vanilla, and UMD integrations (except where noted).
| Option | Type | Default | Notes |
| :---------------------------------------------------------------------------------------- | :---------------------------------------------------------------------------- | :----------------------------------- | :-------------------------------------------------------------------- |
| `checkoutUrl` | `string` | — | Required checkout URL from your backend. |
| `isOpen` *(React only)* | `boolean` | — | Required in React component mode; controls visibility. |
| `checkoutTheme` | `'light' \| 'dark'` | — | Forwards `theme` to checkout page (different from host card theming). |
| `position` | `'bottom-sheet' \| 'center-modal' \| 'side-panel-right' \| 'side-panel-left'` | `'bottom-sheet'` | Layout preset. |
| `width` | `string \| number` | — | Override preset width. |
| `height` | `string \| number` | — | Override preset height. |
| `zIndex` | `number` | `2147483000` | Host layer z-index. |
| `portalTarget` / `container` | `HTMLElement` | `document.body` | Mount target element. |
| `showCloseButton` | `boolean` | `true` | Show/hide close button. |
| `showDragBar` | `boolean` | `true` on bottom-sheet, else `false` | Bottom-sheet drag indicator. |
| `dismissOnBackdropClick` | `boolean` | `true` | Close on backdrop click. |
| `dismissOnEscape` | `boolean` | `true` | Close on Esc key. |
| `autoCloseOnSuccess` | `boolean` | `true` | Fires callback before close. |
| `autoCloseOnFailure` | `boolean` | `true` | Auto-close after failure event. |
| `backdrop` | `{ blur?, color?, opacity?, hidden? }` | — | Backdrop styling/visibility overrides. |
| `theme` | `StashPayTheme` | — | Per-instance CSS variable overrides. |
| `animationDuration` | `number` | `300` | Animation duration in ms. |
| `ariaLabel` | `string` | `'Stash Pay checkout'` | Dialog accessibility label. |
| `iframe` | `StashPayIframeOptions` | — | Iframe behavior and security options. |
| `injectStyles` | `boolean` | UMD: `true`, otherwise `false` | Runtime style injection toggle. |
| `cspNonce` | `string` | — | Nonce for injected style tag. |
| `onOpen` / `onClose` / `onReady` / `onError` / `onSuccess` / `onFailure` / `onProcessing` | function | — | Lifecycle and payment callbacks. |
For the full and always up-to-date API surface, refer to the package docs on npm: [@stashgg/stash-pay](https://www.npmjs.com/package/@stashgg/stash-pay).
## Open checkout from websites and WebGL shells [#open-checkout-from-websites-and-webgl-shells]
For web games and launcher-style web surfaces, keep checkout orchestration at the page shell level:
1. Request checkout URL from your backend
2. Open Stash Pay from React, vanilla API, or UMD bridge
3. Handle callbacks for UX updates
4. Confirm final purchase state on backend before granting entitlements
For WebGL, the most common pattern is the UMD entry point from the host page and event handoff between game runtime and page JavaScript.
## Playground and implementation testing [#playground-and-implementation-testing]
Use the [Stash Pay Playground](https://pay-playground.stashpreview.com/) to:
* test checkout URL behavior quickly
* validate config changes and visual options
* inspect callback events in real time
## Detailed references [#detailed-references]
* Repository and sample app: [stash-web](https://github.com/stashgg/stash-web)
* SDK package details: [@stashgg/stash-pay on npm](https://www.npmjs.com/package/@stashgg/stash-pay)
* Interactive playground: [pay-playground.stashpreview.com](https://pay-playground.stashpreview.com/)
* Backend flow reference: [/guides/stash-pay/integration](/guides/stash-pay/integration)
---
## Section: Guides
# Catalog Management
**URL:** https://docs.stash.gg/guides/stash-webshop/catalog/catalog-management
**Description:** Learn about the two ways to manage your Stash Webshop catalog: Static Managed Catalog for stable, Studio-managed catalogs, and Real-time Catalog for real-time synchronization with your game server.
Stash Webshop supports two ways to manage your catalog:
* **Static (Managed Catalog)**: Set up in Stash Studio or through the API. Use this option for stable catalogs.
* **Real-time Catalog**: Sync the catalog in real time from your game server.
Start with a managed catalog to launch your webshop with less setup. As your needs grow, you can move to a Real-time Catalog for full control and real-time synchronization with your in-game store.
## Managed catalog [#managed-catalog]
With a managed catalog, offers are stored in Stash and managed through Stash Studio or API calls.
When a player opens the webshop, the catalog loads directly from Stash's backend. You are responsible for keeping your catalog data up to date so Stash can update the webshop catalog.
## Real-time Catalog [#real-time-catalog]
The Real-time Catalog fetches offers in real time from your game server each time the webshop loads.
Stash does not store catalog data. Instead, it calls your API endpoint to get the latest offers and segmentation. This approach gives you full control through your existing backend tools.
---
## Section: Guides
# Managed Catalog
**URL:** https://docs.stash.gg/guides/stash-webshop/catalog/managed-catalog
**Description:** Learn how to create and publish products, configure Free Gift offers, and schedule product availability in the Stash Webshop managed catalog.
The managed catalog lets you create, configure, and publish webshop products entirely from Stash Studio — no code required. Use it for stable catalogs that don't depend on player state. For real-time, personalized catalogs see the [Real-time Catalog](/guides/stash-webshop/catalog/real-time-catalog) guide instead.
## Open the Products section [#open-the-products-section]
In Stash Studio, sign in, select your **Client Studio** (if you have multiple), open the **Game** you want to manage, then navigate to **Webshop → Products** and click **Add New Product**.
***
## Create a product [#create-a-product]
A product is created with the following fields. Required fields must be set before publishing.
### Basic information [#basic-information]
* **ID** — unique identifier for the product.
* **Product Name** — internal name used for management.
* **Display Name** — name shown to players in the webshop.
* **Product Description** — description visible to players.
### Images [#images]
* **Main Image** — primary image shown in the webshop.
* **Background Image** *(optional)* — additional visual displayed behind the product card.
### Items [#items]
Products can include one or more items. For each item, set its image and quantity. Use the **Add** button to include multiple items in the same product. The items define what the player receives after purchase.
### Pricing [#pricing]
Set the **Price (USD)** that the player pays. To make the product claimable for free instead of charging, see [Free Gift offers](#free-gift-offers) below.
### Publishing [#publishing]
Products are created as **Draft**. When all required fields are set, click **Publish** to make the product available in the webshop (subject to scheduling, if configured).
* Product ID must be unique.
* Display Name and Product Description are customer-facing.
* Items define what the player receives after purchase.
***
## Free Gift offers [#free-gift-offers]
Toggle **Free Gift** in the **Price (USD)** section to make a product claimable at no cost. The product still delivers all configured items — no payment is required from the player.
This is useful for promotions, login rewards, or retention campaigns. Free Gift can be combined with [scheduling](#scheduled-availability) to create time-limited free claims.
Free Gift is configured at the product level. The product must still be properly configured (items, images, etc.) for players to receive anything when they claim it.
***
## Scheduled availability [#scheduled-availability]
Toggle **Schedule Product** in the **Product Scheduling** section to control when a product appears in the webshop. Outside the configured window the product is hidden and cannot be purchased.
Use this for limited-time offers, seasonal campaigns, or recurring deals. Scheduling can be combined with [Free Gift](#free-gift-offers) for time-boxed free claims.
Scheduling is optional. Without it, a published product is available immediately and stays available until you unpublish it.
---
## Section: Guides
# Real-time Catalog
**URL:** https://docs.stash.gg/guides/stash-webshop/catalog/real-time-catalog
**Description:** Learn how to expose REST API endpoints on your game backend to power personalized web shops with real-time offers. This guide covers the Catalog, Player, and Purchase APIs with protobuf-based type-safe integration.
The Stash v1 WebShop APIs enable game studios to power dynamic, player-personalized web shops with special offers. These protobuf-based APIs provide a robust, type-safe integration path that accelerates development while ensuring reliability at scale.
## Getting Started [#getting-started]
You can integrate the v1 APIs in two ways. Both produce the same endpoints; pick whichever fits your stack, then follow the [Integration Steps](#integration-steps) below to roll it out.
Clone the [proto repository](https://github.com/stashgg/public-api) and generate type-safe clients automatically:
```bash
# Add the public-api repo as a submodule in your backend repo
git submodule add https://github.com/stashgg/public-api.git
# Or just clone it locally
git clone https://github.com/stashgg/public-api.git
# Generate clients using the included script
cd public-api
./gen.sh
```
The `gen.sh` script generates clients for Go, TypeScript, and OpenAPI specs. Adapt it for your preferred language (C#, Java, Python, etc.) using standard protobuf tooling.
**No documentation required**: The generated clients provide full type
definitions, so your IDE's autocomplete guides the integration.
Implement the REST endpoints described in the [API Reference](/api/egress) directly in your preferred language without code generation. This gives you maximum control over your client code at the cost of more upfront work.
The [proto repository](https://github.com/stashgg/public-api) is still a useful source of truth for field types, enum values, and validation rules, even if you don't run `gen.sh`.
### Integration Steps [#integration-steps]
### Obtain API credentials [#obtain-api-credentials]
Your Stash engineering partner will generate an Egress API key for you in [Stash Studio](https://studio-test.stash.gg). Set your Game Backend URL in Stash Studio to match where the APIs will be hosted. Custom API endpoint paths can be configured if needed.
### Generate clients or review the API reference [#generate-clients-or-review-the-api-reference]
Use the proto repository to generate type-safe clients, or review the [API Reference](/api/egress) for detailed endpoint documentation.
### Implement the required endpoints [#implement-the-required-endpoints]
At minimum, implement these endpoints on your game backend:
**Required:**
* [GetCatalog](/api/egress/catalog/GetCatalog): Returns the product catalog
* [ConfirmPayment](/api/egress/purchase/ConfirmPayment): Powers both WebShop and StashPay
**Recommended:**
For the best multi-platform user experience across the Web Shop & Game Client(s), especially when selling items with limited inventory:
* [RegisterPayment](/api/egress/purchase/RegisterPayment): Reserves inventory across all game/shop clients
* [CancelPayment](/api/egress/purchase/CancelPayment): Releases inventory reservation locks
**Optional**:
* [GetOfferDetails](/api/egress/catalog/GetOfferDetails): Show extra details like drop rates for legal compliance
* [GetPlayer](/api/egress/players/GetPlayer): Show player-specific details like avatar, level, currency
### Test with test credentials [#test-with-test-credentials]
Test your integration with your [studio-test.stash.gg](https://studio-test.stash.gg) credentials before going live.
## API Overview [#api-overview]
The v1 APIs are organized into three services, exposed as REST endpoints. Stash sends requests to your Game Studio's backend servers:
All endpoints use **HMAC authentication** for secure server-to-server communication.
## Catalog API [#catalog-api]
Retrieve dynamic, player-specific product catalogs.
### GetCatalog [#getcatalog]
`GET /api/v1/catalog`: returns the complete product catalog for a given `platform`, `region`, `language`, and `playerId`. The response is structured as sections (grids or carousels) containing `PurchasableItem`, `OfferChainItem`, or `NonPurchasableItem` entries.
For the full request parameters and response schema, see the [GetCatalog API Reference](/api/egress/catalog/GetCatalog).
### GetOfferDetails [#getofferdetails]
`GET /api/v1/catalog/offer`: returns detailed offer information including **drop rates for loot boxes**, required for legal compliance in many jurisdictions.
For the full request parameters and response schema, see the [GetOfferDetails API Reference](/api/egress/catalog/GetOfferDetails).
***
## Purchase API [#purchase-api]
Handle the complete purchase lifecycle with three endpoints.
### Purchase Flow [#purchase-flow]
### RegisterPayment [#registerpayment]
`POST /api/v1/purchase/register` (**Step 1**): registers a purchase intent. Your backend should **reserve inventory** for the player and respond with one of the inline status codes (e.g. `SUCCESS_REGISTERED`, `FAILED_INSUFFICIENT_INVENTORY`, `FAILED_PURCHASE_LIMIT_EXCEEDED`, `FAILED_INVALID_PRICE`).
For the full list of status codes and the complete request/response schema, see the [RegisterPayment API Reference](/api/egress/purchase/RegisterPayment).
### ConfirmPayment [#confirmpayment]
`POST /api/v1/purchase/confirm` (**Step 2A**): confirms and completes the purchase after successful payment. Your backend grants items to the player and acknowledges the transaction.
**Unified Integration**: This endpoint is the same API used for StashPay
integrations. Implement once to power both your WebShop and StashPay checkout
links.
For the full request/response schema (including optional fields like `extraInGameCurrency`, `extraLoyaltyPoints`, and `emailMarketingOptIn`), see the [ConfirmPayment API Reference](/api/egress/purchase/ConfirmPayment).
### CancelPayment [#cancelpayment]
`POST /api/v1/purchase/cancel` (**Step 2B**, failure path): cancels a pending purchase. Your backend should **release reserved inventory** so the player can retry.
See the [CancelPayment API Reference](/api/egress/purchase/CancelPayment) for the full request/response schema.
### Loyalty snapshot on purchase requests [#loyalty-snapshot-on-purchase-requests]
When the shop runs a live [loyalty program](/guides/stash-webshop/how-tos/loyalty), the `RegisterPayment` and `ConfirmPayment` request bodies carry a `loyalty` snapshot (type `PlayerLoyaltyState`): the same object your backend already receives on loyalty webhooks. This gives your backend the player's XP balance, tier, and tier-relative earn multiplier at purchase time, in-band with the register/confirm calls, so it can apply tier-aware logic (for example bonus sizing) without a separate lookup.
```json title="loyalty snapshot on the purchase request body"
"loyalty": {
"campaignId": "spring_2026",
"totalPoints": 1250,
"currentTierId": "silver",
"pointsMultiplierPermille": 2000,
"pointsToNextTier": 750,
"pointsToNextMilestone": 250,
"nextMilestone": {
"milestoneId": "milestone_uuid",
"rewards": [
{ "itemId": "gold-coins", "quantity": 500, "type": "IN_GAME_CURRENCY" }
]
}
}
```
* The snapshot reflects state **as of the request**. On `RegisterPayment` it is pre-purchase; on `ConfirmPayment` it reflects the XP the confirmed purchase awards.
* It is present only when the shop has a published, enabled loyalty program and a live campaign. Otherwise the field is omitted and the request body is byte-identical to a non-loyalty shop's.
* Treat it as read-only context. It never replaces the authoritative loyalty state your backend receives on the [loyalty webhooks](/guides/stash-webshop/how-tos/loyalty/analytics-app-integration); grant XP-linked effects from the webhook, not from this snapshot.
The snapshot fields match the shared `PlayerLoyaltyState` payload documented in [Loyalty webhooks](/guides/stash-webshop/how-tos/loyalty/analytics-app-integration#the-loyalty-payload). The signed `pointsDelta` and `previousTierId` are event-specific and meaningful only on webhooks; the purchase-request snapshot otherwise carries the same fields, including the balance, tier, progression, and `nextMilestone`. When the purchase's XP gain crossed one or more milestone thresholds, the snapshot also carries `unlockedMilestones`, with the same semantics and de-duplication guidance as on the webhook payload.
***
## Player API [#player-api]
Retrieve player profile information for personalized experiences.
### GetPlayer [#getplayer]
`GET /api/v1/player`: returns player profile data (name, avatar, language, in-game level, in-game currency) for display in the web shop. Stash calls this endpoint with the `playerId` you supplied to the catalog request.
See the [GetPlayer API Reference](/api/egress/players/GetPlayer) for the full request/response schema.
## Key Data Types [#key-data-types]
### Catalog Items [#catalog-items]
The catalog supports four item types using protobuf `oneof`:
| Type | Use Case |
| :--------------------- | :----------------------------------------------------------------------------------------------- |
| **PurchasableItem** | Standard products and bundle offers with pricing |
| **OfferChainItem** | Progressive offers that unlock sequentially with `CLAIMED` / `UNLOCKED` / `LOCKED` link statuses |
| **NonPurchasableItem** | Banners, promotions, and informational displays |
| **FreeItem** | Free-to-claim gifts with a claim `status`, an optional `refreshAt` window, and claim tracking |
For the full field-level structure of each type, including pricing, contents, expiration, attributes, and offer chain link details, see the [GetCatalog API Reference](/api/egress/catalog/GetCatalog).
### Free items and claim identity [#free-items-and-claim-identity]
A `FreeItem` is claimable at no cost. When a player claims one, Stash records the redemption and emits a [`FREE_ITEM_REDEEMED` webhook](/guides/get-started/stash-webhooks/webhook-list). Two fields govern how claims are tracked:
* **`status`**: your response is authoritative for whether the gift is offered (`AVAILABLE`, `CLAIMED`, or `LOCKED`). After a recorded claim, Stash overrides `AVAILABLE` to `CLAIMED` on catalog reads so a reload cannot show a consumed gift as claimable. It only ever applies that one flip: a `CLAIMED` or `LOCKED` status you send is never changed, and Stash never produces `AVAILABLE`. The override ends at the item's `refreshAt`; from then on your status alone decides the next period.
* **`claimId`** (optional): a stable claim identity, separate from `itemId`. Free items that share a `claimId` are the same claim for a claim period: claiming any one of them consumes the claim for all of them. When absent, `itemId` is the claim identity, which is the existing behavior; integrations that do not send it change nothing.
Use `claimId` when the item you serve varies per player, for example a daily gift whose `itemId` differs by loyalty tier. Keep the `claimId` stable across the variants and the claim still de-duplicates as one gift per period, whichever variant a player sees.
Rules to follow:
* Return at most one item per `claimId` per response; additional items sharing one may be discarded. A locked preview of a later reward must carry a distinct `claimId`, or none at all.
* A repeat claim inside the same window returns an idempotent success: no duplicate `FREE_ITEM_REDEEMED` webhook, and no second Loyalty XP credit for gifts that grant XP.
* On the `FREE_ITEM_REDEEMED` payload, `itemId` is the item that was granted; `claimId` is the claim it consumed and appears only when it differs from `itemId`.
### Localization [#localization]
All user-facing text supports localization. For each text field you can return either (but not both):
* **`localizationKey`**: Stash-side lookup in our localization system (requires sharing localization keys with Stash up front).
* **`localizedText`**: Pre-resolved text in the player's language, computed by your backend.
Pick whichever fits your localization pipeline; you can mix the two across different fields in the same response.
## Web Store Bonuses [#web-store-bonuses]
Incentivize web purchases with bonus content:
| Feature | Description |
| :-------------------- | :---------------------------------------------------- |
| **Bonus Items** | Extra items added exclusively for web purchases |
| **Bonus Quantities** | Percentage increases on item quantities |
| **Visual Indicators** | `ContentItemType.WEB_STORE_BONUS` for UI highlighting |
## Drop Rate Compliance [#drop-rate-compliance]
For loot boxes and randomized rewards, the API supports drop rate disclosure required for legal compliance in many jurisdictions.
### Enabling Drop Rate Display [#enabling-drop-rate-display]
To show drop rates or offer details in a popup:
1. **Add a badge with the show details action**: Include a badge on the offer with `action: BADGE_ACTION_SHOW_OFFER_DETAILS`. This signals to the frontend to display an info button that calls the [GetOfferDetails](/api/egress/catalog/GetOfferDetails) API and opens the corresponding modal.
2. **Enable per-item details (optional)**: For individual content items that should show their own reward/drop rate details, include `clickAction: CONTENT_ITEM_CLICK_ACTION_SHOW_DETAILS_BY_ID` on that `ContentItem`.
### Example Catalog.PurchasableItem Response [#example-catalogpurchasableitem-response]
```json
{
"attributes": {
"badge": {
"text": { "defaultText": "Loot Box" },
"action": "BADGE_ACTION_SHOW_OFFER_DETAILS"
}
},
"contents": [
{
"name": "Legendary Hero",
"guid": "xxx",
"image": "https://...",
"quantity": "1",
"dropRate": "2.5%",
"clickAction": "CONTENT_ITEM_CLICK_ACTION_SHOW_DETAILS_BY_ID"
},
{
"name": "Common Item",
"quantity": "1",
"dropRate": "97.5%"
}
]
}
```
If using `clickAction`, the `guid` must be supplied (can't be auto-generated)
to cross-reference with the GetOfferDetails API response.
## Caching [#caching]
Stash caches the catalog response your server returns. This reduces load on your catalog server and improves shop load times for players.
**Caching is enabled by default for all Real-time Catalog integrations.** If you wish to disable it temporarily for testing purposes, let your engineering partner at Stash know.
### How long are responses cached? [#how-long-are-responses-cached]
The effective cache lifetime is:
```
min(5 minutes, earliest upcoming timestamp in your response)
```
Stash inspects every refresh and expiration timestamp in your response (offer refresh times, offer and item expirations, section display expirations, and scheduled resets such as a midnight-UTC daily offer rollover) and caps the cache at the earliest one. Stash only ever **shortens** the window from these signals; it never serves a cached response past the point your response indicated.
The default cap is **5 minutes** when your response contains no timestamp signals.
**Recommended pattern for timed catalog resets:** set the refresh or expiration timestamp equal to your planned reset time. Stash re-fetches exactly at that boundary, so there is no perceptible delay when the catalog changes.
### Immediate invalidation after player actions [#immediate-invalidation-after-player-actions]
Stash clears a player's cached catalog immediately after every non-read action:
* Purchases
* Free-gift redemptions
* Loyalty-milestone claims (where integrated)
The next shop load re-fetches live from your server. No special annotation or forced reload is needed. This is automatic.
### Always-fresh Stash-side data [#always-fresh-stash-side-data]
Only the raw response from your catalog API is cached. Data that Stash computes (prices, bonuses, offer-chain and purchase-progression state, injected free offers) is recomputed on every request and is never cached. Changes you make to prices or bonuses in Stash Studio are reflected immediately regardless of the cache window.
### Force a catalog refresh [#force-a-catalog-refresh]
Most integrations never need this. The cache window is short, and Stash already clears a player's cached catalog automatically after the actions above.
If something changes **outside** the web shop and you want the catalog view in the Web Shop to reflect it right away, call [Force refresh catalog](/api/ingress/catalog/ForceRefreshCatalog) from your backend. Pass a `player_id` to refresh a single player, or omit it to refresh every player of your shop. It applies only to shops with a Real-time Catalog integration; for any other integration it is a no-op that still returns success.
This endpoint is optional and never required for correctness. Before any purchase, Stash re-checks the catalog live against your server (current quantities, bonuses, and availability), so a stale catalog view in the Web Shop can never let a player buy something that is no longer available. Use it only to keep the catalog view in the Web Shop consistent; the catalog view in the Web Shop is otherwise at most a few minutes behind.
Never omit the `player_id` unless you know exactly what you are doing. Forcing a catalog refresh for every single player can result in a much slower Web Shop experience for all players across the board and a spike of API calls to your external catalog API server.
| Scenario | Call `ForceRefreshCatalog`? |
| ---------------------------------------------------------------------------------------------------- | -------------------------------------------------------------------------------- |
| A player made a purchase **in-game** (outside the web shop) that changes what they should see | ✅ Yes (optional); refresh so the catalog view in the Web Shop updates right away |
| Your catalog changed outside a normal player action and you want it visible before the cache expires | ✅ Yes (optional); shortens the visible staleness window |
| A player completed a purchase **in the web shop** | ❌ No; the cache is cleared automatically |
| A player redeemed a free gift or claimed a loyalty milestone | ❌ No; the cache is cleared automatically |
| You changed prices or bonuses in Stash Studio | ❌ No; Stash-computed data is never cached and updates immediately |
| Your shop does not use a Real-time Catalog integration | ❌ No; the call is a no-op |
### Frequently asked questions [#frequently-asked-questions]
**Does Stash cache the response my server returns?**
Yes. Stash caches your catalog/offer response for a short, bounded window. This reduces load on your catalog server and speeds up the shop for players.
**What is the worst-case staleness? How long is my data cached?**
`min(5 minutes, earliest refresh/expiration timestamp in your response)`. Without any timestamp signals in your response, responses may be served for up to 5 minutes.
**How do I make a catalog change appear at a known time, such as a daily reset?**
Include the planned reset time as the refresh or expiration timestamp in your response. Stash re-fetches exactly at that boundary with no delay.
**What happens after a player makes a purchase?**
The player's cached catalog is cleared immediately on every purchase, free-gift redemption, and loyalty-milestone claim. The next shop visit re-fetches live from your server. This is automatic. No special annotation is needed.
**Do I need to send `Cache-Control` HTTP headers?**
No. Stash does not use HTTP `Cache-Control` headers for this. Control freshness via refresh and expiration timestamps in your catalog payload instead.
**Can the cache show a player an offer they already purchased?**
The window is short, and Stash performs a fresh server-side check before completing any purchase or redemption. Stale attempts are rejected before they reach your server, so players cannot buy something that is no longer available. To minimize the visual window further, include accurate expiration or refresh timestamps in your response.
**My catalog has offers with different refresh times. How should I structure the timestamps?**
Include the earliest upcoming refresh or expiration timestamp across the catalog. Stash caps the cache lifetime to that value. Ideally align all refreshes to a single consistent reset time so the whole catalog expires together.
**Can caching be turned off while I test catalog changes?**
Yes. Contact your Stash engineering partner and they will disable caching for your test shop, so every request hits your server live.
**What are the benefits of caching?**
Faster shop loads for players, fewer requests to your catalog server, and improved reliability if your server is briefly slow or unavailable.
## Authentication [#authentication]
Stash authenticates outgoing requests to your game backend using a versioned HMAC-SHA256 signature in the `x-stash-hmac-signature` header:
```
x-stash-hmac-signature: v1;;;
```
| Field | Description |
| :---------------------- | :-------------------------------------------------------------- |
| `v1` | Protocol version |
| `` | Your immutable App ID (Studio → Project Settings → App details) |
| `` | Request timestamp in Unix milliseconds |
| `` | Standard base64-encoded HMAC-SHA256 signature |
The signature covers `"." + `, where `` is the exact bytes Stash transmits: empty string for GET requests, raw request body for POST requests. The HMAC key is your egress secret base64-decoded: the value shown in Studio → Project Settings → API Secrets is base64-encoded; decode it before computing the HMAC (e.g. `Buffer.from(secret, 'base64')`). Reject requests where `` is more than 5 minutes from your server clock.
### Verifying the signature [#verifying-the-signature]
For Node.js, Python, and Go implementation code, see [API Keys → HMAC Verification](/guides/get-started/stash-api-keys/overview#hmac-verification).
New shops (created on or after 2026-08-15) receive only `x-stash-hmac-signature`. The legacy unversioned `stash-hmac-signature` header is no longer emitted for them. New integrations should verify `x-stash-hmac-signature` only.
If you've implemented HMAC authentication and your game backend is still
responding to Stash's API requests with 3xx, 4xx, or 5xx error codes, you may
need to allowlist `test-api.stash.gg` and `api.stash.gg` on your cloud network
firewall.
## Configuration [#configuration]
To configure your Real-time Catalog endpoint in Stash Studio:
### Navigate to game settings [#navigate-to-game-settings]
In Stash Studio, navigate to your game settings.
### Open App Backend [#open-app-backend]
Go to **Project Settings** → **App Backend**
### Set endpoint URL [#set-endpoint-url]
Set your Game Backend URL to match where the Catalog & Purchase APIs will be hosted.
### Configure authentication [#configure-authentication]
Your Stash engineering partner can configure custom API endpoint paths if needed.
## Debugging & Logs [#debugging--logs]
Stash Studio provides comprehensive logging and debugging tools for your Real-time Catalog. Use these tools to monitor your catalog endpoint and troubleshoot issues:
* Check Stash Studio logs for endpoint response times
* Verify your endpoint returns valid JSON
* Ensure all required fields are present
* Test with your studio-test credentials before going live
---
## Section: Guides
# Create and Edit Promo Codes
**URL:** https://docs.stash.gg/guides/stash-webshop/how-tos/create-promo-codes
**Description:** Learn how to create and manage promo codes in Stash Studio. Configure discounts, redemption limits, minimum spend requirements, and duration settings to enable players to apply promotional discounts during checkout.
With promo codes, players can apply discounts during checkout.
You can create promo codes in Stash Studio and manage details such as descriptions, redemption limit, minimum spend, and duration.
## Steps to create promo codes [#steps-to-create-promo-codes]
Follow these steps in Stash Studio to create and edit promo codes:
### Navigate to Promo Codes [#navigate-to-promo-codes]
Navigate to **Webshop > Promo Codes**.
### Create new promo code [#create-new-promo-code]
Click **+ Create Promo Code**.
### Publish your promo code [#publish-your-promo-code]
Enter promo code details and click **Publish**.
After you publish, the code goes live immediately. If you set a future start time, players cannot use the code until that time. You can edit a promo code at any time.
### Promo code fields [#promo-code-fields]
The following table lists the fields available when creating or editing a promo code.
| Field | Description | Required |
| :--------------- | :----------------------------------------------------------------------------------------- | :------- |
| Code | Code that players enter at checkout (not case-sensitive) | Yes |
| Type | Choose a percentage discount or a bonus item | Yes |
| Description | Add an internal note to identify the promo code | No |
| Redemption Limit | Set the total number of times the code can be redeemed. Each player can redeem a code once | No |
| Minimum Spend | Set the minimum purchase amount in USD to activate the promo code | No |
| Duration | Define the start and end dates for the promo code | No |
## How players use promo codes [#how-players-use-promo-codes]
---
## Section: Guides
# Customize the Webshop Appearance
**URL:** https://docs.stash.gg/guides/stash-webshop/how-tos/customize-webshop-appearance
**Description:** Learn how to customize appearance settings directly in Stash Studio including brand assets like logos and backgrounds. Understand how to update webshop appearance settings and apply changes immediately.
You can customize some appearance settings directly in Stash Studio. Update brand assets such as your logo or background. Changes apply immediately after you save them.
For more options, see the [theme settings](/guides/get-started/manage-your-integration/edit-project-settings) in Stash Studio.
## Edit appearance settings [#edit-appearance-settings]
Follow these steps to edit appearance settings in Stash Studio:
### Navigate to Appearance [#navigate-to-appearance]
Go to the **Webshop** section in Stash Studio and select **Appearance**.
### Configure settings [#configure-settings]
Select the settings you want to change and update them.
### Save changes [#save-changes]
Click **Update** to save your changes.
---
## Section: Guides
# Account Linking
**URL:** https://docs.stash.gg/guides/stash-webshop/player-authentication/account-linking
**Description:** Learn how to connect a player's webshop session with their game client through account linking. Understand deep link setup, integration steps for different engines, and Unity-specific implementation using the Stash SDK.
Account linking connects a player's webshop session with their game client.
The webshop launches the game through a deep link (on mobile) or a QR code (on desktop). The deep link carries a session code. The game client attaches the player's authentication data to this code and sends both to the Stash API to complete login.
## Deeplink setup [#deeplink-setup]
Configure a deep link scheme in Stash Studio. Use a scheme that clearly represents your game. For example, the demo app uses `howlingwoods://`.
Follow these steps:
### Open your game instance [#open-your-game-instance]
Open your game instance in Stash Studio.
### Navigate to Webshop [#navigate-to-webshop]
In the main menu, click **Webshop**.
### Configure URL Schemes [#configure-url-schemes]
Go to **Account Linking**, then select the **URL Schemes** tab.
## Integrate account linking [#integrate-account-linking]
The example below uses Unity, but you can follow the same flow in other engines such as Unreal Engine, Godot, or custom web/native clients.
### Obtain the Player's Authentication Token [#obtain-the-players-authentication-token]
Use the platform's authentication system (Google, Apple, or other providers) to retrieve a valid token or credential for the player.
### Extract the Code [#extract-the-code]
Parse the deep link or callback URL to extract the `code` parameter.
### Call the Stash Linking Endpoint [#call-the-stash-linking-endpoint]
Send the code and the player's authentication data to your game server. From there, call [`ApproveCustomLogin`](/api/ingress/webshop-account-linking/ApproveCustomLogin) (`POST /sdk/custom_login/approve`) to complete the link.
`ApproveCustomLogin` is a server-side endpoint. Call it from your game server, not from the game client directly.
Refer to your engine's documentation for handling deep links. The game client extracts the code and forwards it to your game server. The server completes the link by calling [`ApproveCustomLogin`](/api/ingress/webshop-account-linking/ApproveCustomLogin).
## Set up account linking in Unity [#set-up-account-linking-in-unity]
Use the Stash SDK to integrate account linking in Unity.
The SDK is optional. It provides convenient wrappers around the API endpoints, but you can also implement account linking with direct API calls.
### Import the Stash SDK [#import-the-stash-sdk]
Follow these steps to add the Stash SDK to your Unity project:
### Download the SDK [#download-the-sdk]
[Download the latest Stash for Unity release](https://github.com/stashgg/stash-unity).
### Import the package [#import-the-package]
Import the `.unitypackage` file into your game with the [Unity asset package import process](https://docs.unity3d.com/Manual/AssetPackagesImport.html).
### Import demo scenes (Optional) [#import-demo-scenes-optional]
Select the `Scenes` folder to import demo scenes.
### Set up deep links [#set-up-deep-links]
See the [Unity deep linking overview](https://docs.unity3d.com/Manual/deep-linking.html) for platform-specific instructions.
Let's take a look at the structure of the Stash's deep links.
```text title="Deep Link Structure"
stashggsample://login?code=
```
The key element in the link is the code. Configure deep links correctly and add logic to extract the code when your game launches through a deep link.
### Extract the code [#extract-the-code-1]
With deep linking configured, you can extract the code.
Use Unity's [`Application.deepLinkActivated`](https://docs.unity3d.com/Manual/deep-linking.html) event to handle deep link activations. This event triggers whenever the game launches or resumes from a Stash deep link.
In the `onDeepLinkActivated` handler, split the link to extract the code.
```csharp title="Extract Code from Deep Link"
public void onDeepLinkActivated(string url) {
// Extract the code parameter from the link.
var code = url.Split("login?code=")[1];
if (!string.IsNullOrEmpty(code)) {
// Work with code...
}
}
```
---
## Section: Guides
# Authentication Methods
**URL:** https://docs.stash.gg/guides/stash-webshop/player-authentication/authentication-methods
**Description:** Learn about the two methods for authenticating players in your Stash webshop - Direct Sign-in (SSO) using providers like Google, Apple, or Facebook, and Account Linking through deep links and QR codes for passwordless authentication.
Stash provides two methods for authenticating players in your webshop. You can implement one or both methods based on your setup.
Both methods share similar initial configuration steps, but each method has a different integration process.
## Direct Sign in (SSO) [#direct-sign-in-sso]
Players authenticate directly in the webshop using SSO providers such as Google, Apple, or Facebook.
You configure the providers in Stash Studio by adding their credentials. Players click **Sign in**, select a provider, and complete authentication in the browser.
## Account Linking [#account-linking]
With account linking, players authenticate by launching your game through a deep link on mobile or by scanning a QR code on desktop.
The deep link passes a session code to the game client. The client attaches the player's authentication data to the session code and sends both to Stash.
This method enables passwordless login by reusing the player's existing game session.
---
## Section: Guides
# Authentication Providers
**URL:** https://docs.stash.gg/guides/stash-webshop/player-authentication/authentication-providers
**Description:** Learn about the authentication providers supported by Stash including Apple, Google, Facebook, Game Center, Play Games, Amazon Cognito, and custom JWT/OIDC. Understand the credentials needed for each provider and how to configure them in Stash Studio.
Stash supports the following authentication providers:
| | Provider | Credentials Needed | Notes |
| --------------------------------------------------------------------------------------------------------------------------------------------------------------------------------------------------------------------------------------- | --------------------- | -------------------------------------------------------------- | ----------------------------------------------------------- |
|  | **Apple Account** | Apple Services ID, Client Secret, Team ID, Key ID, Private Key | For Sign in with Apple (OAuth). |
|
| **Apple Account** | Apple Services ID, Client Secret, Team ID, Key ID, Private Key | For Sign in with Apple (OAuth). |
|  | **Google Account** | Client ID, Client Secret | From Google Cloud Console (OAuth 2.0 credentials). |
|
| **Google Account** | Client ID, Client Secret | From Google Cloud Console (OAuth 2.0 credentials). |
|  | **Facebook** | App ID, App Secret | From Facebook Developer Console. |
| | **Apple Game Center** | iOS/macOS Bundle ID | Used for passwordless login via Game Center. |
|
| **Facebook** | App ID, App Secret | From Facebook Developer Console. |
| | **Apple Game Center** | iOS/macOS Bundle ID | Used for passwordless login via Game Center. |
|  | **Google Play Games** | Client ID, Client Secret | From Google Play Console (OAuth 2.0 credentials). |
|
| **Google Play Games** | Client ID, Client Secret | From Google Play Console (OAuth 2.0 credentials). |
|  | **Amazon Cognito** | User Pool ID, App Client ID, App Client Secret (if enabled) | From AWS Cognito dashboard. |
|
| **Amazon Cognito** | User Pool ID, App Client ID, App Client Secret (if enabled) | From AWS Cognito dashboard. |
|  | **Custom JWT/OIDC** | OIDC Discovery URL, Client ID, Client Secret | Contact Stash support for custom/OIDC provider integration. |
Apple Game Center and Google Play Games support only passwordless login in the game client. They do not work with browser-based SSO.
## Set up identity providers [#set-up-identity-providers]
Configure your identity providers in Stash Studio under **Webshop settings**. You can add more than one provider. Some providers require additional credentials.
For more information on using Stash Studio, see the [Stash Studio Overview](/guides/partners/stash-studio) article in the documentation.
To add a custom or OIDC provider, contact Stash support before setting up the integration.
## Set up direct sign-in and SSO [#set-up-direct-sign-in-and-sso]
Configure sign-in and SSO in your webshop by adding provider details, such as redirect URLs and token exchange settings.
This setup does not require code or client-side development.
## Configure account linking [#configure-account-linking]
After setting up your identity providers, configure account linking in your game client. This step requires changes in the client code.
---
## Section: Guides
# Analytics & App Integration
**URL:** https://docs.stash.gg/guides/stash-webshop/how-tos/loyalty/analytics-app-integration
**Description:** Consume loyalty state two ways: process pushed loyalty events through webhooks for analytics and data pipelines, and pull loyalty on demand with the read-only API to show loyalty in-app and enrich offers.
There are two goals your backend uses loyalty state for, and each has a natural path:
* **Analytics and data pipelines** consume the loyalty events Stash pushes on webhooks: earn, tier changes, milestone claims, and refunds, as they happen.
* **In-app integration** pulls loyalty on demand with the read-only API: show a player's tier and progress in your app, and enrich offers based on tier.
Stash owns all program state (XP balances, tiers, claim history). Both paths are read-only views of it; grants are driven by webhooks (or synchronous milestone delivery), never by a read.
## Analytics: loyalty webhooks [#analytics-loyalty-webhooks]
Every webhook that can change or reflect a player's XP carries a shared `loyalty` sub-payload, so your backend receives a consistent, campaign-scoped view of XP balance, tier, and progression on each of them. Because these events arrive as they happen, they are the feed for analytics and data pipelines: track earn, tier upgrades and downgrades, milestone claims, and refunds over time. The payload is additive; events serialize exactly as before for shops without an active loyalty program.
### Events that carry loyalty [#events-that-carry-loyalty]
| Event | `loyalty` payload | XP effect |
| --------------------------- | ------------------------------------ | ---------------------------------------------------- |
| `PURCHASE_SUCCEEDED` | Present when the program is live | Positive `pointsDelta`; tier may upgrade |
| `PURCHASE_REFUNDED` | Present when the program is live | Negative `pointsDelta`; tier may downgrade |
| `LOYALTY_MILESTONE_CLAIMED` | Always present | No internal XP change; adds `milestoneTierId` |
| `FREE_ITEM_REDEEMED` | Present when the free gift grants XP | Positive `pointsDelta` if the gift grants Loyalty XP |
### The `loyalty` payload [#the-loyalty-payload]
The `loyalty` object (type `PlayerLoyaltyState`) rides inside each event's payload. It is populated only when the shop has a **published, enabled** loyalty program **and** a live campaign. Otherwise the whole object is omitted and the event is byte-identical to a non-loyalty shop's.
```json title="Shared loyalty sub-payload"
"loyalty": {
"campaignId": "spring_2026",
"totalPoints": 1250,
"pointsDelta": 150,
"currentTierId": "silver",
"previousTierId": "bronze",
"pointsMultiplierPermille": 2000,
"pointsToNextTier": 750,
"pointsToNextMilestone": 250,
"nextMilestone": {
"milestoneId": "milestone_uuid",
"rewards": [
{ "itemId": "gold-coins", "quantity": 500, "type": "IN_GAME_CURRENCY" },
{ "itemId": "starter-sword", "quantity": 1, "type": "SKU_ITEM" }
]
},
"unlockedMilestones": [
{
"milestoneId": "earlier_milestone_uuid",
"rewards": [
{ "itemId": "gold-coins", "quantity": 250, "type": "IN_GAME_CURRENCY" }
]
}
]
}
```
The tier ID fields (`currentTierId`, `previousTierId`), `nextMilestone`, and `unlockedMilestones` are omitted when they do not apply. Treat a missing field as "no change" / "none", not as an error. `nextMilestone.rewards` is a list: read every entry, since one milestone can grant several rewards.
### Payload examples [#payload-examples]
The envelope is the standard v1 webhook shape; the `loyalty` object appears inside the event's payload object.
A purchase awards XP at the current tier's earn rate. `pointsDelta` is positive, `totalPoints` is the post-purchase balance, and `previousTierId` appears only if the purchase moved the player up a tier. If the XP gain crossed one or more milestone thresholds, `unlockedMilestones` lists them; milestones are claimed manually, so this is how your pipeline observes the moment one became claimable.
```json title="Purchase Succeeded with loyalty"
{
"type": "PURCHASE_SUCCEEDED",
"environment": "production",
"purchaseSucceeded": {
"timeMillis": 1748476800000,
"orderId": "order_abc123",
"userId": "player_external_account_id",
"currency": "USD",
"total": "9.99",
"source": "Cart",
"items": [{ "id": "item_456", "quantity": 1, "price": "9.99" }],
"loyalty": {
"campaignId": "spring_2026",
"totalPoints": 1250,
"pointsDelta": 150,
"currentTierId": "silver",
"previousTierId": "bronze",
"pointsMultiplierPermille": 2000,
"pointsToNextTier": 750,
"pointsToNextMilestone": 250,
"nextMilestone": {
"milestoneId": "milestone_uuid",
"rewards": [
{ "itemId": "gold-coins", "quantity": 500, "type": "IN_GAME_CURRENCY" },
{ "itemId": "starter-sword", "quantity": 1, "type": "SKU_ITEM" }
]
},
"unlockedMilestones": [
{
"milestoneId": "earlier_milestone_uuid",
"rewards": [
{ "itemId": "gold-coins", "quantity": 250, "type": "IN_GAME_CURRENCY" }
]
}
]
}
}
}
```
A refund is delivered as an XP-update event. Stash debits XP proportional to the refunded amount, so `pointsDelta` is **negative** and `totalPoints` is the post-refund balance. If the debit drops the player below a tier threshold, `previousTierId` reflects the downgrade. See [Refunds & XP adjustments](/guides/stash-webshop/how-tos/loyalty/refunds-and-xp).
```json title="Purchase Refunded with loyalty"
{
"type": "PURCHASE_REFUNDED",
"environment": "production",
"purchaseRefunded": {
"timeMillis": 1748480400000,
"orderId": "order_abc123",
"userId": "player_external_account_id",
"currency": "USD",
"total": "9.99",
"reason": "Customer requested refund",
"source": "Cart",
"items": [{ "id": "item_456", "quantity": 1, "price": "9.99" }],
"loyalty": {
"campaignId": "spring_2026",
"totalPoints": 1100,
"pointsDelta": -150,
"currentTierId": "bronze",
"previousTierId": "silver",
"pointsMultiplierPermille": 1000,
"pointsToNextTier": 400,
"pointsToNextMilestone": 100
}
}
}
```
Fired when a player claims a milestone and the shop uses async webhook delivery. The `rewards` array is your grant list; each entry is `{ itemId, quantity, type }`, where `type` is one of the bare reward-kind tokens (`IN_GAME_CURRENCY`, `LOYALTY_CURRENCY`, `LOYALTY_POINTS`, or `SKU_ITEM`). The [loyalty API](/api/ingress/loyalty/GetLoyalty) reports the same values in their prefixed form. Alongside the shared `loyalty` payload, this event adds `milestoneTierId`: the tier the claimed milestone belongs to. Claiming does not change the internal XP balance, so `pointsDelta` is 0 and `previousTierId` is omitted.
```json title="Loyalty Milestone Claimed with loyalty"
{
"type": "LOYALTY_MILESTONE_CLAIMED",
"environment": "production",
"shopId": "your-shop-uuid",
"loyaltyMilestoneClaimed": {
"timeMillis": 1748476800000,
"userId": "player_external_account_id",
"milestoneId": "milestone_uuid",
"milestoneTierId": "silver",
"rewards": [
{ "itemId": "gold-coins", "quantity": 500, "type": "IN_GAME_CURRENCY" }
],
"loyalty": {
"campaignId": "spring_2026",
"totalPoints": 1250,
"pointsDelta": 0,
"currentTierId": "silver",
"pointsMultiplierPermille": 2000,
"pointsToNextTier": 750,
"pointsToNextMilestone": 250,
"nextMilestone": {
"milestoneId": "milestone_uuid",
"rewards": [
{ "itemId": "power-up", "quantity": 3, "type": "IN_GAME_CURRENCY" }
]
}
}
}
}
```
A free gift can be configured to grant Loyalty XP. When it does, the redemption credits XP and this event carries the loyalty payload with a positive `pointsDelta`. Any metadata declared on the free gift in your catalog is echoed on the `metadata` field. See [Refunds & XP adjustments](/guides/stash-webshop/how-tos/loyalty/refunds-and-xp#free-gift-xp).
```json title="Free Item Redeemed with loyalty"
{
"type": "FREE_ITEM_REDEEMED",
"environment": "production",
"freeItemRedeemed": {
"userId": "player_external_account_id",
"itemId": "item_free_001",
"metadata": { "promotionId": "spring_kickoff" },
"loyalty": {
"campaignId": "spring_2026",
"totalPoints": 300,
"pointsDelta": 100,
"currentTierId": "bronze",
"pointsMultiplierPermille": 1000,
"pointsToNextTier": 200,
"pointsToNextMilestone": 50
}
}
}
```
### Receiver guidance [#receiver-guidance]
* **Key tier logic on the tier ID.** `currentTierId`, `previousTierId`, and `milestoneTierId` are Studio tier IDs, stable for the campaign. Display names change and are localized.
* **React to tier changes from `previousTierId`.** Its presence means the tier changed this event; its absence means no change. You do not need to track prior tier state yourself.
* **Use `pointsMultiplierPermille` for tier-relative display, not for granting.** It reports how much faster the current tier earns Loyalty XP per USD than the base (first, lowest) tier, as an integer in permille: divide by 1000 (`2000` = 2x, base tier `1000` = 1x). It is derived from Studio earn rates for display and messaging (for example "2x XP at this tier"); the authoritative XP change for this event is always `pointsDelta`.
* **Reconcile on `campaignId`.** Values are scoped to the active campaign. When a season rolls to a new campaign, the `campaignId` changes; scope any per-season tier or reward logic to it.
* **Be idempotent.** Webhooks can be re-delivered. De-duplicate purchase grants on `orderId` and milestone grants on `userId` + `milestoneId`.
* **De-duplicate unlock reactions on `milestoneId`.** Redelivery, and on the purchase path a loyalty snapshot frozen at cart-calculation time, mean the same entry in `unlockedMilestones` can be reported more than once. And do not grant from it: an unlock only means the milestone became claimable; the grant signal is the `LOYALTY_MILESTONE_CLAIMED` event.
* **Treat a missing `loyalty` object as "no loyalty".** It is omitted for shops without a live program, and (on refund only) when an XP debit could not be applied.
For webhook endpoint setup, signature verification, and retry behavior, see [Webhooks overview](/guides/get-started/stash-webhooks/overview). For every event type Stash sends, see the [Webhook list](/guides/get-started/stash-webhooks/webhook-list).
## In-app integration: the loyalty API [#in-app-integration-the-loyalty-api]
Two read-only endpoints let your backend pull loyalty on demand, so you can show a player's loyalty in your app and enrich offers based on tier:
* [Get loyalty program configuration](/api/ingress/loyalty/GetLoyalty) returns the shop's active campaign: its tiers (ordered by starting points) and the milestones inside each tier, with their rewards. Use it to render the tier ladder, milestones, and upcoming rewards in your own surfaces. Cache it; it changes only when you publish in Studio.
* [Get a player's loyalty standing](/api/ingress/loyalty/GetPlayerLoyalty) returns one player's live state: points balance, current tier, distance to the next tier and milestone, and the effective points multiplier. Use it to show where a player stands, and to enrich offers, for example adding a larger bonus at higher tiers by scaling with the effective multiplier.
Both return `NOT_FOUND` when the shop has no active loyalty campaign.
The API Reference is the authoritative source for exact paths, parameters, the full response schema, and an interactive try-it console. See [Get loyalty program configuration](/api/ingress/loyalty/GetLoyalty) and [Get a player's loyalty standing](/api/ingress/loyalty/GetPlayerLoyalty).
### Authentication [#authentication]
Call these endpoints from your backend only, with your shop's server API key. The key is shop-scoped, so the tiers, milestones, and standing returned belong to the shop the key authenticates. Never call them from a game client or expose the key.
### Reward type values [#reward-type-values]
Reward `type` takes two string forms for the same set of reward kinds. The loyalty API emits the **prefixed** enum names: `LOYALTY_REWARD_TYPE_IN_GAME_CURRENCY`, `LOYALTY_REWARD_TYPE_LOYALTY_CURRENCY`, `LOYALTY_REWARD_TYPE_LOYALTY_POINTS`, `LOYALTY_REWARD_TYPE_SKU_ITEM`, plus `LOYALTY_REWARD_TYPE_UNSPECIFIED` for the zero value. The webhook payloads above emit the **bare** token: `IN_GAME_CURRENCY`, `LOYALTY_CURRENCY`, `LOYALTY_POINTS`, `SKU_ITEM`. They map one-to-one; strip the `LOYALTY_REWARD_TYPE_` prefix to line them up. For a SKU reward, `itemId` is the catalog product's SKU (external ID); for currency and points rewards, `itemId` is the reward type ID.
## When to use which [#when-to-use-which]
* **Webhooks, for analytics.** Consume pushed events to feed analytics and data pipelines, and to react as state changes: earn, tier upgrades and downgrades, milestone claims, and refunds the moment they happen.
* **The API, for in-app integration.** Pull on demand to render loyalty in your app (tier ladder, current standing, progress, next milestone), to enrich offers by tier, and to reconcile a player after a missed or replayed webhook. Read the configuration once and cache it.
* **Grant from webhooks, not reads.** The loyalty API is read-only context; grant rewards from the `LOYALTY_MILESTONE_CLAIMED` webhook (or synchronous milestone delivery), never from a read.
---
## Section: Guides
# Configure in Stash Studio
**URL:** https://docs.stash.gg/guides/stash-webshop/how-tos/loyalty/configuration
**Description:** Step-by-step walkthrough for configuring a loyalty program in Stash Studio: reward types, program settings, tiers, milestones, validation rules, and publishing.
Configuration is self-serve. Open your shop in [Stash Studio](https://studio.stash.gg/) and go to the **Loyalty** section, which has two surfaces: **Reward Types** and **Configuration**. Use [studio-test](https://studio-test.stash.gg/) for test shops.
Follow the order below. Reward types must exist before tiers and milestones can reference them.
### Define reward types [#define-reward-types]
On the **Reward Types** surface, create each currency or item your program grants: Loyalty XP, your in-game currencies, and any catalog products used as rewards. Give each a name and a 162 x 162 px icon.
Reward types are reused across the whole program, so define them once here. See [Reward types](/guides/stash-webshop/how-tos/loyalty/reward-types) for what each type means.
### Configure program settings [#configure-program-settings]
On the **Configuration** surface, set the program's display name (for example "Pit Pass" or "VIP Club") and turn on the **Enabled** toggle. The program must be enabled to publish.
### Create tiers [#create-tiers]
Add tiers in ascending XP order. Each tier is a short modal: general info (name, tier ID, XP threshold), assets (icon, optional background and colour), and earn rates (reward type and amount per USD for each).
The first tier must start at 0 XP. Configure earn rates for every tier; there are no inherited defaults. See [Tiers](/guides/stash-webshop/how-tos/loyalty/tiers) for field details.
### Add milestones [#add-milestones]
Inside each tier, add one or more milestones: general info (name, XP threshold within the tier's range), assets (icon and background, both required), and rewards (reward name, reward types, and fixed amounts).
Each tier must contain at least one milestone. See [Milestones](/guides/stash-webshop/how-tos/loyalty/milestones) for field details.
### Publish the program [#publish-the-program]
The program starts in **Draft**: no XP is awarded and no milestone is claimable until you publish. Click **Publish** in the Loyalty overview to validate and take the program live.
## Validation rules [#validation-rules]
All of these must pass before the program can publish:
* The program is enabled and has a display name.
* At least one reward type is configured.
* At least one tier exists, and the first tier starts at 0 XP.
* Tier XP thresholds are unique.
* Every tier has a name, a threshold, and at least one earn rate greater than 0.
* Every tier contains at least one milestone.
* Every milestone has a name, an XP threshold within its tier's range, an icon, a background image, a reward name, and at least one reward amount greater than 0.
## Draft and published [#draft-and-published]
A program moves **Draft → Published**, and back via unpublish.
Once published, the **structure locks**: XP thresholds, reward assignments, and reward amounts cannot change, and tiers, milestones, and reward types cannot be created or deleted.
**Display fields stay editable**: names, icons, backgrounds, and colours can be updated live, so creative can be refreshed within a season without touching the economy.
To make structural changes after publishing, unpublish, edit, and re-publish.
---
## Section: Guides
# Loyalty Program
**URL:** https://docs.stash.gg/guides/stash-webshop/how-tos/loyalty
**Description:** Overview of the Stash loyalty program: how programs, campaigns, tiers, milestones, and rewards fit together, and how your backend receives loyalty state on webshop webhooks.
The Stash loyalty program rewards players for webshop spend. Players earn Loyalty XP on every purchase, progress through tiers as their XP grows, and claim milestone rewards you configure. Stash is the source of truth for all program state: XP balances, tier status, and claim history. Your backend only grants the rewards Stash tells it to grant, and receives a consistent view of loyalty state on every XP-affecting webhook.
You configure the program in [Stash Studio](https://studio.stash.gg/) under the **Loyalty** section of your shop. It runs on your existing webshop with no additional client integration for accrual.
## The model [#the-model]
A shop has one loyalty program. The program is organized as a hierarchy:
| Concept | What it is |
| --------------- | -------------------------------------------------------------------------------------------------------------------------------------------------------------------------------------------------------------------------------------------------------------------------------------------------------------------------------------------------------------------- |
| **Program** | The loyalty system on your shop. One per shop, configured in Studio. |
| **Campaign** | A generation of the program, scoped to a season. Every loyalty value your backend receives is stamped with a `campaignId` so you can reconcile XP and tier across season boundaries. See [Refunds & XP adjustments](/guides/stash-webshop/how-tos/loyalty/refunds-and-xp#campaign-and-season-boundaries). |
| **Reward Type** | A reward players can earn, defined once on the **Reward Types** surface in Studio: Loyalty XP or an in-game currency (Core Currency in Studio). Reward types are applied as per-tier earn rates for spend (reward per USD spent); catalog products can also be granted as milestone rewards. See [Reward types](/guides/stash-webshop/how-tos/loyalty/reward-types). |
| **Tier** | A named progression level unlocked when the player's XP crosses its threshold. Each tier carries its own spend-based earn rates and contains its own milestones. See [Tiers](/guides/stash-webshop/how-tos/loyalty/tiers). |
| **Milestone** | A one-time reward checkpoint at a specific XP value, nested under the tier it belongs to. See [Milestones](/guides/stash-webshop/how-tos/loyalty/milestones). |
## How players earn and claim [#how-players-earn-and-claim]
Two reward mechanics run in parallel, and the distinction drives the whole integration:
* **Accrual is automatic.** At checkout, Stash updates the player's Loyalty XP and reports the per-USD Core Currency reward on the purchase webhook for your backend to grant. No player action or extra client integration is involved.
* **Milestone claims are player-initiated.** When XP crosses a milestone threshold the reward becomes claimable in the loyalty hub. The player clicks **Claim**, and Stash delivers the reward to your backend to grant.
## Loyalty state on webhooks [#loyalty-state-on-webhooks]
Every webhook that can change or reflect a player's XP carries a shared `loyalty` sub-payload (the loyalty snapshot, type `PlayerLoyaltyState`): the current XP balance, the signed XP delta, the current and previous tier IDs, the current tier's `pointsMultiplierPermille` (its XP earn rate relative to the base tier, in permille: `2000` = 2x), progress to the next tier and milestone, and the `campaignId`. It rides on four events:
* `PURCHASE_SUCCEEDED`
* `PURCHASE_REFUNDED`
* `LOYALTY_MILESTONE_CLAIMED`
* `FREE_ITEM_REDEEMED`
Refunds are delivered as genuine XP-update events: Stash debits XP proportional to the refunded amount and reports the new balance and tier. See [Analytics & app integration](/guides/stash-webshop/how-tos/loyalty/analytics-app-integration) for the full contract.
The same loyalty snapshot is also included in the `RegisterPayment` and `ConfirmPayment` purchase requests Stash sends to a real-time-catalog backend, so your backend has the player's tier and XP context in-band at purchase time. See [Loyalty snapshot on purchase requests](/guides/stash-webshop/catalog/real-time-catalog#loyalty-snapshot-on-purchase-requests).
## The loyalty hub [#the-loyalty-hub]
Players view their tier status, XP progress, and claimable milestones through the Stash loyalty hub, a hosted UI embedded in your webshop. No additional integration is required for the hub itself.
To deep-link a player directly into the hub, call [Generate authenticated URL](/api/ingress/server-urls/GenerateAuthenticatedUrl) from your backend with the target set to `LOYALTY`. The endpoint returns an authenticated URL that opens the player straight to the loyalty hub.
## Next steps [#next-steps]
---
## Section: Guides
# Milestone SKU Rewards
**URL:** https://docs.stash.gg/guides/stash-webshop/how-tos/loyalty/milestone-sku-rewards
**Description:** Configure a catalog product (SKU) as a milestone reward in Stash Studio: the tabbed reward picker, adding products and reward types inline, the milestone preview, and how SKU rewards appear on the claim webhook.
A milestone reward does not have to be a currency amount. It can also be an arbitrary product from your catalog, a single item or a bundle, delivered as a SKU. Use SKU rewards when a milestone should grant a packaged product rather than raw currency.
This page covers configuring SKU rewards on a milestone. For the reward types themselves, see [Reward types](/guides/stash-webshop/how-tos/loyalty/reward-types); for the milestone model and claim flow, see [Milestones](/guides/stash-webshop/how-tos/loyalty/milestones).
## The reward picker [#the-reward-picker]
A milestone's **Reward** step uses a tabbed picker with two sources. One selection can mix rewards from both tabs.
| Tab | What it lists | Row shows |
| ------------------- | ----------------------------------------------------- | -------------------------------------------------------- |
| **Reward Types** | Shop reward types (Loyalty XP and in-game currencies) | Icon, name, and reward type |
| **Product Catalog** | Published catalog products | Image, display name, and the product's external ID (SKU) |
Type in the picker to filter the active tab by name or external ID, then **Apply** to commit the selection. Currency rewards take an amount; product rewards take a quantity, which defaults to 1.
A product reward row shows the product's SKU as a subtitle. For a bundle, it also shows an item count and a tooltip listing the bundle contents.
{/* SCREENSHOT PENDING: milestone Reward step, tabbed picker (Reward Types | Product Catalog) */}
Only **published** catalog products can be attached as a milestone reward. A product that is not yet published cannot be selected. See adding a product inline below.
## Add a product without leaving the modal [#add-a-product-without-leaving-the-modal]
If the product you want does not exist yet, add it inline from the picker's **+ Add a new product** link, without losing your milestone draft.
### Enter the product details [#enter-the-product-details]
Provide a **Product ID** (your partner SKU, stored as the product's external ID), a **Display Name**, and a **Main Image**. For a bundle, add one or more **Items** rows, each with an image and quantity.
### Save [#save]
Stash creates the product as a reward-only product and publishes it immediately, then auto-selects it as a product reward on the milestone with quantity 1. Reward-only products are publishable without a price, so they are eligible to attach right away.
If publishing fails, your draft is kept, the product is not auto-selected, and the error is surfaced so you can resolve it in the catalog.
{/* SCREENSHOT PENDING: inline "Add New Product" subview (Product ID, Display Name, Main Image, bundle Items) */}
## Add a reward type inline [#add-a-reward-type-inline]
The picker also offers **+ Add a new reward type**, which creates an in-game currency reward type (name and icon) and auto-selects it. A shop has one reward type per currency, so the link is hidden once that reward type exists. Loyalty XP is the progression currency and is not offered as a milestone reward type here.
{/* SCREENSHOT PENDING: inline "Add New Reward Type" subview (Name, Icon) */}
## Preview the milestone [#preview-the-milestone]
The milestone modal has a **Preview** step that renders a live, read-only mock of the shop-facing milestone card from your current configuration: the XP-threshold header, the reward image, a reward caption, and the Claim pill. The caption uses the milestone's reward name if set, otherwise it is derived from the first configured reward (for example "Handful of Bucks x2").
If the milestone is incomplete, the preview shows a placeholder card and a checklist of what is missing, with links that jump to the step that fixes each item.
{/* SCREENSHOT PENDING: milestone Preview step (complete card and incomplete checklist) */}
## SKU rewards on the claim webhook [#sku-rewards-on-the-claim-webhook]
A SKU reward appears in `LOYALTY_MILESTONE_CLAIMED` exactly like a currency reward: an entry in the `rewards` array with the product SKU as `itemId`, the configured `quantity`, and `type` `SKU_ITEM`. The `type` field is a typed enum: currency rewards carry `IN_GAME_CURRENCY`, `LOYALTY_CURRENCY`, or `LOYALTY_POINTS`; catalog product rewards carry `SKU_ITEM`. These are the webhook's bare tokens; the read-only [GetLoyalty API](/guides/stash-webshop/how-tos/loyalty/analytics-app-integration) returns the prefixed `LOYALTY_REWARD_TYPE_...` form of the same values. Your backend grants the product on receipt.
```json title="LOYALTY_MILESTONE_CLAIMED with a SKU reward"
"rewards": [
{ "itemId": "starter-bundle-sku", "quantity": 1, "type": "SKU_ITEM" },
{ "itemId": "gold-coins", "quantity": 500, "type": "IN_GAME_CURRENCY" }
]
```
See [Loyalty webhooks](/guides/stash-webshop/how-tos/loyalty/analytics-app-integration#loyalty_milestone_claimed) for the full event.
As with all milestone rewards, the `rewards` array is authoritative server-side configuration, never client input. Grant against the `itemId`, and de-duplicate on `userId` + `milestoneId` so a retry cannot grant a bundle twice.
---
## Section: Guides
# Milestones & Rewards
**URL:** https://docs.stash.gg/guides/stash-webshop/how-tos/loyalty/milestones
**Description:** One-time loyalty milestone rewards: how the claim flow works, what a milestone reward can contain, and the two delivery modes (async webhook or synchronous API) Stash uses to hand the reward to your backend.
A milestone is a one-time reward checkpoint at a specific XP value inside a tier. Every tier has at least one. Unlike tier earn rates, which apply on every purchase, a milestone reward is granted exactly once, when the player reaches the threshold and claims it.
## The claim flow [#the-claim-flow]
1. The player's cumulative Loyalty XP crosses a milestone's threshold.
2. The reward becomes claimable in the loyalty hub.
3. The player clicks **Claim**.
4. Stash delivers the reward to your backend, which grants it.
Claims are player-initiated. Crossing the threshold makes a milestone claimable; it does not auto-grant. Each milestone is claimable once per player.
Your backend observes step 1 the moment it happens: the loyalty payload of the webhook that awarded the XP lists the crossed milestones under [`unlockedMilestones`](/guides/stash-webshop/how-tos/loyalty/analytics-app-integration#the-loyalty-payload). The grant signal remains the claim (step 4), never the unlock.
## Milestone reward contents [#milestone-reward-contents]
A milestone reward is a fixed, one-time grant of one or more [reward types](/guides/stash-webshop/how-tos/loyalty/reward-types):
* **In-game currency**: the standard case, a fixed amount of a currency your backend grants (for example, 500 coins).
* **Loyalty XP**: a milestone can grant additional Loyalty XP.
* **Catalog products (SKU rewards)**: a milestone can deliver an arbitrary catalog product or bundle instead of currency. See [Milestone SKU rewards](/guides/stash-webshop/how-tos/loyalty/milestone-sku-rewards).
Every reward in the milestone payload is expressed as an `itemId` (the reward type or catalog SKU) and a `quantity`. The list comes from your Studio configuration and is authoritative; treat it as server-side truth, never from the client.
## Which tier a milestone belongs to [#which-tier-a-milestone-belongs-to]
Each milestone lives inside a tier. When a milestone is claimed, the `LOYALTY_MILESTONE_CLAIMED` webhook reports the owning tier as `milestoneTierId`, alongside the shared loyalty payload. See [Loyalty webhooks](/guides/stash-webshop/how-tos/loyalty/analytics-app-integration#loyalty_milestone_claimed).
## Reward delivery modes [#reward-delivery-modes]
Stash delivers a claimed reward to your backend through one of two mechanisms, configured per shop with your Stash engineering contact. It is a backend setting, not a Studio toggle.
| Mode | When to use | Trade-off |
| ------------------- | ------------------------------------------------------------ | ----------------------------------------------------------------------------------------------- |
| **Async webhook** | Simple grants where eventual consistency is acceptable. | No API to implement. Delivery is queued, so there is no immediate error feedback to the player. |
| **Synchronous API** | Real-time validation, for example complex eligibility rules. | Immediate confirmation, but you must implement an API endpoint Stash calls. |
With async webhook delivery, Stash sends `LOYALTY_MILESTONE_CLAIMED`. With synchronous API delivery, Stash calls your game backend directly and the webhook is not sent.
Make your grant handler idempotent. De-duplicate on `userId` + `milestoneId` so a retry or duplicate delivery never grants a milestone reward twice.
## Fields [#fields]
| Field | Type | Required | Notes |
| ---------------- | ----------------------- | -------- | ------------------------------------------------------------------ |
| Name | Text | Yes | Display name shown in the loyalty hub. |
| XP threshold | Number | Yes | Must fall within the parent tier's XP range. Locked after publish. |
| Icon | Image, 162 x 162 px | Yes | Milestone badge in the loyalty hub. |
| Background image | Image, 340 x 162 px | Yes | Banner behind the milestone card. |
| Reward name | Text | Yes | Display name for the reward (for example "Welcome Bonus"). |
| Rewards | 1+ reward type + amount | Yes | Fixed one-time amount per reward type. Locked after publish. |
XP thresholds and reward amounts lock when the program is published; display fields stay editable. See [Configuration](/guides/stash-webshop/how-tos/loyalty/configuration).
---
## Section: Guides
# Refunds & XP Adjustments
**URL:** https://docs.stash.gg/guides/stash-webshop/how-tos/loyalty/refunds-and-xp
**Description:** How Stash reverses Loyalty XP on refund: proportional clamp-to-zero debit, tier downgrade, and idempotency across partial refunds; plus free-gift XP grants and campaign/season boundary behavior.
Loyalty XP is not static after a purchase. Refunds reverse it, and free gifts can grant it. Both are delivered to your backend as loyalty-carrying webhook events so your game state stays in sync with the player's XP.
## Refunds are XP-update events [#refunds-are-xp-update-events]
When a webshop purchase is refunded, Stash does not just drop the loyalty state. It debits the player's Loyalty XP, recomputes the tier, and delivers `PURCHASE_REFUNDED` with the updated loyalty payload and a negative `pointsDelta`.
### Proportional debit [#proportional-debit]
The XP debited is proportional to how much of the original purchase was refunded:
```
debit = round( earnedXP x refundAmount / originalTotal )
```
* `earnedXP` is the XP the original purchase awarded.
* Rounding is half-up.
* A full refund debits the full earned XP; a partial refund debits proportionally.
### Clamp to zero [#clamp-to-zero]
The balance is floored at zero. A debit never drives XP negative, even if the player has already spent XP progression or the balance has otherwise moved since the purchase.
### Tier downgrade [#tier-downgrade]
After the debit, Stash recomputes the tier from the new balance. If the balance falls below the current tier's threshold, `currentTierId` reflects the lower tier and `previousTierId` reports the tier the player just left. React to the downgrade the same way you would any tier change.
### Idempotency and partial refunds [#idempotency-and-partial-refunds]
* Each refund is applied once. Duplicate refund notifications for the same refund are de-duplicated and do not double-debit.
* Multiple partial refunds on one order each debit proportionally and independently. Because the balance is clamped at zero, a sequence of partials that sums to the full amount can never over-debit.
The XP debit is a real balance change, so its failure handling is stricter than webhook field population. If the debit cannot be applied, Stash still sends `PURCHASE_REFUNDED` (the money is already refunded) but omits the `loyalty` payload rather than report an inconsistent balance. Treat a refund with no `loyalty` object as "XP unchanged for this event".
## Free-gift XP [#free-gift-xp]
A free gift can grant Loyalty XP in addition to its item. The XP amount is declared on the free gift in your catalog. On redemption, Stash credits the XP to the player and `FREE_ITEM_REDEEMED` carries the loyalty payload with a positive `pointsDelta`.
* If a free gift declares no XP reward, no XP is credited and the event carries no `loyalty` payload; it serializes exactly as before.
* Any metadata declared on the free gift is passed through to the `metadata` field on the webhook, the same way product metadata is. Use it for opaque correlation keys, not for display or business logic.
See the [free item redeemed example](/guides/stash-webshop/how-tos/loyalty/analytics-app-integration#free_item_redeemed).
## Campaign and season boundaries [#campaign-and-season-boundaries]
Loyalty state is keyed by campaign: a generation of the program scoped to a season. Every loyalty payload carries the `campaignId` it belongs to.
The XP wallet is a single running balance, not a per-campaign balance. This matters when a refund lands after a new season has started:
* The debit still applies to the one XP wallet.
* The `earnedXP` used for the proportional debit comes from the original purchase, so the math is stable across the boundary.
* The reported `currentTierId` and `campaignId` reflect the **current** campaign's tiers, not the campaign the purchase was made in.
Scope any per-season reconciliation on your side to the `campaignId` on each event, and expect a late refund to be reported against the live campaign.
---
## Section: Guides
# Reward Types
**URL:** https://docs.stash.gg/guides/stash-webshop/how-tos/loyalty/reward-types
**Description:** The three reward types a Stash loyalty program grants: Loyalty XP, in-game currency, and catalog products (SKU rewards). Each is defined once in Studio and reused across tiers and milestones.
A reward type defines something players earn. You define reward types once, on the **Reward Types** surface in Studio, and reference them from tier earn rates and milestone rewards. Reward types must exist before you can build tiers or milestones.
Each reward type maps to a stable ID that appears as `itemId` in webhook reward payloads. Grant against that ID, not the display name.
## Loyalty XP [#loyalty-xp]
Loyalty XP is the progression currency of the program. It is tracked entirely by Stash and is not spendable: a player's XP total determines their tier and which milestones they have reached.
* Earned automatically on every purchase at the current tier's XP earn rate.
* Reversed proportionally on refund. See [Refunds & XP adjustments](/guides/stash-webshop/how-tos/loyalty/refunds-and-xp).
* Reported to your backend as `totalPoints` and `pointsDelta` in the loyalty webhook payload.
Loyalty XP is often named natively per game (for example "Race Points"). The display name is cosmetic; the reward type ID is what identifies it on the wire.
## In-game currency [#in-game-currency]
An in-game currency is a currency, token, or item in your game's economy that Stash grants to players as a loyalty reward. Stash does not hold in-game currency balances. Stash tells your backend what to grant and when; your backend owns the balance and applies the grant.
In-game currency is granted two ways:
* **As a tier earn rate**, per USD of webshop spend, applied automatically at checkout. See [Tiers](/guides/stash-webshop/how-tos/loyalty/tiers).
* **As a milestone reward**, a fixed one-time amount the player claims. See [Milestones](/guides/stash-webshop/how-tos/loyalty/milestones).
## Catalog products (SKU rewards) [#catalog-products-sku-rewards]
A milestone reward can also deliver an arbitrary product from your catalog: a bundle or item (a SKU), rather than a currency amount. Use this for reward moments that should grant a packaged product instead of raw currency.
SKU rewards appear in the milestone claim payload the same way currency rewards do: an `itemId` (the catalog SKU) and a `quantity`. Your backend grants the product on receipt.
SKU rewards are configured on milestones, not as a standalone earn rate. See [Milestone SKU rewards](/guides/stash-webshop/how-tos/loyalty/milestone-sku-rewards) for the Studio configuration flow.
## Assets [#assets]
Each reward type takes a square icon (162 x 162 px), uploaded in Studio, shown next to the reward in the loyalty hub. Icons are display fields and stay editable after the program is published.
---
## Section: Guides
# Tiers
**URL:** https://docs.stash.gg/guides/stash-webshop/how-tos/loyalty/tiers
**Description:** How loyalty tiers work: XP thresholds, the stable string tier ID your backend receives on webhooks, per-tier earn rates, and how tier changes are reported on purchase and refund.
A tier is a named progression level. A player enters a tier when their Loyalty XP crosses the tier's threshold, and holds it as long as their balance stays at or above that threshold. Higher tiers carry more generous earn rates.
## Tier IDs [#tier-ids]
Every tier has a stable string tier ID, set in Studio. This ID is what your backend receives in the loyalty webhook payload; `currentTierId`, `previousTierId`, and `milestoneTierId` all carry it.
Key your logic on the string tier ID, never on the display name. Display names are editable after publish and are localized for players; the tier ID is stable for the life of the campaign.
## Thresholds and progression [#thresholds-and-progression]
* The first tier must start at `0` XP, so every player begins in a tier.
* Thresholds are unique and ascending. A player's tier is the highest tier whose threshold their XP has reached.
* XP is cumulative within a campaign. Reaching a higher tier does not reset the balance.
Because tier is derived from the XP balance, it moves in both directions. A purchase can move a player up a tier; a [refund](/guides/stash-webshop/how-tos/loyalty/refunds-and-xp) can move them back down when the proportional XP debit drops the balance below a threshold.
## Earn rates [#earn-rates]
Each tier defines an earn rate per USD of webshop spend, for one or more [reward types](/guides/stash-webshop/how-tos/loyalty/reward-types). Earn rates are applied automatically at checkout, using the tier the player is in at the time of purchase.
For example, a Silver tier might grant `10 XP + 5 coins per $1`, while Gold grants `20 XP + 10 coins per $1`. A player in Silver earns at Silver rates for that transaction, even if the purchase pushes them into Gold.
## Effective points multiplier [#effective-points-multiplier]
The loyalty snapshot reports `pointsMultiplierPermille`: how much faster the player's current tier earns Loyalty XP per USD than the base tier. It is the ratio of the current tier's XP earn rate to the XP earn rate of the base (first, lowest) tier, encoded as an **integer in permille** (thousandths). Divide by 1000 to get the multiplier: `1500` is 1.5x.
* The base tier is its own reference, so its value is exactly `1000` (1x).
* A tier whose XP earn rate is double the base tier's reports `2000`, triple reports `3000`, and so on.
Given the earn rates above (Bronze `5 XP`, Silver `10 XP`, Gold `20 XP` per USD), Bronze is the base tier and reports `1000` (1x), Silver reports `2000` (10 / 5 = 2x), and Gold reports `4000` (20 / 5 = 4x). Use it for tier-relative display and messaging (for example "2x XP at this tier"); it is a derived, display-oriented value, not the XP granted by any single event. The XP change for an event is always the snapshot's `pointsDelta`.
`pointsMultiplierPermille` is always measured against the base tier, not the adjacent lower tier and not the player's own `previousTierId` from the event. It is always present in the loyalty snapshot.
## Tier change reporting [#tier-change-reporting]
The loyalty webhook payload reports tier transitions explicitly:
* `currentTierId` is always the player's tier after the event applied.
* `previousTierId` is present only when the event changed the player's tier: an upgrade on purchase or a downgrade on refund. When the tier is unchanged, `previousTierId` is omitted.
This lets your backend react to tier changes (for example, unlocking or revoking a tier benefit) without tracking prior state yourself.
## Fields [#fields]
| Field | Type | Required | Notes |
| ---------------- | -------------------------- | -------- | -------------------------------------------------------------- |
| Name | Text | Yes | Display name shown in the loyalty hub. |
| Tier ID | Text | Yes | Stable identifier reported on webhooks. Set once. |
| XP threshold | Number ≥ 0 | Yes | First tier must be 0; thresholds unique. Locked after publish. |
| Earn rates | Number > 0 per reward type | Yes | Reward granted per USD spent. Locked after publish. |
| Icon | Image, 162 x 162 px | Yes | Tier badge in the loyalty hub. |
| Background image | Image, 340 x 162 px | No | Banner behind the tier card. |
| Colour | Hex | No | Tier accent colour. |
XP thresholds and earn rates lock when the program is published; display fields stay editable. See [Configuration](/guides/stash-webshop/how-tos/loyalty/configuration#draft-and-published) for the publish flow.
---
## Section: API
# Getting Started
**URL:** https://docs.stash.gg/api/ingress
**Description:** APIs provided by Stash that your backend can call.
## What this section is [#what-this-section-is]
Stash-hosted endpoints your backend calls.
This is an **ingress** integration: your backend calls Stash. Stash hosts and maintains these APIs, while you implement the server-side caller in your backend services.
Call Stash API endpoints from your backend only. Do not expose private API keys in game clients.
Keep credentials on the server, call these endpoints from backend code only, and handle auth, retries, and idempotency in your service layer.
## Endpoints [#endpoints]
---
## Section: API
# Force refresh catalog
**URL:** https://docs.stash.gg/api/ingress/catalog/ForceRefreshCatalog
**Description:** Refreshes a web shop's cached catalog so the next time a player opens the shop it reflects the latest catalog from your game backend. Applies only to shops with a real-time catalog integration; for any other integration it is a no-op that still returns success. You rarely need to call it: the catalog already refreshes automatically after web shop purchases and free-gift redemptions, and checkout always revalidates against the server. It is most useful after an in-game purchase (outside the web shop) when you want the catalog view in the Web Shop to update right away.
{/* This file was generated by Fumadocs. Do not edit this file directly. Any changes should be made by running the generation command again. */}
---
## Section: API
# Get loyalty program configuration
**URL:** https://docs.stash.gg/api/ingress/loyalty/GetLoyalty
**Description:** Retrieves the shop's active loyalty campaign configuration: its tiers (ordered by starting points) and milestones (ordered by points needed). Returns NOT_FOUND when the shop has no active loyalty campaign.
{/* This file was generated by Fumadocs. Do not edit this file directly. Any changes should be made by running the generation command again. */}
---
## Section: API
# Get a player's loyalty standing
**URL:** https://docs.stash.gg/api/ingress/loyalty/GetPlayerLoyalty
**Description:** Retrieves a single player's loyalty standing (points balance, current tier, distance to the next tier and milestone, and effective points multiplier) for the shop's active loyalty campaign. Returns NOT_FOUND when the shop has no active loyalty campaign.
{/* This file was generated by Fumadocs. Do not edit this file directly. Any changes should be made by running the generation command again. */}
---
## Section: API
# Get payment event by ID
**URL:** https://docs.stash.gg/api/ingress/payments/GetPaymentEvent
**Description:** Retrieves payment details by ID. Returns information about items, pricing, and payment status. This is a server-side endpoint and should not be called from the client.
{/* This file was generated by Fumadocs. Do not edit this file directly. Any changes should be made by running the generation command again. */}
---
## Section: API
# Convert prices
**URL:** https://docs.stash.gg/api/ingress/pricing/ConvertPrices
**Description:** Fetches pre-converted prices from the price sheet for the given destination country, applies tax based on region, and optionally applies custom rounding. Returns final prices in minor units and locale-formatted display strings.
{/* This file was generated by Fumadocs. Do not edit this file directly. Any changes should be made by running the generation command again. */}
---
## Section: API
# Get prices
**URL:** https://docs.stash.gg/api/ingress/pricing/GetPrices
**Description:** Retrieves uploaded pricing sheet data for the shop associated with the API key, filtered by region. Returns paginated price entries.
{/* This file was generated by Fumadocs. Do not edit this file directly. Any changes should be made by running the generation command again. */}
---
## Section: API
# Generate authenticated URL
**URL:** https://docs.stash.gg/api/ingress/server-urls/GenerateAuthenticatedUrl
**Description:** Generates an authenticated URL for a specific target (home or loyalty) for a user. This endpoint is used for server-side URL generation.
{/* This file was generated by Fumadocs. Do not edit this file directly. Any changes should be made by running the generation command again. */}
---
## Section: API
# Generate Checkout
**URL:** https://docs.stash.gg/api/ingress/stash-pay/GenerateQuickPayUrl
**Description:** Generates a quick payment URL for server-side operations. This endpoint is used internally for creating payment links with user information.
{/* This file was generated by Fumadocs. Do not edit this file directly. Any changes should be made by running the generation command again. */}
---
## Section: API
# Create a subscription change checkout link
**URL:** https://docs.stash.gg/api/ingress/subscription-checkout-links/CreateSubscriptionChangeCheckoutLink
**Description:** Creates a checkout link for upgrading an existing subscription to a new plan. Only subscriptions in a `active`, `trialing`, or `cancelled` (still within paid period before expiration) state are eligible for upgrades.
{/* This file was generated by Fumadocs. Do not edit this file directly. Any changes should be made by running the generation command again. */}
---
## Section: API
# Create a subscription checkout link
**URL:** https://docs.stash.gg/api/ingress/subscription-checkout-links/CreateSubscriptionCheckoutLink
**Description:** Creates a checkout link for purchasing a subscription plan. The link can be shared with users to complete their subscription purchase.
{/* This file was generated by Fumadocs. Do not edit this file directly. Any changes should be made by running the generation command again. */}
---
## Section: API
# Get plan by ID
**URL:** https://docs.stash.gg/api/ingress/subscription-plans/GetPlan
**Description:** Retrieves a subscription plan by its unique identifier. Returns full plan details including pricing, billing period, and trial configuration.
{/* This file was generated by Fumadocs. Do not edit this file directly. Any changes should be made by running the generation command again. */}
---
## Section: API
# Get plan by code
**URL:** https://docs.stash.gg/api/ingress/subscription-plans/GetPlanByCode
**Description:** Retrieves a subscription plan by its code (e.g., 'monthly_premium'). Plan codes are unique within a segment.
{/* This file was generated by Fumadocs. Do not edit this file directly. Any changes should be made by running the generation command again. */}
---
## Section: API
# List plans
**URL:** https://docs.stash.gg/api/ingress/subscription-plans/ListPlans
**Description:** Lists all available subscription plans for a shop. By default returns only active plans. Use the status filter to include archived or deprecated plans.
{/* This file was generated by Fumadocs. Do not edit this file directly. Any changes should be made by running the generation command again. */}
---
## Section: API
# Cancel subscription
**URL:** https://docs.stash.gg/api/ingress/subscriptions/CancelSubscription
**Description:** Cancels a subscription. By default, access continues until the end of the current billing period (cancel_at_period_end=true). A subscription.canceled webhook is sent and the returned subscription has status 'canceled'. For past_due subscriptions, cancellation is immediate: a single subscription.expired webhook is sent and the returned subscription has status 'expired'.
{/* This file was generated by Fumadocs. Do not edit this file directly. Any changes should be made by running the generation command again. */}
---
## Section: API
# Get payments by subscription ID
**URL:** https://docs.stash.gg/api/ingress/subscriptions/GetPaymentsBySubscriptionId
**Description:** Retrieves payments associated with a subscription with pagination support. Returns a list of payment objects including payment ID, amount, currency, a succeeded indicator, and timestamps. Use the `next_page_token` from the response to fetch the next page.
{/* This file was generated by Fumadocs. Do not edit this file directly. Any changes should be made by running the generation command again. */}
---
## Section: API
# Get subscription by ID
**URL:** https://docs.stash.gg/api/ingress/subscriptions/GetSubscription
**Description:** Retrieves a subscription by its unique identifier. Returns the full subscription object including status, billing period, and dates.
{/* This file was generated by Fumadocs. Do not edit this file directly. Any changes should be made by running the generation command again. */}
---
## Section: API
# List subscriptions
**URL:** https://docs.stash.gg/api/ingress/subscriptions/ListSubscriptions
**Description:** Query subscriptions by player and optionally filter by status. Returns all matching subscriptions for the specified external_account_id.
{/* This file was generated by Fumadocs. Do not edit this file directly. Any changes should be made by running the generation command again. */}
---
## Section: API
# Reactivate subscription
**URL:** https://docs.stash.gg/api/ingress/subscriptions/ReactivateSubscription
**Description:** Reactivates a previously canceled subscription. Only valid before the subscription has expired.
{/* This file was generated by Fumadocs. Do not edit this file directly. Any changes should be made by running the generation command again. */}
---
## Section: API
# Get user preferences
**URL:** https://docs.stash.gg/api/ingress/user-preferences/GetUserPreferences
**Description:** Retrieves the payment channel preference for a specific user. Returns 404 NotFound if no preference is set.
{/* This file was generated by Fumadocs. Do not edit this file directly. Any changes should be made by running the generation command again. */}
---
## Section: API
# Set user preferences
**URL:** https://docs.stash.gg/api/ingress/user-preferences/SetUserPreferences
**Description:** Creates or updates the payment channel preference for a user. This is a server-side endpoint and should not be called from the client.
{/* This file was generated by Fumadocs. Do not edit this file directly. Any changes should be made by running the generation command again. */}
---
## Section: API
# Approve custom login
**URL:** https://docs.stash.gg/api/ingress/webshop-account-linking/ApproveCustomLogin
**Description:** Used to approve custom login requests using JWT authentication (For exampe Apple ID, Google or other JWT based login providers). This is a server-side endpoint and should not be called from the client.
{/* This file was generated by Fumadocs. Do not edit this file directly. Any changes should be made by running the generation command again. */}
---
## Section: API
# Force Logout user
**URL:** https://docs.stash.gg/api/ingress/webshop-account-linking/LogoutUser
**Description:** Logs out a user by invalidating their session. This endpoint is typically called when a user signs out of the game or switches to another account.
{/* This file was generated by Fumadocs. Do not edit this file directly. Any changes should be made by running the generation command again. */}
---
## Section: Game server API
# Getting Started
**URL:** https://docs.stash.gg/api/egress
**Description:** APIs you can expose on your game backend server to power a WebShop via Real-time Catalog, and/or StashPay checkout links.
## What this section is [#what-this-section-is]
Reference endpoints that Stash calls on your backend.
This is an **egress** integration: Stash calls your backend. You implement and host these APIs, and Stash invokes them during catalog and checkout flows.
**Skip the API reference**: You can [generate type-safe clients](/guides/stash-webshop/catalog/real-time-catalog#step-1-auto-generate-clients-recommended) from our protobufs and let your IDE's autocomplete guide the integration - no need to read through the API specification below.
Implement these endpoints in your backend, keep request/response contracts aligned with the reference, and return validation outcomes exactly as documented.
## Endpoints [#endpoints]
---
## Section: Game server API
# Get product catalog
**URL:** https://docs.stash.gg/api/egress/catalog/GetCatalog
**Description:** Retrieves the complete product catalog including all purchasable items, offer chains, and non-purchasable display items organized in rows.
{/* This file was generated by Fumadocs. Do not edit this file directly. Any changes should be made by running the generation command again. */}
---
## Section: Game server API
# Get offer details
**URL:** https://docs.stash.gg/api/egress/catalog/GetOfferDetails
**Description:** Retrieves detailed information about a specific offer, including reward details and tabbed content with structured data tables for each item.
{/* This file was generated by Fumadocs. Do not edit this file directly. Any changes should be made by running the generation command again. */}
---
## Section: Game server API
# Get player by ID
**URL:** https://docs.stash.gg/api/egress/players/GetPlayer
**Description:** Retrieves an existing player by ID. Returns player information including profile data and in-game currency balance.
{/* This file was generated by Fumadocs. Do not edit this file directly. Any changes should be made by running the generation command again. */}
---
## Section: Game server API
# Cancel pending payment
**URL:** https://docs.stash.gg/api/egress/purchase/CancelPayment
**Description:** Step 2B: Cancels a pending purchase that was previously registered. IMPORTANT: Always expects HTTP 200 OK response with inline error codes in the body.
{/* This file was generated by Fumadocs. Do not edit this file directly. Any changes should be made by running the generation command again. */}
---
## Section: Game server API
# Confirm payment completion
**URL:** https://docs.stash.gg/api/egress/purchase/ConfirmPayment
**Description:** Step 2A: Confirms and completes a pending purchase that was previously registered. IMPORTANT: Expects HTTP error status (3xx, 4xx, 5xx) codes for failed purchases.
{/* This file was generated by Fumadocs. Do not edit this file directly. Any changes should be made by running the generation command again. */}
---
## Section: Game server API
# Register payment intent
**URL:** https://docs.stash.gg/api/egress/purchase/RegisterPayment
**Description:** Step 1: Registers a purchase intent with the game backend. The game backend is expected to reserve inventory for the purchase. IMPORTANT: Always expects HTTP 200 OK response with inline error codes in the body.
{/* This file was generated by Fumadocs. Do not edit this file directly. Any changes should be made by running the generation command again. */}
---
## Section: Partners
# Partner Resources
**URL:** https://docs.stash.gg/partners
**Description:** Resources and guides for Stash partners, including payment integration, merchant operations, and compliance information.
Welcome to the Stash Partner portal. Here you'll find everything you need to understand and implement Stash's payment solutions and merchant services.
## Get to know Stash [#get-to-know-stash]
## Payments & operations [#payments--operations]
## Products [#products]
---
## Section: Partners
# Who we are
**URL:** https://docs.stash.gg/partners/Introduction/company-introduction
**Description:** An introduction to Stash and its Product Suite, outlining how studios use direct distribution, payments, and commerce tools to monetize and distribute games with greater control and less operational overhead.
Studios are increasingly investing in web and direct channels to reduce platform dependency. Stash helps game studios distribute and monetize their games directly. Instead of relying entirely on third-party platforms and intermediaries, studios can use Stash to take greater ownership of how their games are sold, paid for, and delivered to players.
At its core, Stash is built around direct distribution. This means giving studios more control over payments, pricing, and player relationships, while reducing the operational complexity that typically comes with running those systems at scale. Stash handles the heavy lifting behind the scenes so partners can focus on building great games and growing their business.
## Product Suite [#product-suite]
Stash offers a set of products designed to support direct distribution for game studios. Each product addresses a different part of the player journey, from payments to commerce to distribution, and can be used independently depending on a studio’s needs.
While the products are modular, they are designed to work together as part of a single ecosystem. This allows partners to adopt Stash incrementally, without committing to a fixed path or rigid architecture.
## Stash Pay [#stash-pay]
Stash Pay enables in-game payments through a checkout experience designed to be reliable, fast to integrate, and easy for players to use. It allows studios to process payments directly while Stash manages the operational complexity behind the scenes.
| **Custom JWT/OIDC** | OIDC Discovery URL, Client ID, Client Secret | Contact Stash support for custom/OIDC provider integration. |
Apple Game Center and Google Play Games support only passwordless login in the game client. They do not work with browser-based SSO.
## Set up identity providers [#set-up-identity-providers]
Configure your identity providers in Stash Studio under **Webshop settings**. You can add more than one provider. Some providers require additional credentials.
For more information on using Stash Studio, see the [Stash Studio Overview](/guides/partners/stash-studio) article in the documentation.
To add a custom or OIDC provider, contact Stash support before setting up the integration.
## Set up direct sign-in and SSO [#set-up-direct-sign-in-and-sso]
Configure sign-in and SSO in your webshop by adding provider details, such as redirect URLs and token exchange settings.
This setup does not require code or client-side development.
## Configure account linking [#configure-account-linking]
After setting up your identity providers, configure account linking in your game client. This step requires changes in the client code.
---
## Section: Guides
# Analytics & App Integration
**URL:** https://docs.stash.gg/guides/stash-webshop/how-tos/loyalty/analytics-app-integration
**Description:** Consume loyalty state two ways: process pushed loyalty events through webhooks for analytics and data pipelines, and pull loyalty on demand with the read-only API to show loyalty in-app and enrich offers.
There are two goals your backend uses loyalty state for, and each has a natural path:
* **Analytics and data pipelines** consume the loyalty events Stash pushes on webhooks: earn, tier changes, milestone claims, and refunds, as they happen.
* **In-app integration** pulls loyalty on demand with the read-only API: show a player's tier and progress in your app, and enrich offers based on tier.
Stash owns all program state (XP balances, tiers, claim history). Both paths are read-only views of it; grants are driven by webhooks (or synchronous milestone delivery), never by a read.
## Analytics: loyalty webhooks [#analytics-loyalty-webhooks]
Every webhook that can change or reflect a player's XP carries a shared `loyalty` sub-payload, so your backend receives a consistent, campaign-scoped view of XP balance, tier, and progression on each of them. Because these events arrive as they happen, they are the feed for analytics and data pipelines: track earn, tier upgrades and downgrades, milestone claims, and refunds over time. The payload is additive; events serialize exactly as before for shops without an active loyalty program.
### Events that carry loyalty [#events-that-carry-loyalty]
| Event | `loyalty` payload | XP effect |
| --------------------------- | ------------------------------------ | ---------------------------------------------------- |
| `PURCHASE_SUCCEEDED` | Present when the program is live | Positive `pointsDelta`; tier may upgrade |
| `PURCHASE_REFUNDED` | Present when the program is live | Negative `pointsDelta`; tier may downgrade |
| `LOYALTY_MILESTONE_CLAIMED` | Always present | No internal XP change; adds `milestoneTierId` |
| `FREE_ITEM_REDEEMED` | Present when the free gift grants XP | Positive `pointsDelta` if the gift grants Loyalty XP |
### The `loyalty` payload [#the-loyalty-payload]
The `loyalty` object (type `PlayerLoyaltyState`) rides inside each event's payload. It is populated only when the shop has a **published, enabled** loyalty program **and** a live campaign. Otherwise the whole object is omitted and the event is byte-identical to a non-loyalty shop's.
```json title="Shared loyalty sub-payload"
"loyalty": {
"campaignId": "spring_2026",
"totalPoints": 1250,
"pointsDelta": 150,
"currentTierId": "silver",
"previousTierId": "bronze",
"pointsMultiplierPermille": 2000,
"pointsToNextTier": 750,
"pointsToNextMilestone": 250,
"nextMilestone": {
"milestoneId": "milestone_uuid",
"rewards": [
{ "itemId": "gold-coins", "quantity": 500, "type": "IN_GAME_CURRENCY" },
{ "itemId": "starter-sword", "quantity": 1, "type": "SKU_ITEM" }
]
},
"unlockedMilestones": [
{
"milestoneId": "earlier_milestone_uuid",
"rewards": [
{ "itemId": "gold-coins", "quantity": 250, "type": "IN_GAME_CURRENCY" }
]
}
]
}
```
The tier ID fields (`currentTierId`, `previousTierId`), `nextMilestone`, and `unlockedMilestones` are omitted when they do not apply. Treat a missing field as "no change" / "none", not as an error. `nextMilestone.rewards` is a list: read every entry, since one milestone can grant several rewards.
### Payload examples [#payload-examples]
The envelope is the standard v1 webhook shape; the `loyalty` object appears inside the event's payload object.
A purchase awards XP at the current tier's earn rate. `pointsDelta` is positive, `totalPoints` is the post-purchase balance, and `previousTierId` appears only if the purchase moved the player up a tier. If the XP gain crossed one or more milestone thresholds, `unlockedMilestones` lists them; milestones are claimed manually, so this is how your pipeline observes the moment one became claimable.
```json title="Purchase Succeeded with loyalty"
{
"type": "PURCHASE_SUCCEEDED",
"environment": "production",
"purchaseSucceeded": {
"timeMillis": 1748476800000,
"orderId": "order_abc123",
"userId": "player_external_account_id",
"currency": "USD",
"total": "9.99",
"source": "Cart",
"items": [{ "id": "item_456", "quantity": 1, "price": "9.99" }],
"loyalty": {
"campaignId": "spring_2026",
"totalPoints": 1250,
"pointsDelta": 150,
"currentTierId": "silver",
"previousTierId": "bronze",
"pointsMultiplierPermille": 2000,
"pointsToNextTier": 750,
"pointsToNextMilestone": 250,
"nextMilestone": {
"milestoneId": "milestone_uuid",
"rewards": [
{ "itemId": "gold-coins", "quantity": 500, "type": "IN_GAME_CURRENCY" },
{ "itemId": "starter-sword", "quantity": 1, "type": "SKU_ITEM" }
]
},
"unlockedMilestones": [
{
"milestoneId": "earlier_milestone_uuid",
"rewards": [
{ "itemId": "gold-coins", "quantity": 250, "type": "IN_GAME_CURRENCY" }
]
}
]
}
}
}
```
A refund is delivered as an XP-update event. Stash debits XP proportional to the refunded amount, so `pointsDelta` is **negative** and `totalPoints` is the post-refund balance. If the debit drops the player below a tier threshold, `previousTierId` reflects the downgrade. See [Refunds & XP adjustments](/guides/stash-webshop/how-tos/loyalty/refunds-and-xp).
```json title="Purchase Refunded with loyalty"
{
"type": "PURCHASE_REFUNDED",
"environment": "production",
"purchaseRefunded": {
"timeMillis": 1748480400000,
"orderId": "order_abc123",
"userId": "player_external_account_id",
"currency": "USD",
"total": "9.99",
"reason": "Customer requested refund",
"source": "Cart",
"items": [{ "id": "item_456", "quantity": 1, "price": "9.99" }],
"loyalty": {
"campaignId": "spring_2026",
"totalPoints": 1100,
"pointsDelta": -150,
"currentTierId": "bronze",
"previousTierId": "silver",
"pointsMultiplierPermille": 1000,
"pointsToNextTier": 400,
"pointsToNextMilestone": 100
}
}
}
```
Fired when a player claims a milestone and the shop uses async webhook delivery. The `rewards` array is your grant list; each entry is `{ itemId, quantity, type }`, where `type` is one of the bare reward-kind tokens (`IN_GAME_CURRENCY`, `LOYALTY_CURRENCY`, `LOYALTY_POINTS`, or `SKU_ITEM`). The [loyalty API](/api/ingress/loyalty/GetLoyalty) reports the same values in their prefixed form. Alongside the shared `loyalty` payload, this event adds `milestoneTierId`: the tier the claimed milestone belongs to. Claiming does not change the internal XP balance, so `pointsDelta` is 0 and `previousTierId` is omitted.
```json title="Loyalty Milestone Claimed with loyalty"
{
"type": "LOYALTY_MILESTONE_CLAIMED",
"environment": "production",
"shopId": "your-shop-uuid",
"loyaltyMilestoneClaimed": {
"timeMillis": 1748476800000,
"userId": "player_external_account_id",
"milestoneId": "milestone_uuid",
"milestoneTierId": "silver",
"rewards": [
{ "itemId": "gold-coins", "quantity": 500, "type": "IN_GAME_CURRENCY" }
],
"loyalty": {
"campaignId": "spring_2026",
"totalPoints": 1250,
"pointsDelta": 0,
"currentTierId": "silver",
"pointsMultiplierPermille": 2000,
"pointsToNextTier": 750,
"pointsToNextMilestone": 250,
"nextMilestone": {
"milestoneId": "milestone_uuid",
"rewards": [
{ "itemId": "power-up", "quantity": 3, "type": "IN_GAME_CURRENCY" }
]
}
}
}
}
```
A free gift can be configured to grant Loyalty XP. When it does, the redemption credits XP and this event carries the loyalty payload with a positive `pointsDelta`. Any metadata declared on the free gift in your catalog is echoed on the `metadata` field. See [Refunds & XP adjustments](/guides/stash-webshop/how-tos/loyalty/refunds-and-xp#free-gift-xp).
```json title="Free Item Redeemed with loyalty"
{
"type": "FREE_ITEM_REDEEMED",
"environment": "production",
"freeItemRedeemed": {
"userId": "player_external_account_id",
"itemId": "item_free_001",
"metadata": { "promotionId": "spring_kickoff" },
"loyalty": {
"campaignId": "spring_2026",
"totalPoints": 300,
"pointsDelta": 100,
"currentTierId": "bronze",
"pointsMultiplierPermille": 1000,
"pointsToNextTier": 200,
"pointsToNextMilestone": 50
}
}
}
```
### Receiver guidance [#receiver-guidance]
* **Key tier logic on the tier ID.** `currentTierId`, `previousTierId`, and `milestoneTierId` are Studio tier IDs, stable for the campaign. Display names change and are localized.
* **React to tier changes from `previousTierId`.** Its presence means the tier changed this event; its absence means no change. You do not need to track prior tier state yourself.
* **Use `pointsMultiplierPermille` for tier-relative display, not for granting.** It reports how much faster the current tier earns Loyalty XP per USD than the base (first, lowest) tier, as an integer in permille: divide by 1000 (`2000` = 2x, base tier `1000` = 1x). It is derived from Studio earn rates for display and messaging (for example "2x XP at this tier"); the authoritative XP change for this event is always `pointsDelta`.
* **Reconcile on `campaignId`.** Values are scoped to the active campaign. When a season rolls to a new campaign, the `campaignId` changes; scope any per-season tier or reward logic to it.
* **Be idempotent.** Webhooks can be re-delivered. De-duplicate purchase grants on `orderId` and milestone grants on `userId` + `milestoneId`.
* **De-duplicate unlock reactions on `milestoneId`.** Redelivery, and on the purchase path a loyalty snapshot frozen at cart-calculation time, mean the same entry in `unlockedMilestones` can be reported more than once. And do not grant from it: an unlock only means the milestone became claimable; the grant signal is the `LOYALTY_MILESTONE_CLAIMED` event.
* **Treat a missing `loyalty` object as "no loyalty".** It is omitted for shops without a live program, and (on refund only) when an XP debit could not be applied.
For webhook endpoint setup, signature verification, and retry behavior, see [Webhooks overview](/guides/get-started/stash-webhooks/overview). For every event type Stash sends, see the [Webhook list](/guides/get-started/stash-webhooks/webhook-list).
## In-app integration: the loyalty API [#in-app-integration-the-loyalty-api]
Two read-only endpoints let your backend pull loyalty on demand, so you can show a player's loyalty in your app and enrich offers based on tier:
* [Get loyalty program configuration](/api/ingress/loyalty/GetLoyalty) returns the shop's active campaign: its tiers (ordered by starting points) and the milestones inside each tier, with their rewards. Use it to render the tier ladder, milestones, and upcoming rewards in your own surfaces. Cache it; it changes only when you publish in Studio.
* [Get a player's loyalty standing](/api/ingress/loyalty/GetPlayerLoyalty) returns one player's live state: points balance, current tier, distance to the next tier and milestone, and the effective points multiplier. Use it to show where a player stands, and to enrich offers, for example adding a larger bonus at higher tiers by scaling with the effective multiplier.
Both return `NOT_FOUND` when the shop has no active loyalty campaign.
The API Reference is the authoritative source for exact paths, parameters, the full response schema, and an interactive try-it console. See [Get loyalty program configuration](/api/ingress/loyalty/GetLoyalty) and [Get a player's loyalty standing](/api/ingress/loyalty/GetPlayerLoyalty).
### Authentication [#authentication]
Call these endpoints from your backend only, with your shop's server API key. The key is shop-scoped, so the tiers, milestones, and standing returned belong to the shop the key authenticates. Never call them from a game client or expose the key.
### Reward type values [#reward-type-values]
Reward `type` takes two string forms for the same set of reward kinds. The loyalty API emits the **prefixed** enum names: `LOYALTY_REWARD_TYPE_IN_GAME_CURRENCY`, `LOYALTY_REWARD_TYPE_LOYALTY_CURRENCY`, `LOYALTY_REWARD_TYPE_LOYALTY_POINTS`, `LOYALTY_REWARD_TYPE_SKU_ITEM`, plus `LOYALTY_REWARD_TYPE_UNSPECIFIED` for the zero value. The webhook payloads above emit the **bare** token: `IN_GAME_CURRENCY`, `LOYALTY_CURRENCY`, `LOYALTY_POINTS`, `SKU_ITEM`. They map one-to-one; strip the `LOYALTY_REWARD_TYPE_` prefix to line them up. For a SKU reward, `itemId` is the catalog product's SKU (external ID); for currency and points rewards, `itemId` is the reward type ID.
## When to use which [#when-to-use-which]
* **Webhooks, for analytics.** Consume pushed events to feed analytics and data pipelines, and to react as state changes: earn, tier upgrades and downgrades, milestone claims, and refunds the moment they happen.
* **The API, for in-app integration.** Pull on demand to render loyalty in your app (tier ladder, current standing, progress, next milestone), to enrich offers by tier, and to reconcile a player after a missed or replayed webhook. Read the configuration once and cache it.
* **Grant from webhooks, not reads.** The loyalty API is read-only context; grant rewards from the `LOYALTY_MILESTONE_CLAIMED` webhook (or synchronous milestone delivery), never from a read.
---
## Section: Guides
# Configure in Stash Studio
**URL:** https://docs.stash.gg/guides/stash-webshop/how-tos/loyalty/configuration
**Description:** Step-by-step walkthrough for configuring a loyalty program in Stash Studio: reward types, program settings, tiers, milestones, validation rules, and publishing.
Configuration is self-serve. Open your shop in [Stash Studio](https://studio.stash.gg/) and go to the **Loyalty** section, which has two surfaces: **Reward Types** and **Configuration**. Use [studio-test](https://studio-test.stash.gg/) for test shops.
Follow the order below. Reward types must exist before tiers and milestones can reference them.
### Define reward types [#define-reward-types]
On the **Reward Types** surface, create each currency or item your program grants: Loyalty XP, your in-game currencies, and any catalog products used as rewards. Give each a name and a 162 x 162 px icon.
Reward types are reused across the whole program, so define them once here. See [Reward types](/guides/stash-webshop/how-tos/loyalty/reward-types) for what each type means.
### Configure program settings [#configure-program-settings]
On the **Configuration** surface, set the program's display name (for example "Pit Pass" or "VIP Club") and turn on the **Enabled** toggle. The program must be enabled to publish.
### Create tiers [#create-tiers]
Add tiers in ascending XP order. Each tier is a short modal: general info (name, tier ID, XP threshold), assets (icon, optional background and colour), and earn rates (reward type and amount per USD for each).
The first tier must start at 0 XP. Configure earn rates for every tier; there are no inherited defaults. See [Tiers](/guides/stash-webshop/how-tos/loyalty/tiers) for field details.
### Add milestones [#add-milestones]
Inside each tier, add one or more milestones: general info (name, XP threshold within the tier's range), assets (icon and background, both required), and rewards (reward name, reward types, and fixed amounts).
Each tier must contain at least one milestone. See [Milestones](/guides/stash-webshop/how-tos/loyalty/milestones) for field details.
### Publish the program [#publish-the-program]
The program starts in **Draft**: no XP is awarded and no milestone is claimable until you publish. Click **Publish** in the Loyalty overview to validate and take the program live.
## Validation rules [#validation-rules]
All of these must pass before the program can publish:
* The program is enabled and has a display name.
* At least one reward type is configured.
* At least one tier exists, and the first tier starts at 0 XP.
* Tier XP thresholds are unique.
* Every tier has a name, a threshold, and at least one earn rate greater than 0.
* Every tier contains at least one milestone.
* Every milestone has a name, an XP threshold within its tier's range, an icon, a background image, a reward name, and at least one reward amount greater than 0.
## Draft and published [#draft-and-published]
A program moves **Draft → Published**, and back via unpublish.
Once published, the **structure locks**: XP thresholds, reward assignments, and reward amounts cannot change, and tiers, milestones, and reward types cannot be created or deleted.
**Display fields stay editable**: names, icons, backgrounds, and colours can be updated live, so creative can be refreshed within a season without touching the economy.
To make structural changes after publishing, unpublish, edit, and re-publish.
---
## Section: Guides
# Loyalty Program
**URL:** https://docs.stash.gg/guides/stash-webshop/how-tos/loyalty
**Description:** Overview of the Stash loyalty program: how programs, campaigns, tiers, milestones, and rewards fit together, and how your backend receives loyalty state on webshop webhooks.
The Stash loyalty program rewards players for webshop spend. Players earn Loyalty XP on every purchase, progress through tiers as their XP grows, and claim milestone rewards you configure. Stash is the source of truth for all program state: XP balances, tier status, and claim history. Your backend only grants the rewards Stash tells it to grant, and receives a consistent view of loyalty state on every XP-affecting webhook.
You configure the program in [Stash Studio](https://studio.stash.gg/) under the **Loyalty** section of your shop. It runs on your existing webshop with no additional client integration for accrual.
## The model [#the-model]
A shop has one loyalty program. The program is organized as a hierarchy:
| Concept | What it is |
| --------------- | -------------------------------------------------------------------------------------------------------------------------------------------------------------------------------------------------------------------------------------------------------------------------------------------------------------------------------------------------------------------- |
| **Program** | The loyalty system on your shop. One per shop, configured in Studio. |
| **Campaign** | A generation of the program, scoped to a season. Every loyalty value your backend receives is stamped with a `campaignId` so you can reconcile XP and tier across season boundaries. See [Refunds & XP adjustments](/guides/stash-webshop/how-tos/loyalty/refunds-and-xp#campaign-and-season-boundaries). |
| **Reward Type** | A reward players can earn, defined once on the **Reward Types** surface in Studio: Loyalty XP or an in-game currency (Core Currency in Studio). Reward types are applied as per-tier earn rates for spend (reward per USD spent); catalog products can also be granted as milestone rewards. See [Reward types](/guides/stash-webshop/how-tos/loyalty/reward-types). |
| **Tier** | A named progression level unlocked when the player's XP crosses its threshold. Each tier carries its own spend-based earn rates and contains its own milestones. See [Tiers](/guides/stash-webshop/how-tos/loyalty/tiers). |
| **Milestone** | A one-time reward checkpoint at a specific XP value, nested under the tier it belongs to. See [Milestones](/guides/stash-webshop/how-tos/loyalty/milestones). |
## How players earn and claim [#how-players-earn-and-claim]
Two reward mechanics run in parallel, and the distinction drives the whole integration:
* **Accrual is automatic.** At checkout, Stash updates the player's Loyalty XP and reports the per-USD Core Currency reward on the purchase webhook for your backend to grant. No player action or extra client integration is involved.
* **Milestone claims are player-initiated.** When XP crosses a milestone threshold the reward becomes claimable in the loyalty hub. The player clicks **Claim**, and Stash delivers the reward to your backend to grant.
## Loyalty state on webhooks [#loyalty-state-on-webhooks]
Every webhook that can change or reflect a player's XP carries a shared `loyalty` sub-payload (the loyalty snapshot, type `PlayerLoyaltyState`): the current XP balance, the signed XP delta, the current and previous tier IDs, the current tier's `pointsMultiplierPermille` (its XP earn rate relative to the base tier, in permille: `2000` = 2x), progress to the next tier and milestone, and the `campaignId`. It rides on four events:
* `PURCHASE_SUCCEEDED`
* `PURCHASE_REFUNDED`
* `LOYALTY_MILESTONE_CLAIMED`
* `FREE_ITEM_REDEEMED`
Refunds are delivered as genuine XP-update events: Stash debits XP proportional to the refunded amount and reports the new balance and tier. See [Analytics & app integration](/guides/stash-webshop/how-tos/loyalty/analytics-app-integration) for the full contract.
The same loyalty snapshot is also included in the `RegisterPayment` and `ConfirmPayment` purchase requests Stash sends to a real-time-catalog backend, so your backend has the player's tier and XP context in-band at purchase time. See [Loyalty snapshot on purchase requests](/guides/stash-webshop/catalog/real-time-catalog#loyalty-snapshot-on-purchase-requests).
## The loyalty hub [#the-loyalty-hub]
Players view their tier status, XP progress, and claimable milestones through the Stash loyalty hub, a hosted UI embedded in your webshop. No additional integration is required for the hub itself.
To deep-link a player directly into the hub, call [Generate authenticated URL](/api/ingress/server-urls/GenerateAuthenticatedUrl) from your backend with the target set to `LOYALTY`. The endpoint returns an authenticated URL that opens the player straight to the loyalty hub.
## Next steps [#next-steps]
---
## Section: Guides
# Milestone SKU Rewards
**URL:** https://docs.stash.gg/guides/stash-webshop/how-tos/loyalty/milestone-sku-rewards
**Description:** Configure a catalog product (SKU) as a milestone reward in Stash Studio: the tabbed reward picker, adding products and reward types inline, the milestone preview, and how SKU rewards appear on the claim webhook.
A milestone reward does not have to be a currency amount. It can also be an arbitrary product from your catalog, a single item or a bundle, delivered as a SKU. Use SKU rewards when a milestone should grant a packaged product rather than raw currency.
This page covers configuring SKU rewards on a milestone. For the reward types themselves, see [Reward types](/guides/stash-webshop/how-tos/loyalty/reward-types); for the milestone model and claim flow, see [Milestones](/guides/stash-webshop/how-tos/loyalty/milestones).
## The reward picker [#the-reward-picker]
A milestone's **Reward** step uses a tabbed picker with two sources. One selection can mix rewards from both tabs.
| Tab | What it lists | Row shows |
| ------------------- | ----------------------------------------------------- | -------------------------------------------------------- |
| **Reward Types** | Shop reward types (Loyalty XP and in-game currencies) | Icon, name, and reward type |
| **Product Catalog** | Published catalog products | Image, display name, and the product's external ID (SKU) |
Type in the picker to filter the active tab by name or external ID, then **Apply** to commit the selection. Currency rewards take an amount; product rewards take a quantity, which defaults to 1.
A product reward row shows the product's SKU as a subtitle. For a bundle, it also shows an item count and a tooltip listing the bundle contents.
{/* SCREENSHOT PENDING: milestone Reward step, tabbed picker (Reward Types | Product Catalog) */}
Only **published** catalog products can be attached as a milestone reward. A product that is not yet published cannot be selected. See adding a product inline below.
## Add a product without leaving the modal [#add-a-product-without-leaving-the-modal]
If the product you want does not exist yet, add it inline from the picker's **+ Add a new product** link, without losing your milestone draft.
### Enter the product details [#enter-the-product-details]
Provide a **Product ID** (your partner SKU, stored as the product's external ID), a **Display Name**, and a **Main Image**. For a bundle, add one or more **Items** rows, each with an image and quantity.
### Save [#save]
Stash creates the product as a reward-only product and publishes it immediately, then auto-selects it as a product reward on the milestone with quantity 1. Reward-only products are publishable without a price, so they are eligible to attach right away.
If publishing fails, your draft is kept, the product is not auto-selected, and the error is surfaced so you can resolve it in the catalog.
{/* SCREENSHOT PENDING: inline "Add New Product" subview (Product ID, Display Name, Main Image, bundle Items) */}
## Add a reward type inline [#add-a-reward-type-inline]
The picker also offers **+ Add a new reward type**, which creates an in-game currency reward type (name and icon) and auto-selects it. A shop has one reward type per currency, so the link is hidden once that reward type exists. Loyalty XP is the progression currency and is not offered as a milestone reward type here.
{/* SCREENSHOT PENDING: inline "Add New Reward Type" subview (Name, Icon) */}
## Preview the milestone [#preview-the-milestone]
The milestone modal has a **Preview** step that renders a live, read-only mock of the shop-facing milestone card from your current configuration: the XP-threshold header, the reward image, a reward caption, and the Claim pill. The caption uses the milestone's reward name if set, otherwise it is derived from the first configured reward (for example "Handful of Bucks x2").
If the milestone is incomplete, the preview shows a placeholder card and a checklist of what is missing, with links that jump to the step that fixes each item.
{/* SCREENSHOT PENDING: milestone Preview step (complete card and incomplete checklist) */}
## SKU rewards on the claim webhook [#sku-rewards-on-the-claim-webhook]
A SKU reward appears in `LOYALTY_MILESTONE_CLAIMED` exactly like a currency reward: an entry in the `rewards` array with the product SKU as `itemId`, the configured `quantity`, and `type` `SKU_ITEM`. The `type` field is a typed enum: currency rewards carry `IN_GAME_CURRENCY`, `LOYALTY_CURRENCY`, or `LOYALTY_POINTS`; catalog product rewards carry `SKU_ITEM`. These are the webhook's bare tokens; the read-only [GetLoyalty API](/guides/stash-webshop/how-tos/loyalty/analytics-app-integration) returns the prefixed `LOYALTY_REWARD_TYPE_...` form of the same values. Your backend grants the product on receipt.
```json title="LOYALTY_MILESTONE_CLAIMED with a SKU reward"
"rewards": [
{ "itemId": "starter-bundle-sku", "quantity": 1, "type": "SKU_ITEM" },
{ "itemId": "gold-coins", "quantity": 500, "type": "IN_GAME_CURRENCY" }
]
```
See [Loyalty webhooks](/guides/stash-webshop/how-tos/loyalty/analytics-app-integration#loyalty_milestone_claimed) for the full event.
As with all milestone rewards, the `rewards` array is authoritative server-side configuration, never client input. Grant against the `itemId`, and de-duplicate on `userId` + `milestoneId` so a retry cannot grant a bundle twice.
---
## Section: Guides
# Milestones & Rewards
**URL:** https://docs.stash.gg/guides/stash-webshop/how-tos/loyalty/milestones
**Description:** One-time loyalty milestone rewards: how the claim flow works, what a milestone reward can contain, and the two delivery modes (async webhook or synchronous API) Stash uses to hand the reward to your backend.
A milestone is a one-time reward checkpoint at a specific XP value inside a tier. Every tier has at least one. Unlike tier earn rates, which apply on every purchase, a milestone reward is granted exactly once, when the player reaches the threshold and claims it.
## The claim flow [#the-claim-flow]
1. The player's cumulative Loyalty XP crosses a milestone's threshold.
2. The reward becomes claimable in the loyalty hub.
3. The player clicks **Claim**.
4. Stash delivers the reward to your backend, which grants it.
Claims are player-initiated. Crossing the threshold makes a milestone claimable; it does not auto-grant. Each milestone is claimable once per player.
Your backend observes step 1 the moment it happens: the loyalty payload of the webhook that awarded the XP lists the crossed milestones under [`unlockedMilestones`](/guides/stash-webshop/how-tos/loyalty/analytics-app-integration#the-loyalty-payload). The grant signal remains the claim (step 4), never the unlock.
## Milestone reward contents [#milestone-reward-contents]
A milestone reward is a fixed, one-time grant of one or more [reward types](/guides/stash-webshop/how-tos/loyalty/reward-types):
* **In-game currency**: the standard case, a fixed amount of a currency your backend grants (for example, 500 coins).
* **Loyalty XP**: a milestone can grant additional Loyalty XP.
* **Catalog products (SKU rewards)**: a milestone can deliver an arbitrary catalog product or bundle instead of currency. See [Milestone SKU rewards](/guides/stash-webshop/how-tos/loyalty/milestone-sku-rewards).
Every reward in the milestone payload is expressed as an `itemId` (the reward type or catalog SKU) and a `quantity`. The list comes from your Studio configuration and is authoritative; treat it as server-side truth, never from the client.
## Which tier a milestone belongs to [#which-tier-a-milestone-belongs-to]
Each milestone lives inside a tier. When a milestone is claimed, the `LOYALTY_MILESTONE_CLAIMED` webhook reports the owning tier as `milestoneTierId`, alongside the shared loyalty payload. See [Loyalty webhooks](/guides/stash-webshop/how-tos/loyalty/analytics-app-integration#loyalty_milestone_claimed).
## Reward delivery modes [#reward-delivery-modes]
Stash delivers a claimed reward to your backend through one of two mechanisms, configured per shop with your Stash engineering contact. It is a backend setting, not a Studio toggle.
| Mode | When to use | Trade-off |
| ------------------- | ------------------------------------------------------------ | ----------------------------------------------------------------------------------------------- |
| **Async webhook** | Simple grants where eventual consistency is acceptable. | No API to implement. Delivery is queued, so there is no immediate error feedback to the player. |
| **Synchronous API** | Real-time validation, for example complex eligibility rules. | Immediate confirmation, but you must implement an API endpoint Stash calls. |
With async webhook delivery, Stash sends `LOYALTY_MILESTONE_CLAIMED`. With synchronous API delivery, Stash calls your game backend directly and the webhook is not sent.
Make your grant handler idempotent. De-duplicate on `userId` + `milestoneId` so a retry or duplicate delivery never grants a milestone reward twice.
## Fields [#fields]
| Field | Type | Required | Notes |
| ---------------- | ----------------------- | -------- | ------------------------------------------------------------------ |
| Name | Text | Yes | Display name shown in the loyalty hub. |
| XP threshold | Number | Yes | Must fall within the parent tier's XP range. Locked after publish. |
| Icon | Image, 162 x 162 px | Yes | Milestone badge in the loyalty hub. |
| Background image | Image, 340 x 162 px | Yes | Banner behind the milestone card. |
| Reward name | Text | Yes | Display name for the reward (for example "Welcome Bonus"). |
| Rewards | 1+ reward type + amount | Yes | Fixed one-time amount per reward type. Locked after publish. |
XP thresholds and reward amounts lock when the program is published; display fields stay editable. See [Configuration](/guides/stash-webshop/how-tos/loyalty/configuration).
---
## Section: Guides
# Refunds & XP Adjustments
**URL:** https://docs.stash.gg/guides/stash-webshop/how-tos/loyalty/refunds-and-xp
**Description:** How Stash reverses Loyalty XP on refund: proportional clamp-to-zero debit, tier downgrade, and idempotency across partial refunds; plus free-gift XP grants and campaign/season boundary behavior.
Loyalty XP is not static after a purchase. Refunds reverse it, and free gifts can grant it. Both are delivered to your backend as loyalty-carrying webhook events so your game state stays in sync with the player's XP.
## Refunds are XP-update events [#refunds-are-xp-update-events]
When a webshop purchase is refunded, Stash does not just drop the loyalty state. It debits the player's Loyalty XP, recomputes the tier, and delivers `PURCHASE_REFUNDED` with the updated loyalty payload and a negative `pointsDelta`.
### Proportional debit [#proportional-debit]
The XP debited is proportional to how much of the original purchase was refunded:
```
debit = round( earnedXP x refundAmount / originalTotal )
```
* `earnedXP` is the XP the original purchase awarded.
* Rounding is half-up.
* A full refund debits the full earned XP; a partial refund debits proportionally.
### Clamp to zero [#clamp-to-zero]
The balance is floored at zero. A debit never drives XP negative, even if the player has already spent XP progression or the balance has otherwise moved since the purchase.
### Tier downgrade [#tier-downgrade]
After the debit, Stash recomputes the tier from the new balance. If the balance falls below the current tier's threshold, `currentTierId` reflects the lower tier and `previousTierId` reports the tier the player just left. React to the downgrade the same way you would any tier change.
### Idempotency and partial refunds [#idempotency-and-partial-refunds]
* Each refund is applied once. Duplicate refund notifications for the same refund are de-duplicated and do not double-debit.
* Multiple partial refunds on one order each debit proportionally and independently. Because the balance is clamped at zero, a sequence of partials that sums to the full amount can never over-debit.
The XP debit is a real balance change, so its failure handling is stricter than webhook field population. If the debit cannot be applied, Stash still sends `PURCHASE_REFUNDED` (the money is already refunded) but omits the `loyalty` payload rather than report an inconsistent balance. Treat a refund with no `loyalty` object as "XP unchanged for this event".
## Free-gift XP [#free-gift-xp]
A free gift can grant Loyalty XP in addition to its item. The XP amount is declared on the free gift in your catalog. On redemption, Stash credits the XP to the player and `FREE_ITEM_REDEEMED` carries the loyalty payload with a positive `pointsDelta`.
* If a free gift declares no XP reward, no XP is credited and the event carries no `loyalty` payload; it serializes exactly as before.
* Any metadata declared on the free gift is passed through to the `metadata` field on the webhook, the same way product metadata is. Use it for opaque correlation keys, not for display or business logic.
See the [free item redeemed example](/guides/stash-webshop/how-tos/loyalty/analytics-app-integration#free_item_redeemed).
## Campaign and season boundaries [#campaign-and-season-boundaries]
Loyalty state is keyed by campaign: a generation of the program scoped to a season. Every loyalty payload carries the `campaignId` it belongs to.
The XP wallet is a single running balance, not a per-campaign balance. This matters when a refund lands after a new season has started:
* The debit still applies to the one XP wallet.
* The `earnedXP` used for the proportional debit comes from the original purchase, so the math is stable across the boundary.
* The reported `currentTierId` and `campaignId` reflect the **current** campaign's tiers, not the campaign the purchase was made in.
Scope any per-season reconciliation on your side to the `campaignId` on each event, and expect a late refund to be reported against the live campaign.
---
## Section: Guides
# Reward Types
**URL:** https://docs.stash.gg/guides/stash-webshop/how-tos/loyalty/reward-types
**Description:** The three reward types a Stash loyalty program grants: Loyalty XP, in-game currency, and catalog products (SKU rewards). Each is defined once in Studio and reused across tiers and milestones.
A reward type defines something players earn. You define reward types once, on the **Reward Types** surface in Studio, and reference them from tier earn rates and milestone rewards. Reward types must exist before you can build tiers or milestones.
Each reward type maps to a stable ID that appears as `itemId` in webhook reward payloads. Grant against that ID, not the display name.
## Loyalty XP [#loyalty-xp]
Loyalty XP is the progression currency of the program. It is tracked entirely by Stash and is not spendable: a player's XP total determines their tier and which milestones they have reached.
* Earned automatically on every purchase at the current tier's XP earn rate.
* Reversed proportionally on refund. See [Refunds & XP adjustments](/guides/stash-webshop/how-tos/loyalty/refunds-and-xp).
* Reported to your backend as `totalPoints` and `pointsDelta` in the loyalty webhook payload.
Loyalty XP is often named natively per game (for example "Race Points"). The display name is cosmetic; the reward type ID is what identifies it on the wire.
## In-game currency [#in-game-currency]
An in-game currency is a currency, token, or item in your game's economy that Stash grants to players as a loyalty reward. Stash does not hold in-game currency balances. Stash tells your backend what to grant and when; your backend owns the balance and applies the grant.
In-game currency is granted two ways:
* **As a tier earn rate**, per USD of webshop spend, applied automatically at checkout. See [Tiers](/guides/stash-webshop/how-tos/loyalty/tiers).
* **As a milestone reward**, a fixed one-time amount the player claims. See [Milestones](/guides/stash-webshop/how-tos/loyalty/milestones).
## Catalog products (SKU rewards) [#catalog-products-sku-rewards]
A milestone reward can also deliver an arbitrary product from your catalog: a bundle or item (a SKU), rather than a currency amount. Use this for reward moments that should grant a packaged product instead of raw currency.
SKU rewards appear in the milestone claim payload the same way currency rewards do: an `itemId` (the catalog SKU) and a `quantity`. Your backend grants the product on receipt.
SKU rewards are configured on milestones, not as a standalone earn rate. See [Milestone SKU rewards](/guides/stash-webshop/how-tos/loyalty/milestone-sku-rewards) for the Studio configuration flow.
## Assets [#assets]
Each reward type takes a square icon (162 x 162 px), uploaded in Studio, shown next to the reward in the loyalty hub. Icons are display fields and stay editable after the program is published.
---
## Section: Guides
# Tiers
**URL:** https://docs.stash.gg/guides/stash-webshop/how-tos/loyalty/tiers
**Description:** How loyalty tiers work: XP thresholds, the stable string tier ID your backend receives on webhooks, per-tier earn rates, and how tier changes are reported on purchase and refund.
A tier is a named progression level. A player enters a tier when their Loyalty XP crosses the tier's threshold, and holds it as long as their balance stays at or above that threshold. Higher tiers carry more generous earn rates.
## Tier IDs [#tier-ids]
Every tier has a stable string tier ID, set in Studio. This ID is what your backend receives in the loyalty webhook payload; `currentTierId`, `previousTierId`, and `milestoneTierId` all carry it.
Key your logic on the string tier ID, never on the display name. Display names are editable after publish and are localized for players; the tier ID is stable for the life of the campaign.
## Thresholds and progression [#thresholds-and-progression]
* The first tier must start at `0` XP, so every player begins in a tier.
* Thresholds are unique and ascending. A player's tier is the highest tier whose threshold their XP has reached.
* XP is cumulative within a campaign. Reaching a higher tier does not reset the balance.
Because tier is derived from the XP balance, it moves in both directions. A purchase can move a player up a tier; a [refund](/guides/stash-webshop/how-tos/loyalty/refunds-and-xp) can move them back down when the proportional XP debit drops the balance below a threshold.
## Earn rates [#earn-rates]
Each tier defines an earn rate per USD of webshop spend, for one or more [reward types](/guides/stash-webshop/how-tos/loyalty/reward-types). Earn rates are applied automatically at checkout, using the tier the player is in at the time of purchase.
For example, a Silver tier might grant `10 XP + 5 coins per $1`, while Gold grants `20 XP + 10 coins per $1`. A player in Silver earns at Silver rates for that transaction, even if the purchase pushes them into Gold.
## Effective points multiplier [#effective-points-multiplier]
The loyalty snapshot reports `pointsMultiplierPermille`: how much faster the player's current tier earns Loyalty XP per USD than the base tier. It is the ratio of the current tier's XP earn rate to the XP earn rate of the base (first, lowest) tier, encoded as an **integer in permille** (thousandths). Divide by 1000 to get the multiplier: `1500` is 1.5x.
* The base tier is its own reference, so its value is exactly `1000` (1x).
* A tier whose XP earn rate is double the base tier's reports `2000`, triple reports `3000`, and so on.
Given the earn rates above (Bronze `5 XP`, Silver `10 XP`, Gold `20 XP` per USD), Bronze is the base tier and reports `1000` (1x), Silver reports `2000` (10 / 5 = 2x), and Gold reports `4000` (20 / 5 = 4x). Use it for tier-relative display and messaging (for example "2x XP at this tier"); it is a derived, display-oriented value, not the XP granted by any single event. The XP change for an event is always the snapshot's `pointsDelta`.
`pointsMultiplierPermille` is always measured against the base tier, not the adjacent lower tier and not the player's own `previousTierId` from the event. It is always present in the loyalty snapshot.
## Tier change reporting [#tier-change-reporting]
The loyalty webhook payload reports tier transitions explicitly:
* `currentTierId` is always the player's tier after the event applied.
* `previousTierId` is present only when the event changed the player's tier: an upgrade on purchase or a downgrade on refund. When the tier is unchanged, `previousTierId` is omitted.
This lets your backend react to tier changes (for example, unlocking or revoking a tier benefit) without tracking prior state yourself.
## Fields [#fields]
| Field | Type | Required | Notes |
| ---------------- | -------------------------- | -------- | -------------------------------------------------------------- |
| Name | Text | Yes | Display name shown in the loyalty hub. |
| Tier ID | Text | Yes | Stable identifier reported on webhooks. Set once. |
| XP threshold | Number ≥ 0 | Yes | First tier must be 0; thresholds unique. Locked after publish. |
| Earn rates | Number > 0 per reward type | Yes | Reward granted per USD spent. Locked after publish. |
| Icon | Image, 162 x 162 px | Yes | Tier badge in the loyalty hub. |
| Background image | Image, 340 x 162 px | No | Banner behind the tier card. |
| Colour | Hex | No | Tier accent colour. |
XP thresholds and earn rates lock when the program is published; display fields stay editable. See [Configuration](/guides/stash-webshop/how-tos/loyalty/configuration#draft-and-published) for the publish flow.
---
## Section: API
# Getting Started
**URL:** https://docs.stash.gg/api/ingress
**Description:** APIs provided by Stash that your backend can call.
## What this section is [#what-this-section-is]
Stash-hosted endpoints your backend calls.
This is an **ingress** integration: your backend calls Stash. Stash hosts and maintains these APIs, while you implement the server-side caller in your backend services.
Call Stash API endpoints from your backend only. Do not expose private API keys in game clients.
Keep credentials on the server, call these endpoints from backend code only, and handle auth, retries, and idempotency in your service layer.
## Endpoints [#endpoints]
---
## Section: API
# Force refresh catalog
**URL:** https://docs.stash.gg/api/ingress/catalog/ForceRefreshCatalog
**Description:** Refreshes a web shop's cached catalog so the next time a player opens the shop it reflects the latest catalog from your game backend. Applies only to shops with a real-time catalog integration; for any other integration it is a no-op that still returns success. You rarely need to call it: the catalog already refreshes automatically after web shop purchases and free-gift redemptions, and checkout always revalidates against the server. It is most useful after an in-game purchase (outside the web shop) when you want the catalog view in the Web Shop to update right away.
{/* This file was generated by Fumadocs. Do not edit this file directly. Any changes should be made by running the generation command again. */}
---
## Section: API
# Get loyalty program configuration
**URL:** https://docs.stash.gg/api/ingress/loyalty/GetLoyalty
**Description:** Retrieves the shop's active loyalty campaign configuration: its tiers (ordered by starting points) and milestones (ordered by points needed). Returns NOT_FOUND when the shop has no active loyalty campaign.
{/* This file was generated by Fumadocs. Do not edit this file directly. Any changes should be made by running the generation command again. */}
---
## Section: API
# Get a player's loyalty standing
**URL:** https://docs.stash.gg/api/ingress/loyalty/GetPlayerLoyalty
**Description:** Retrieves a single player's loyalty standing (points balance, current tier, distance to the next tier and milestone, and effective points multiplier) for the shop's active loyalty campaign. Returns NOT_FOUND when the shop has no active loyalty campaign.
{/* This file was generated by Fumadocs. Do not edit this file directly. Any changes should be made by running the generation command again. */}
---
## Section: API
# Get payment event by ID
**URL:** https://docs.stash.gg/api/ingress/payments/GetPaymentEvent
**Description:** Retrieves payment details by ID. Returns information about items, pricing, and payment status. This is a server-side endpoint and should not be called from the client.
{/* This file was generated by Fumadocs. Do not edit this file directly. Any changes should be made by running the generation command again. */}
---
## Section: API
# Convert prices
**URL:** https://docs.stash.gg/api/ingress/pricing/ConvertPrices
**Description:** Fetches pre-converted prices from the price sheet for the given destination country, applies tax based on region, and optionally applies custom rounding. Returns final prices in minor units and locale-formatted display strings.
{/* This file was generated by Fumadocs. Do not edit this file directly. Any changes should be made by running the generation command again. */}
---
## Section: API
# Get prices
**URL:** https://docs.stash.gg/api/ingress/pricing/GetPrices
**Description:** Retrieves uploaded pricing sheet data for the shop associated with the API key, filtered by region. Returns paginated price entries.
{/* This file was generated by Fumadocs. Do not edit this file directly. Any changes should be made by running the generation command again. */}
---
## Section: API
# Generate authenticated URL
**URL:** https://docs.stash.gg/api/ingress/server-urls/GenerateAuthenticatedUrl
**Description:** Generates an authenticated URL for a specific target (home or loyalty) for a user. This endpoint is used for server-side URL generation.
{/* This file was generated by Fumadocs. Do not edit this file directly. Any changes should be made by running the generation command again. */}
---
## Section: API
# Generate Checkout
**URL:** https://docs.stash.gg/api/ingress/stash-pay/GenerateQuickPayUrl
**Description:** Generates a quick payment URL for server-side operations. This endpoint is used internally for creating payment links with user information.
{/* This file was generated by Fumadocs. Do not edit this file directly. Any changes should be made by running the generation command again. */}
---
## Section: API
# Create a subscription change checkout link
**URL:** https://docs.stash.gg/api/ingress/subscription-checkout-links/CreateSubscriptionChangeCheckoutLink
**Description:** Creates a checkout link for upgrading an existing subscription to a new plan. Only subscriptions in a `active`, `trialing`, or `cancelled` (still within paid period before expiration) state are eligible for upgrades.
{/* This file was generated by Fumadocs. Do not edit this file directly. Any changes should be made by running the generation command again. */}
---
## Section: API
# Create a subscription checkout link
**URL:** https://docs.stash.gg/api/ingress/subscription-checkout-links/CreateSubscriptionCheckoutLink
**Description:** Creates a checkout link for purchasing a subscription plan. The link can be shared with users to complete their subscription purchase.
{/* This file was generated by Fumadocs. Do not edit this file directly. Any changes should be made by running the generation command again. */}
---
## Section: API
# Get plan by ID
**URL:** https://docs.stash.gg/api/ingress/subscription-plans/GetPlan
**Description:** Retrieves a subscription plan by its unique identifier. Returns full plan details including pricing, billing period, and trial configuration.
{/* This file was generated by Fumadocs. Do not edit this file directly. Any changes should be made by running the generation command again. */}
---
## Section: API
# Get plan by code
**URL:** https://docs.stash.gg/api/ingress/subscription-plans/GetPlanByCode
**Description:** Retrieves a subscription plan by its code (e.g., 'monthly_premium'). Plan codes are unique within a segment.
{/* This file was generated by Fumadocs. Do not edit this file directly. Any changes should be made by running the generation command again. */}
---
## Section: API
# List plans
**URL:** https://docs.stash.gg/api/ingress/subscription-plans/ListPlans
**Description:** Lists all available subscription plans for a shop. By default returns only active plans. Use the status filter to include archived or deprecated plans.
{/* This file was generated by Fumadocs. Do not edit this file directly. Any changes should be made by running the generation command again. */}
---
## Section: API
# Cancel subscription
**URL:** https://docs.stash.gg/api/ingress/subscriptions/CancelSubscription
**Description:** Cancels a subscription. By default, access continues until the end of the current billing period (cancel_at_period_end=true). A subscription.canceled webhook is sent and the returned subscription has status 'canceled'. For past_due subscriptions, cancellation is immediate: a single subscription.expired webhook is sent and the returned subscription has status 'expired'.
{/* This file was generated by Fumadocs. Do not edit this file directly. Any changes should be made by running the generation command again. */}
---
## Section: API
# Get payments by subscription ID
**URL:** https://docs.stash.gg/api/ingress/subscriptions/GetPaymentsBySubscriptionId
**Description:** Retrieves payments associated with a subscription with pagination support. Returns a list of payment objects including payment ID, amount, currency, a succeeded indicator, and timestamps. Use the `next_page_token` from the response to fetch the next page.
{/* This file was generated by Fumadocs. Do not edit this file directly. Any changes should be made by running the generation command again. */}
---
## Section: API
# Get subscription by ID
**URL:** https://docs.stash.gg/api/ingress/subscriptions/GetSubscription
**Description:** Retrieves a subscription by its unique identifier. Returns the full subscription object including status, billing period, and dates.
{/* This file was generated by Fumadocs. Do not edit this file directly. Any changes should be made by running the generation command again. */}
---
## Section: API
# List subscriptions
**URL:** https://docs.stash.gg/api/ingress/subscriptions/ListSubscriptions
**Description:** Query subscriptions by player and optionally filter by status. Returns all matching subscriptions for the specified external_account_id.
{/* This file was generated by Fumadocs. Do not edit this file directly. Any changes should be made by running the generation command again. */}
---
## Section: API
# Reactivate subscription
**URL:** https://docs.stash.gg/api/ingress/subscriptions/ReactivateSubscription
**Description:** Reactivates a previously canceled subscription. Only valid before the subscription has expired.
{/* This file was generated by Fumadocs. Do not edit this file directly. Any changes should be made by running the generation command again. */}
---
## Section: API
# Get user preferences
**URL:** https://docs.stash.gg/api/ingress/user-preferences/GetUserPreferences
**Description:** Retrieves the payment channel preference for a specific user. Returns 404 NotFound if no preference is set.
{/* This file was generated by Fumadocs. Do not edit this file directly. Any changes should be made by running the generation command again. */}
---
## Section: API
# Set user preferences
**URL:** https://docs.stash.gg/api/ingress/user-preferences/SetUserPreferences
**Description:** Creates or updates the payment channel preference for a user. This is a server-side endpoint and should not be called from the client.
{/* This file was generated by Fumadocs. Do not edit this file directly. Any changes should be made by running the generation command again. */}
---
## Section: API
# Approve custom login
**URL:** https://docs.stash.gg/api/ingress/webshop-account-linking/ApproveCustomLogin
**Description:** Used to approve custom login requests using JWT authentication (For exampe Apple ID, Google or other JWT based login providers). This is a server-side endpoint and should not be called from the client.
{/* This file was generated by Fumadocs. Do not edit this file directly. Any changes should be made by running the generation command again. */}
---
## Section: API
# Force Logout user
**URL:** https://docs.stash.gg/api/ingress/webshop-account-linking/LogoutUser
**Description:** Logs out a user by invalidating their session. This endpoint is typically called when a user signs out of the game or switches to another account.
{/* This file was generated by Fumadocs. Do not edit this file directly. Any changes should be made by running the generation command again. */}
---
## Section: Game server API
# Getting Started
**URL:** https://docs.stash.gg/api/egress
**Description:** APIs you can expose on your game backend server to power a WebShop via Real-time Catalog, and/or StashPay checkout links.
## What this section is [#what-this-section-is]
Reference endpoints that Stash calls on your backend.
This is an **egress** integration: Stash calls your backend. You implement and host these APIs, and Stash invokes them during catalog and checkout flows.
**Skip the API reference**: You can [generate type-safe clients](/guides/stash-webshop/catalog/real-time-catalog#step-1-auto-generate-clients-recommended) from our protobufs and let your IDE's autocomplete guide the integration - no need to read through the API specification below.
Implement these endpoints in your backend, keep request/response contracts aligned with the reference, and return validation outcomes exactly as documented.
## Endpoints [#endpoints]
---
## Section: Game server API
# Get product catalog
**URL:** https://docs.stash.gg/api/egress/catalog/GetCatalog
**Description:** Retrieves the complete product catalog including all purchasable items, offer chains, and non-purchasable display items organized in rows.
{/* This file was generated by Fumadocs. Do not edit this file directly. Any changes should be made by running the generation command again. */}
---
## Section: Game server API
# Get offer details
**URL:** https://docs.stash.gg/api/egress/catalog/GetOfferDetails
**Description:** Retrieves detailed information about a specific offer, including reward details and tabbed content with structured data tables for each item.
{/* This file was generated by Fumadocs. Do not edit this file directly. Any changes should be made by running the generation command again. */}
---
## Section: Game server API
# Get player by ID
**URL:** https://docs.stash.gg/api/egress/players/GetPlayer
**Description:** Retrieves an existing player by ID. Returns player information including profile data and in-game currency balance.
{/* This file was generated by Fumadocs. Do not edit this file directly. Any changes should be made by running the generation command again. */}
---
## Section: Game server API
# Cancel pending payment
**URL:** https://docs.stash.gg/api/egress/purchase/CancelPayment
**Description:** Step 2B: Cancels a pending purchase that was previously registered. IMPORTANT: Always expects HTTP 200 OK response with inline error codes in the body.
{/* This file was generated by Fumadocs. Do not edit this file directly. Any changes should be made by running the generation command again. */}
---
## Section: Game server API
# Confirm payment completion
**URL:** https://docs.stash.gg/api/egress/purchase/ConfirmPayment
**Description:** Step 2A: Confirms and completes a pending purchase that was previously registered. IMPORTANT: Expects HTTP error status (3xx, 4xx, 5xx) codes for failed purchases.
{/* This file was generated by Fumadocs. Do not edit this file directly. Any changes should be made by running the generation command again. */}
---
## Section: Game server API
# Register payment intent
**URL:** https://docs.stash.gg/api/egress/purchase/RegisterPayment
**Description:** Step 1: Registers a purchase intent with the game backend. The game backend is expected to reserve inventory for the purchase. IMPORTANT: Always expects HTTP 200 OK response with inline error codes in the body.
{/* This file was generated by Fumadocs. Do not edit this file directly. Any changes should be made by running the generation command again. */}
---
## Section: Partners
# Partner Resources
**URL:** https://docs.stash.gg/partners
**Description:** Resources and guides for Stash partners, including payment integration, merchant operations, and compliance information.
Welcome to the Stash Partner portal. Here you'll find everything you need to understand and implement Stash's payment solutions and merchant services.
## Get to know Stash [#get-to-know-stash]
## Payments & operations [#payments--operations]
## Products [#products]
---
## Section: Partners
# Who we are
**URL:** https://docs.stash.gg/partners/Introduction/company-introduction
**Description:** An introduction to Stash and its Product Suite, outlining how studios use direct distribution, payments, and commerce tools to monetize and distribute games with greater control and less operational overhead.
Studios are increasingly investing in web and direct channels to reduce platform dependency. Stash helps game studios distribute and monetize their games directly. Instead of relying entirely on third-party platforms and intermediaries, studios can use Stash to take greater ownership of how their games are sold, paid for, and delivered to players.
At its core, Stash is built around direct distribution. This means giving studios more control over payments, pricing, and player relationships, while reducing the operational complexity that typically comes with running those systems at scale. Stash handles the heavy lifting behind the scenes so partners can focus on building great games and growing their business.
## Product Suite [#product-suite]
Stash offers a set of products designed to support direct distribution for game studios. Each product addresses a different part of the player journey, from payments to commerce to distribution, and can be used independently depending on a studio’s needs.
While the products are modular, they are designed to work together as part of a single ecosystem. This allows partners to adopt Stash incrementally, without committing to a fixed path or rigid architecture.
## Stash Pay [#stash-pay]
Stash Pay enables in-game payments through a checkout experience designed to be reliable, fast to integrate, and easy for players to use. It allows studios to process payments directly while Stash manages the operational complexity behind the scenes.
### Who is it for [#who-is-it-for]
Stash Pay is designed for studios that want to monetize in-game purchases without building or maintaining their own payment infrastructure. It is commonly the first entry point into direct distribution, especially for teams focused on simplifying payments and compliance.
### Player experience [#player-experience]
From the player’s perspective, Stash Pay provides a smooth and familiar checkout experience. Payment options are presented based on location and context, helping players complete purchases with minimal friction.
### Partner experience [#partner-experience]
For partners, Stash Pay removes the need to manage payments, taxes, compliance, refunds, and disputes independently. By acting as the merchant of record, Stash allows studios to focus on their game and monetization strategy rather than payment operations.
## Web Store [#web-store]
The Web Store allows studios to sell content and offers outside the game environment. It provides an additional direct channel where players can engage with a studio’s offerings beyond in-game purchases.
### Why Studios use a Web Store [#why-studios-use-a-web-store]
A Web Store gives studios more flexibility around how and where they sell to players. It can support promotions, bundles, and offers that complement in-game monetization, while remaining fully under the studio’s control.
### Player Engagement Outside the Game [#player-engagement-outside-the-game]
By extending commerce beyond the game client, the Web Store creates opportunities for ongoing player engagement. Players can interact with offers, events, or content without needing to be actively in-game.
## Launcher [#launcher]
Launcher enables studios to distribute games directly to players on desktop platforms. It supports direct distribution as part of the broader Stash ecosystem, helping studios reduce reliance on third-party platforms.
### Role within the Stash ecosystem [#role-within-the-stash-ecosystem]
Within the broader Stash ecosystem, Launcher complements payments and commerce by extending direct distribution beyond transactions. While Stash Pay and Web Store focus on monetization, Launcher focuses on how games are delivered and accessed by players.
### Why it matters for studios [#why-it-matters-for-studios]
By owning distribution through Launcher, studios gain greater control over how their games reach players and how those players engage over time. Launcher integrates with Stash’s infrastructure and operational tooling, allowing studios to manage distribution without taking on additional platform complexity.
---
## Section: Partners
# Partner Success
**URL:** https://docs.stash.gg/partners/customer-success/overview
**Description:** Partner onboarding, enablement, and ongoing support resources.
Welcome to the Partner Success resources for Stash partners. This section
will cover onboarding, enablement, and ongoing support workflows.
At Stash, Partner Success is more than support — it’s a **strategic partnership** focused on helping your business integrate successfully, optimize performance, and grow over time.
Our approach blends structured onboarding, clear communication, dedicated points of contact, and a performance-driven process to ensure lasting value beyond go-live.
## What partnering with Stash means [#what-partnering-with-stash-means]
Partnering with Stash means working with a team that:
* Aligns with your business goals
* Provides proactive insights, not just reports
* Supports both technical and strategic needs
* Collaborates with your team to maximize monetization and efficiency
Rather than a typical “partner success” experience, Stash delivers **ongoing performance partnership** tailored to your product and roadmap.
## Onboarding & integration [#onboarding--integration]
### Start of onboarding [#start-of-onboarding]
Onboarding begins with:
* A dedicated Slack (or Discord) channel
* A formal kickoff call
* Introductions to your Stash team:
* **Account Manager**
* **DevEx (Developer Experience) Engineer**
* **Product Performance Lead**
These initial steps ensure clear alignment and expectations from day one.
### What to expect [#what-to-expect]
During onboarding you will receive:
* A structured integration walkthrough
* A go-live plan with milestones
* SLA clarity and contact protocols
* Guidance tailored to your product and monetization model
### Common Integration Misconceptions [#common-integration-misconceptions]
Studios often assume:
* Integration is purely technical\
→ In reality, it also drives monetization architecture.
* We only provide reporting\
→ We provide recommendations and growth strategy.
* All product decisions are partner-driven\
→ We proactively contribute ideas and optimizations.
### Reference Guides [#reference-guides]
For technical details, see:
* [Webshop integration guide](/guides/stash-webshop/integration)
* [Stash Pay integration guide](/guides/stash-pay/integration)
* [Stash Launcher integration guide](/guides/stash-launcher/integration)
These guides support your technical team while the Partner Success team focuses on partnership and outcomes.
### Channels we support [#channels-we-support]
We primarily use:
* **Slack**
* **Discord** (as needed)
Email threads can also be used for formal discussions or escalations.
### Response Mechanisms [#response-mechanisms]
* Submit questions or issues in Slack
* We create internal tickets and track resolution
* We aim to support your timezone where possible
Your dedicated Account Manager and DevEx Engineer are your go-to contacts for coordination and troubleshooting.
## Ongoing performance & growth [#ongoing-performance--growth]
After launch, Partner Success transitions to **performance partnership**.
### What this means [#what-this-means]
We run a continuous optimization loop:
> Baseline → Diagnose → Prioritize → Experiment → Measure → Iterate → Repeat
This process ensures we not only report on performance, but actively help you improve it.
### Engagement Cadence [#engagement-cadence]
* Weekly or bi-weekly performance readouts
* KPI reviews and planning
* Prioritized experiment planning
### What We Need From You [#what-we-need-from-you]
To hit the ground running, we ask for:
* A single internal owner (PM or LiveOps Manager)
* Clear KPI definitions
* Authority to execute shared strategies
### How We Prioritize Work [#how-we-prioritize-work]
We prioritize initiatives by:
* **Business impact**
* **Friction reduction**
* **Experiment speed and cost**
* **Highest value segments**
### A/B Testing [#ab-testing]
Our A/B testing process includes:
* Hypothesis definition
* Success metric selection
* Audience segmentation
* Runtime and guardrails
* Results publication in performance readouts
## Recommendations vs reporting [#recommendations-vs-reporting]
Stash provides **both**:
* Clear performance reporting
* **Actionable recommendations**
* Offers
* Loyalty mechanics
* Player communications
* Monetization levers
This ensures insights are directly tied to impact.
## Feature requests & roadmap collaboration [#feature-requests--roadmap-collaboration]
### Can you request features? [#can-you-request-features]
Yes — we welcome partner requests.\
These are evaluated through a collaborative prioritization framework based on:
* Urgency
* Potential impact
* Overall platform alignment
### What does “access” mean? [#what-does-access-mean]
When partners ask about *access*, it can include:
* Dashboard access
* Analytics and metric visibility
* API/Dev portal access
* Dedicated reporting
The specifics can vary depending on partner setup and needs.
---
## Section: Partners
# Payments overview
**URL:** https://docs.stash.gg/partners/payments/overview
**Description:** Learn how Stash handles payments globally
Payments are a critical part of any global digital business — and often one of the most complex systems to manage at scale. Different countries, currencies, local payment preferences, tax requirements, and compliance rules can quickly turn payments into a significant operational burden.
## How Stash can help [#how-stash-can-help]
Stash was built to take that complexity off your plate. Instead of working with multiple payment providers and regional setups, partners can rely on a single payments foundation that supports international growth while keeping the experience consistent for players.
## Payment Methods Players Trust [#payment-methods-players-trust]
With Stash, players can pay using methods they recognize and trust, and partners don’t have to manage the financial and compliance overhead that usually comes with operating globally. Payments, reporting, and payouts are handled through one unified flow, making it easier to understand how money moves and what to expect at each step.
## Scaled for growth [#scaled-for-growth]
Stash is designed for studios that want to scale without turning payments into a constant operational challenge. The goal is simple: remove friction at checkout, reduce uncertainty behind the scenes, and give partners a payments setup that works as they grow.
# Why payments matter ? [#why-payments-matter-]
Payments are not just about collecting revenue. They affect how players experience your product and how smoothly your business operates day to day
* *Global reach without added complexity:* Entering new markets usually means adapting to local expectations around currencies and payment methods. A global payments setup helps you do that without rebuilding your flow for every region.
* *Conversion at checkout:* When players see familiar payment options and a smooth checkout experience, they are more likely to complete a purchase.
* *Operational clarity:* Fragmented payment setups make reconciliation and payouts harder to track. Centralizing payments helps create clearer reporting and more predictable financial processes.
## Our philosophy [#our-philosophy]
Stash approaches payments with a few guiding principles that shape how the system is built and operated:
* **Transparency**: Partners should be able to understand how payments are processed and how reporting reflects real transactions.
* **Predictability**: Clear flows and consistent payout expectations help teams plan with confidence.
* **Global reach**: Payments should support international growth, not slow it down.
* **Strong authorization performance**: Reducing unnecessary declines and improving approval rates is key to a healthy checkout experience.
The following sections explore each of these areas in more detail — from where Stash operates and which payment methods are supported, to how authorization rates are optimized and how partners track, reconcile, and receive payouts. Taken together, they show how Stash turns payments into a scalable, reliable part of doing business globally.
---
## Section: Partners
# Supported Payment Methods
**URL:** https://docs.stash.gg/partners/payments/supported-payments-methods
**Description:** Learn about the 200+ payment methods supported by Stash, including credit cards, digital wallets, and regional payment options to provide a seamless checkout experience for your players globally.
## Available regions [#available-regions]
Stash can process payments in almost every country worldwide, except in regions affected by international sanctions.
This means you can make your products available to players across markets without having to build or maintain local payment setups. Differences in payment availability, regulatory requirements, and tax rules are managed within Stash’s payments infrastructure rather than by the partner.
## Guidance for Partners [#guidance-for-partners]
If your product targets a specific country or region, Stash can confirm payment support and highlight any relevant considerations early in the process.
In rare cases where limitations apply, they are typically driven by international regulations rather than technical constraints. For most partners, geographic coverage does not require additional configuration or regional customization.
## Payment methods [#payment-methods]
Players expect to see payment options they already know when they reach checkout. Stash supports a broad set of payment types to meet those expectations across regions.
At a high level, this includes:
* Major card brands such as Visa, Mastercard, and American Express
* Digital wallets like Apple Pay and Google Pay
* Online payment services, including PayPal
* Regional payment methods, depending on the player’s location
Rather than exposing the same options everywhere, Stash adapts the checkout experience to local contexts. The payment methods presented to players can vary by country and currency, reflecting regional norms and availability.
# Supported currencies [#supported-currencies]
> If a specific payment method is important for your product or a particular market, Stash can let you know whether it’s supported and flag any considerations early on.
Stash supports purchase, settlement, and payout currencies.
| **Purchase** | **Settlement** | **Payout** |
| ------------ | -------------- | ---------- |
| AED | AED | USD |
| AMD | AUD | EUR |
| AUD | BGN | SEK |
| BAM | BHD | GBP |
| BGN | CAD | |
| BHD | CHF | |
| BRL | CZK | |
| CAD | DKK | |
| CHF | EUR | |
| COP | GBP | |
| CRC | HKD | |
| CZK | HUF | |
| DKK | ILS | |
| DOP | JPY | |
| DZD | KWD | |
| EUR | MXN | |
| GBP | NOK | |
| GEL | NZD | |
| GIP | RON | |
| GTQ | SEK | |
| HKD | SGD | |
| HNL | THB | |
| HUF | TRY | |
| IDR | USD | |
| ILS | ZAR | |
| INR | | |
| ISK | | |
| JOD | | |
| JPY | | |
| KHR | | |
| KRW | | |
| KWD | | |
| KZT | | |
| LAK | | |
| LBP | | |
| LKR | | |
| MDL | | |
| MOP | | |
| MXN | | |
| MYR | | |
| NOK | | |
| NZD | | |
| PEN | | |
| PHP | | |
| PKR | | |
| PLN | | |
| PYG | | |
| RON | | |
| RSD | | |
| SEK | | |
| SGD | | |
| THB | | |
| TND | | |
| TRY | | |
| TWD | | |
| UAH | | |
| USD | | |
| UYU | | |
| VND | | |
| ZAR | | |
Payout currencies can differ from purchase and settlement currencies.
### Guidance for partners [#guidance-for-partners-1]
If a specific payment method is important for your product or a particular market, Stash can confirm whether it is supported and discuss any relevant considerations early on.
From a partner standpoint, the goal is to deliver a smooth checkout experience, not to manage individual payment methods. Stash handles method selection and availability as part of the checkout flow, so partners don’t need to account for regional differences themselves.
Additional regional payment methods may be available upon request.
---
## Section: Partners
# Compliance, Security and Risk Management
**URL:** https://docs.stash.gg/partners/stash-as-your-merchant/compliance
**Description:** This article explains how Stash addresses compliance, security, and risk management when acting as the Merchant of Record (MoR).
## What Compliance Means for a Merchant of Record [#what-compliance-means-for-a-merchant-of-record]
In global payments, compliance is a core responsibility of the Merchant of Record.
Because the Merchant of Record is legally responsible for the transaction, it must ensure that purchases are processed in accordance with applicable regulations, tax rules, and security standards across regions.
When Stash acts as the Merchant of Record, it assumes this responsibility on behalf of partners. This allows studios to sell globally without having to directly manage compliance obligations tied to payments, taxes, and regulatory exposure.
## Regulatory Frameworks Stash Adheres To [#regulatory-frameworks-stash-adheres-to]
Stash operates within established regulatory and security frameworks relevant to global digital commerce.
At a high level, this includes adherence to:
* **PCI DSS**, for secure handling of payment data
* **COPPA**, for child online privacy protections in the United States
* **GDPR**, for data protection and privacy in the European Union
* **CCPA**, for consumer privacy rights in California
Stash also relies on compliant partners and infrastructure to meet broader security and audit expectations, including **SOC 2 controls via partner services**.
These frameworks are referenced to establish trust and transparency, not to serve as a comprehensive compliance specification.
## How Stash reduces partner compliance burden [#how-stash-reduces-partner-compliance-burden]
By acting as the Merchant of Record, Stash removes the need for partners to manage many ongoing compliance and tax-related activities.
This includes:
* Registering for taxes in multiple jurisdictions
* Maintaining and updating tax calculations
* Filing and remitting taxes
* Managing tax-related audits associated with transactions
Stash assumes the operational and regulatory responsibility for these areas, reducing partner exposure to compliance risk and audit overhead.
## Security and fraud protection [#security-and-fraud-protection]
Security and fraud prevention are integral to Stash’s role as Merchant of Record.
At a high level, Stash applies standard industry practices to protect transactions and sensitive data, including:
* **Tokenization**, to avoid direct handling of sensitive payment information
* **Encryption at rest and in transit**, to protect data throughout the transaction lifecycle
* **Anti-fraud measures**, designed to identify and mitigate fraudulent activity
While these practices are common across modern payment systems, they are intentionally highlighted to provide reassurance to partners.
***
## Risk management and partner protection [#risk-management-and-partner-protection]
By centralizing payment, compliance, and security responsibilities, Stash helps protect partners from:
* Regulatory and tax-related risk
* Operational risk associated with managing disputes and chargebacks
* Liability exposure tied to global payment processing
In addition, Stash can help guide partners on platform and policy boundaries, such as app store terms, to reduce the risk of unintentional violations.
---
## Section: Partners
# Refunds, disputes and chargebacks
**URL:** https://docs.stash.gg/partners/stash-as-your-merchant/refunds
**Description:** Learn what it means for Stash to act as the Merchant of Record (MoR) and how this role removes financial, operational, tax, and compliance responsibilities from game studios.
## Understanding refunds in Stash [#understanding-refunds-in-stash]
When Stash acts as the Merchant of Record, it is responsible for handling **all payment-related refunds**.
Refunds may occur in different scenarios, including:
* Customer-initiated refund requests related to the purchase
* Fraud-related situations, such as the use of a stolen payment method
In most cases, Stash coordinates with the partner before issuing a refund.\
However, Stash may proactively issue a refund in clear fraud scenarios where immediate action is required.
All refunds are reflected in partner financial reporting and are visible alongside other transaction activity.
## Dispute vs. Chargeback [#dispute-vs-chargeback]
A **dispute** and a **chargeback** are related but distinct concepts.
* A **dispute** is the process that begins when a customer challenges a transaction
* A **chargeback** occurs when the dispute is escalated through the customer’s bank
A chargeback can be understood as a formal process in which the merchant has the opportunity to provide evidence to support the validity of the transaction, similar to a court-style process managed by the payment ecosystem.
Regardless of the outcome of a chargeback, fees may be incurred as part of the process.\
Specific fee amounts are not documented publicly and are handled through commercial agreements.
## How Stash manages disputes end-to-end [#how-stash-manages-disputes-end-to-end]
As the Merchant of Record, Stash manages the entire dispute and chargeback lifecycle on behalf of partners.
This includes:
* Communicating with banks and payment networks
* Preparing and submitting evidence
* Managing timelines and responses required by the dispute process
* Handling the operational and financial impact of chargebacks
By covering this complexity, Stash removes the need for partners to build internal processes or allocate resources to dispute management.
## Why studios should not handle disputes directly [#why-studios-should-not-handle-disputes-directly]
Handling disputes and chargebacks in-house introduces significant operational burden and financial risk.
The dispute process involves:
* Strict timelines
* Detailed evidence requirements
* Ongoing communication with banks and payment providers
Many platforms manage this process centrally rather than passing it on to developers.\
Stash follows this approach by fully covering disputes and chargebacks so that partners do not need to manage these workflows themselves.
## What partners see in reporting [#what-partners-see-in-reporting]
Disputes and chargebacks appear in partner financial reporting in the same way as other transactions.
Partners can see:
* Transactions that were disputed
* The resolution status of disputes
* The impact of refunds or chargebacks on monthly reports
This reporting provides visibility into dispute outcomes without requiring partners to take action or manage the process.
---
## Section: Partners
# Reporting
**URL:** https://docs.stash.gg/partners/stash-as-your-merchant/reporting
**Description:** This article explains how Stash addresses compliance, security, and risk management when acting as the Merchant of Record (MoR).
## Payments reporting & payouts [#payments-reporting--payouts]
Payments reporting is designed to help finance and accounting teams understand how transaction activity is reconciled and how payouts are calculated when Stash acts as the Merchant of Record (MoR).
This section provides a high-level overview of reporting and payout mechanics, without going into operational or system-level detail. The goal is to provide clarity on how commercial activity handled by Stash is reflected in partner-facing financial reports.
Stash’s approach prioritizes clarity and predictability, allowing partners to confidently reconcile revenue and close their books.
## Monthly reporting cycle [#monthly-reporting-cycle]
Stash follows a monthly reporting cycle. At the end of each reporting period, transaction data is finalized and consolidated into a single report for partners.
Because Stash operates as the Merchant of Record, this reporting reflects the full purchase lifecycle managed by Stash during the period.
Once reporting is finalized, payouts are initiated on a monthly basis. This consistent cadence allows finance teams to plan reconciliation, forecasting, and close processes with confidence.
Each monthly report provides a structured breakdown of financial activity for the period, including:
* Revenue generated through Stash-powered transactions
* Channel and payment fees applied during processing
* Taxes calculated, collected, and remitted by Stash as Merchant of Record
* Refunds issued during the reporting period
* Disputes and chargebacks, where applicable
The report is designed to clearly show how gross revenue flows through these components to arrive at a net payout, without requiring partners to perform additional calculations.
## Relationship between reporting and MoR responsibilities [#relationship-between-reporting-and-mor-responsibilities]
As Merchant of Record, Stash is legally responsible for the transaction and manages all payment-related activities, including taxes, refunds, and disputes.
Payments reporting reflects these responsibilities by:
* Including taxes handled by Stash rather than requiring partners to account for tax liabilities
* Reflecting refunds, disputes, and chargebacks directly in financial results
* Presenting a net payout amount that represents the partner’s share of proceeds after MoR obligations are applied
This structure ensures that financial reporting aligns with the operational and legal responsibilities assumed by Stash.
## Payout currency and conversion [#payout-currency-and-conversion]
Players may complete purchases in a variety of local currencies. Payouts to partners, however, are made in supported payout currencies.
To manage currency differences across regions, Stash uses a structured pricing and conversion model. Rather than relying on live foreign exchange rates at runtime, pricing is based on predefined price matrices that provide consistency across markets.
This approach helps avoid unexpected currency fluctuations, simplifies reconciliation, and supports predictable financial reporting across regions.
---
## Section: Partners
# Stash as Mor
**URL:** https://docs.stash.gg/partners/stash-as-your-merchant/stash-as-mor
**Description:** Learn what it means for Stash to act as the Merchant of Record (MoR) and how this role removes financial, operational, tax, and compliance responsibilities from game studios.
## What “Merchant of Record” means [#what-merchant-of-record-means]
A **Merchant of Record (MoR)** is the entity that is legally responsible for a transaction.\
In the context of Stash, this means Stash is the party that sells the product to the player and assumes responsibility for the full purchase lifecycle.
One way to think about this is the **retailer analogy**:
* The game is the product
* Stash acts as the retailer selling that product to the customer
* The player purchases from Stash, not directly from the developer
As MoR, Stash is responsible for everything related to the purchase itself, while the developer remains responsible for the game and its functionality.
This role is different from a **Payment Service Provider (PSP)**.\
A PSP focuses on processing payments, while a Merchant of Record takes on legal, financial, tax, and compliance responsibilities associated with selling to customers.
## What Stash handles on your behalf [#what-stash-handles-on-your-behalf]
When Stash acts as the Merchant of Record, it takes responsibility for all purchase-related activities, including:
* **Payment processing**, from the moment a customer enters the web shop to the moment they receive a receipt
* **Refund handling**, including proactive refunds in clear fraud scenarios
* **Disputes and chargebacks**, including communication with banks and evidence submission
* **Fraud detection and prevention**
* **Tax calculation, collection, filing, and remittance** across applicable jurisdictions
* **Audit exposure and tax risk**, including handling audits related to transactions
* **Compliance and regulatory responsibilities** associated with global payments
These responsibilities are handled by Stash so that partners do not need to build, operate, or maintain these systems themselves.
## What you (the Partner) remain responsible for [#what-you-the-partner-remain-responsible-for]
While Stash manages the purchase lifecycle, certain responsibilities remain with the game studio:
* **Game delivery**, including items, entitlements, and in-game content
* **Bug resolution** and technical issues related to the game
* **Customer support for gameplay-related issues**, such as bugs or in-game behavior
This separation ensures clear ownership between commercial responsibilities (handled by Stash) and product responsibilities (handled by the developer).
## Why the Merchant of Record Model Matters for Game Studios [#why-the-merchant-of-record-model-matters-for-game-studios]
Using a Merchant of Record model removes a significant operational and regulatory burden from game studios.
Key benefits include:
* **Operational relief**, as studios do not need to manage payments, refunds, disputes, or chargebacks
* **Reduced legal and tax risk**, since Stash assumes responsibility for tax compliance and related audits
* **Global expansion without tax registration**, avoiding the need to register, calculate, and maintain tax rates in multiple jurisdictions
* **Optimized checkout and authorization performance**, supported by Stash’s technology and in-house expertise
* **Clear and predictable financial processes**, with transactions, refunds, and disputes reflected in standard financial reporting
## High-level purchase flow [#high-level-purchase-flow]
At a high level, the purchase flow under the Merchant of Record model works as follows:
1. A customer enters the **Stash web shop**
2. The customer completes a purchase with Stash
3. Stash processes the payment and collects the funds
4. Applicable taxes are handled by Stash
5. The partner receives their share of the proceeds
This end-to-end flow represents the Merchant of Record experience, from the customer entering the store to leaving with a receipt.
A simplified, non-technical diagram is used to illustrate this flow for clarity.
---
## Section: Partners
# Stash Launcher
**URL:** https://docs.stash.gg/partners/stash-launcher/overview
**Description:** What Stash sets up for your launcher, how customization works, and how to use the launcher section in Studio.
Stash Launcher is your branded game client for Windows and macOS. Stash builds and operates it for you, then hands you a Studio login with a working launcher.
## What you get [#what-you-get]
When you receive your Studio login, the launcher already has:
* A default appearance with Stash-branded colors, icons, and placeholder images
* A default public download channel
* A download page at `https://your-shop.stash.gg/download`
You can replace all of the defaults.
## Customizing the appearance [#customizing-the-appearance]
Open **Launcher > Appearance** in Studio to customize your colors, logos, and images.
Most changes go live the next time a player opens the launcher. No new build is needed.
Some settings are part of the launcher installer itself. Changing them triggers a new build, which takes about 15 to 20 minutes. Studio marks those settings with a tooltip and shows a popup before you publish so you know what to expect.
**Settings that go live immediately (no build needed):**
* General: Background Image
* General: App Logo
* Download Page: Background Image
* Download Page: Background Video
**Settings that require a new build:**
* General: App Icon (Windows and macOS)
* Windows Installer: Installer Left Banner
* Mac Installer: DMG Background
To change the game name or launcher name, contact Stash.
## In Studio [#in-studio]
**Download link and download page**
The launcher home page shows your download page URL. You can copy it or open it directly from there.
**Build status**
The launcher home page shows the status of any build in progress so you can see when it completes.
**Renamed sections**
Two sections were renamed in the latest Studio update:
* "Event log" is now **Analytics**
* "Reported issues" is now **Issues**
## Demo accounts [#demo-accounts]
Demo launchers show a demo banner inside the launcher and include "Test" in the game name. Demo users can only access the launcher section in Studio.
## Not available yet [#not-available-yet]
The following are not part of the current release:
* Setting up a launcher without Stash
* Copying settings from a test launcher to a live one
* Separate appearance themes for different launchers
* Payments inside the launcher
---
---
End of Documentation